Manage PIM Policies in Microsoft Entra Using PowerShell
Configure Microsoft Entra Privileged Identity Management policies using PowerShell to enforce just-in-time access and time-bound role assignments. Manage eligible and active role assignments, set activation requirements including MFA and approval workflows, and implement least-privilege access for administrative roles.
Granting privileged access such as the Global Administrator role for project work is common, especially when external expertise is involved. However, once the project ends, this access is often overlooked and left in place. This increases the risk of privilege misuse, audit gaps, and compliance issues.
Microsoft Entra Privileged Identity Management (PIM) policies help prevent this. They let you set expiration periods, require multifactor authentication (MFA) or approval, and notify the right people when roles are activated.
In this blog, we’ll walk you through how to manage PIM policies using PowerShell to enforce least privilege, just-in-time access, and time-bound admin role assignments.
Privileged Identity Management is a security feature in Microsoft Entra ID. This allows you to manage, control, and monitor access to high–privileged roles such as Global Administrator, Security Administrator, and more. PIM is especially valuable for organizations that frequently manage admin roles, as it prevents long-standing access for users assigned to an admin role.
It reduces risks of standing admin access by enforcing just-in-time (JIT) permissions and approval-based role activations. PIM governs access through role settings, which are a set of rules that define how and when roles can be used. These settings are grouped into PIM policies, which are stored as Microsoft Graph object policies. Each policy includes configurations for assigning Microsoft Entra roles or Azure roles to users and security groups.
In addition to managing role activation, PIM defines two types of role assignments, which determine how access is provided to users. They are eligible and active role assignments.
- Eligible assignments require users to activate the role before use. Ideal for users who need access occasionally.
Example: Assigning the Global Administrator role to an external consultant who only needs access during a project. - Active assignments provide immediate and continuous access without any activation steps. Suitable for users who need continuous access.
Example: A security team member is permanently assigned the Security Administrator role.
Both assignment types offer the same permissions. The key difference is when and how access is granted.
Managing PIM policies is a critical aspect of privileged access management (PAM), which refers to the strategic control of elevated access to critical resources. It ensures that access to sensitive resources is tightly controlled, reducing the risk of privilege misuse, insider threats, and non-compliance.
Administrators must regularly review and update role assignment rules to reflect organizational changes and compliance mandates. Without ongoing management, PIM policies may leave standing access unaddressed, leading to security gaps and audit failures.
You can manage PIM policies directly from the Microsoft Entra admin center, where you can configure role settings, assign roles to individual users, and manage PIM for groups.
However, for larger environments, performing these actions via the admin center interface can be time-consuming and repetitive.
To simplify this, you can use PowerShell to manage PIM policies more efficiently.
Requirements for Managing PIM Policies
Before getting started, ensure the following requirements are in place:
- License: You need either a Microsoft Entra ID P2 license or an Enterprise Mobility + Security (EMS) E5 license.
- Role: You must be assigned either the Privileged Role Administrator or the Global Administrator role.
- Permission: Delegated permission RoleManagement.ReadWrite.Directory is required. To set it, connect to Microsoft Graph using the following command:
1Connect-MgGraph -Scopes "RoleManagement.ReadWrite.Directory"
In the sign-in dialog, check Consent on behalf of your organization and click Accept.
PowerShell offers a scalable and automated solution for managing PIM policies in Entra ID. It provides granular control over role assignments and policy rule configurations.
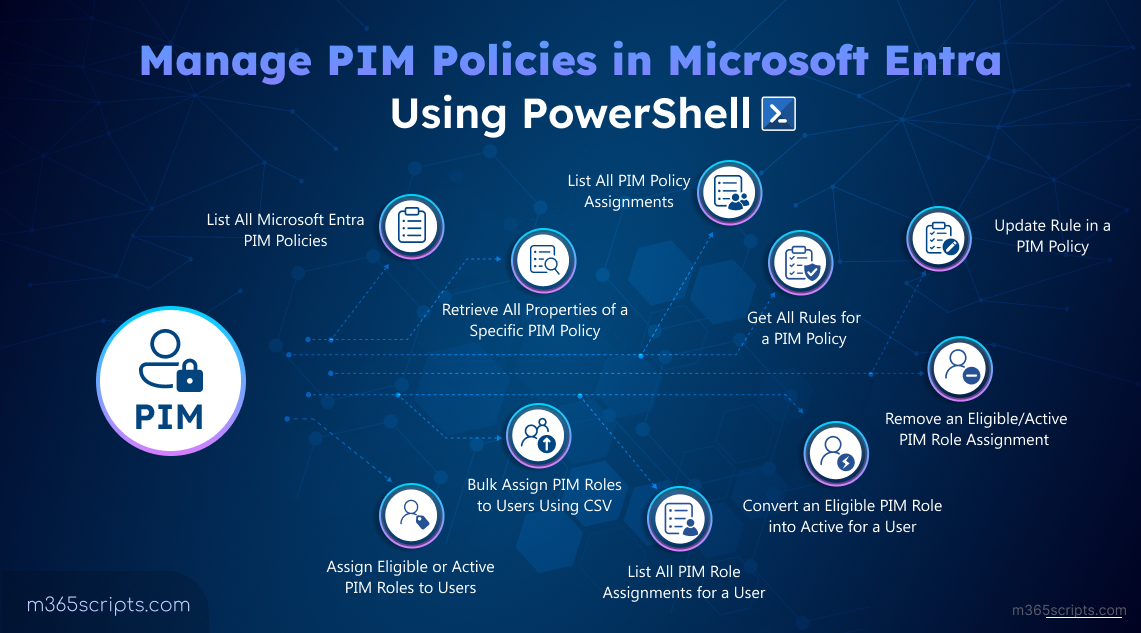
Here are the key PIM management actions you can perform using PowerShell:
- List all Microsoft Entra PIM Policies
- Retrieve all properties of a specific PIM policy
- List all PIM policy assignments
- Get all rules for a PIM policy
- Update rule in a PIM policy
- Assign eligible or active PIM roles to users
- Bulk assign PIM roles to users using CSV
- Convert an eligible PIM role into active for a user
- List all PIM role assignments for a user
- Remove an eligible or active PIM role assignment
Before performing any management actions, it’s important to identify the available PIM policies.
To get this, run the following cmdlet to list all PIM policies in your tenant:
|
1 |
Get-MgPolicyRoleManagementPolicy -Filter "scopeId eq '/' and scopeType eq 'DirectoryRole'" |

This command retrieves all role management policies that apply to directory roles (Microsoft Entra ID built-in roles).
Once you’ve listed all available PIM policies, the next step is to explore the details of a specific policy. This is useful when you need to understand the rules applied, the scope of the policy, and its assignment before making any changes.
To retrieve the full property list of a specific PIM policy, run:
|
1 |
Get-MgPolicyRoleManagementPolicy -UnifiedRoleManagementPolicyId <PolicyId> | Format-List |
Just replace <PolicyId> with the appropriate ID from the previous command.

This helps ensure you’re reviewing the correct policy configuration, especially when troubleshooting role activation issues or preparing for updates.
You can also get details of PIM settings using Microsoft Entra Exporter, which helps you quickly review PIM policies, role assignments, and configuration settings across your environment.
To audit and review the current privileged role management configuration across your organization, you may need to list all PIM policy assignments. This is especially useful for compliance reviews or when preparing to update role settings in bulk.
To view all the PIM policies assigned at the directory level, run the following PowerShell cmdlet:
|
1 |
Get-MgPolicyRoleManagementPolicyAssignment -Filter "scopeId eq '/' and scopeType eq 'Directory'" |

If you need to view the details of a specific policy assignment, use the command below with the appropriate assignment ID:
|
1 |
Get-MgPolicyRoleManagementPolicyAssignment -UnifiedRoleManagementPolicyAssignmentId <AssignmentId> | Format-List |
Replace <AssignmentId> with the unique ID of the policy assignment, which you can retrieve from the Id column in the output of the previous command.

This command provides detailed information on the selected policy assignment. You can use this information to validate current configurations, troubleshoot role activation issues, or prepare for policy updates.
After viewing the policy assignment, you can even dive deeper to inspect all the rules configured within a specific PIM policy. These rules define how roles can be activated, approved, or reviewed.
To retrieve all the rules for a particular PIM policy, use the following PowerShell cmdlet:
|
1 |
Get-MgPolicyRoleManagementPolicyRule -UnifiedRoleManagementPolicyId <PolicyId> | Format-List |
This cmdlet fetches all rule objects associated with the given policy ID.

If you want to verify or examine a specific rule within that policy, for example, to check activation or eligibility conditions, use this command:
|
1 |
Get-MgPolicyRoleManagementPolicyRule -UnifiedRoleManagementPolicyId <PolicyId> -UnifiedRoleManagementPolicyRuleId <RuleId> | Format-List |
Replace <PolicyId> with the unique PIM policy ID and <RuleId> with the specific rule name (here, Enablement_Admin_Eligibility) to view the updated rule.

After reviewing a rule in PIM policy, you may need to modify one of its rules to adjust eligibility, approval, or notification settings.
There are multiple rule IDs, each controlling a specific functionality. In this example, we’ll update the Enablement_Admin_Eligibility rule, which defines how an admin becomes eligible for a role.
|
1 2 3 4 5 6 7 8 9 10 11 12 13 14 15 16 17 |
$policyId = "<PolicyId>" $ruleId = "Enablement_Admin_Eligibility" $params = @{ "@odata.type" = "#microsoft.graph.unifiedRoleManagementPolicyEnablementRule" id = $ruleId enabledRules = @() # Disables all enablement requirements target = @{ caller = "Admin" operations = @("All") level = "Eligibility" inheritableSettings = @() enforcedSettings = @() } } Update-MgPolicyRoleManagementPolicyRule -UnifiedRoleManagementPolicyId $policyId -UnifiedRoleManagementPolicyRuleId $ruleId -BodyParameter $params |
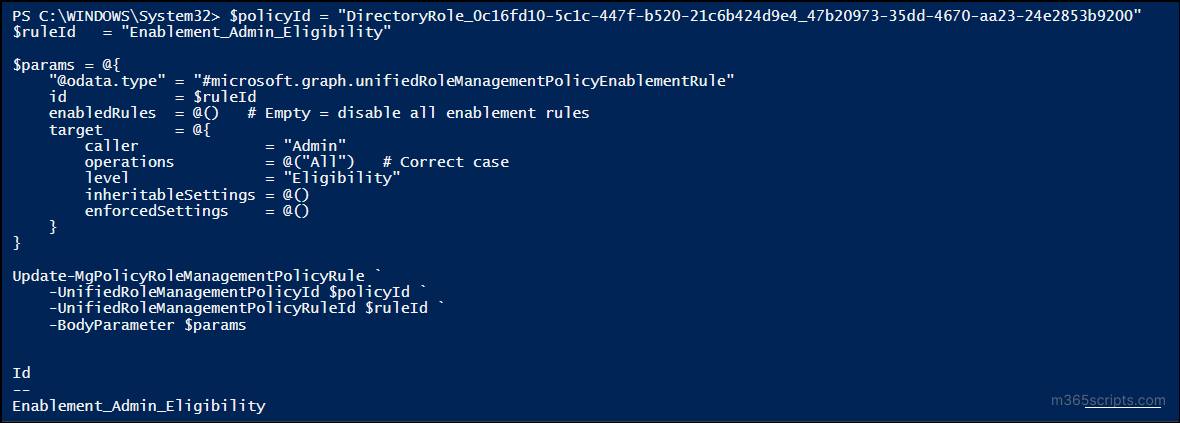
This example disables all conditions such as MFA, justification, and ticketing, required to activate an eligible admin role.
Next to policy modifications, it is equally important to apply the policy to the appropriate users.
Before assigning a user to a role, you must retrieve the Role Definition ID of the role and the Object ID of the user. You can get both from the Microsoft Entra admin center or by executing the simple cmdlets below:
To get the role definition ID of all roles in Microsoft Entra, use:
|
1 |
Get-MgRoleManagementDirectoryRoleDefinition | Select-Object Id, DisplayName |
If you want the ID of a specific role, use:
|
1 |
Get-MgRoleManagementDirectoryRoleDefinition | Where-Object {$_.DisplayName -eq "Global Administrator"} | Select-Object Id, DisplayName |
You can replace “Global Administrator” with any other role name based on your requirement.
Next, to fetch the object ID of a user:
|
1 |
Get-MgUser -UserId "<UserUPN>" | Select-Object Id |
Replace <UPN> with the actual User Principal Name (email ID) of the user.
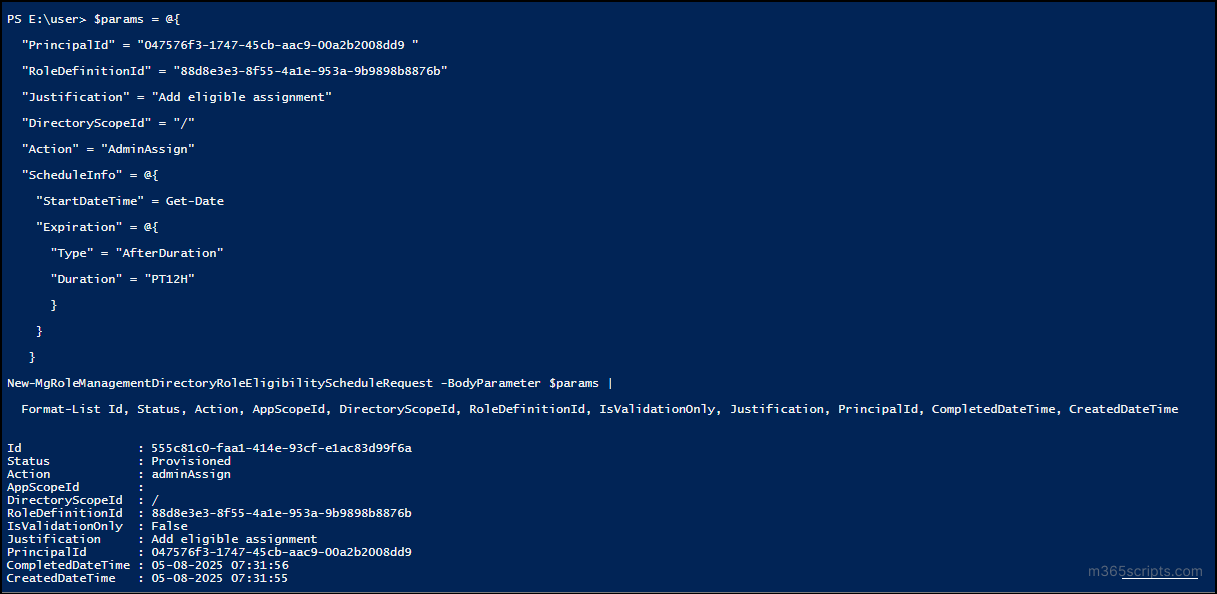
Once you have both the values, you can assign either an eligible or active role to the user. In the below example, we’re assigning an eligible role for a duration of 12 hours:
|
1 2 3 4 5 6 7 8 9 10 11 12 13 14 15 16 17 18 19 20 21 22 23 24 25 26 27 28 29 30 31 |
$params = @{ "PrincipalId" = "<ObjectId> " "RoleDefinitionId" = "<RoleDefinitionId>" "Justification" = "Add eligible assignment" "DirectoryScopeId" = "/" "Action" = "AdminAssign" "ScheduleInfo" = @{ "StartDateTime" = Get-Date "Expiration" = @{ "Type" = "AfterDuration" "Duration" = "PT12H" } } } New-MgRoleManagementDirectoryRoleEligibilityScheduleRequest -BodyParameter $params | Format-List Id, Status, Action, AppScopeId, DirectoryScopeId, RoleDefinitionId, IsValidationOnly, Justification, PrincipalId, CompletedDateTime, CreatedDateTime |
To extend the assignment, just change the Duration value. You can give any value between 1–24 hours like “PT24H” or even assign a date using (Get-Date).AddDays(30).
If you want to assign an active role instead of eligible, just replace the cmdlet with New-MgRoleManagementDirectoryRoleAssignmentScheduleRequest and set the justification to “Assign active assignment“.
You can also audit all PIM role activations to verify compliance with least privilege principles and detect any unnecessary or excessive access.
In large environments, assigning roles to users one by one can be tedious and inefficient. Instead, a simple CSV file can help automate bulk PIM role assignments easily.
Start by creating a CSV file with the list of users and the roles you want to assign with the following format:
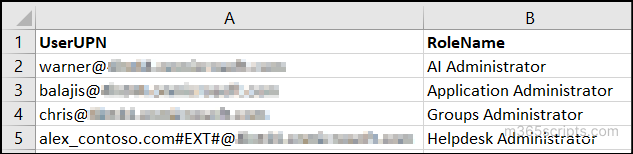
Once the file is ready, use the following PowerShell script to loop through the list and assign eligible roles to each user:
|
1 2 3 4 5 6 7 8 9 10 11 12 13 14 15 16 17 18 19 20 21 22 23 24 25 26 27 28 29 30 31 32 33 |
$users = Import-Csv -Path "<FilePath>" $results = @() foreach ($user in $users) { $userObj = Get-MgUser -UserId $user.UserUPN $role = Get-MgRoleManagementDirectoryRoleDefinition | Where-Object { $_.DisplayName -eq $user.RoleName } $params = @{ "PrincipalId" = $userObj.Id "RoleDefinitionId" = $role.Id "Justification" = "Bulk eligible assignment" "DirectoryScopeId" = "/" "Action" = "AdminAssign" "ScheduleInfo" = @{ "StartDateTime" = Get-Date "Expiration" = @{ "Type" = "AfterDuration" "Duration" = "PT12H" } } } # Create role removal request and select required properties $result = New-MgRoleManagementDirectoryRoleEligibilityScheduleRequest -BodyParameter $params | Select-Object Id, CreatedDateTime, Duration, Status, Action, DirectoryScopeId, Justification # Store in results array $results += $result } Output all results in a single table with one set of headers $results | Format-Table -AutoSize |
Replace <FilePath> with the location of the CSV file that contains the username and the roles.
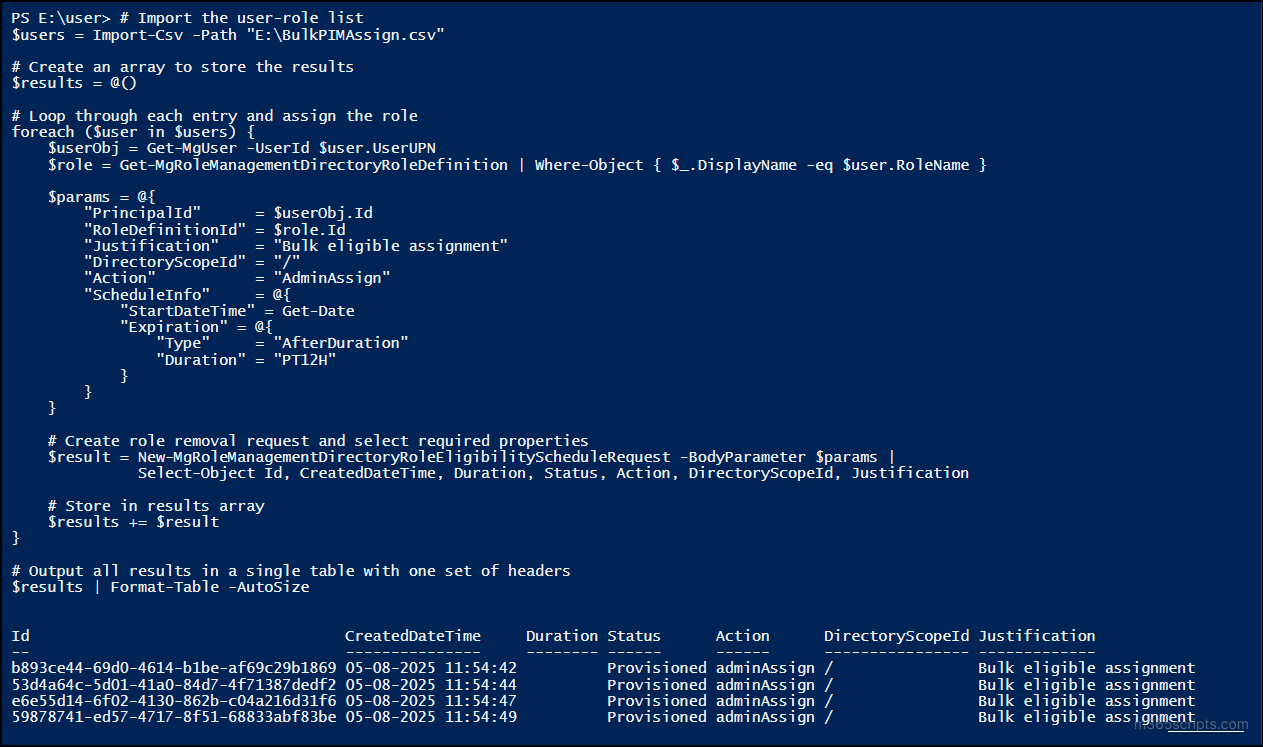
This assigns the role as eligible with a justification and a duration of 5 hours. You can also modify Duration or switch “AfterDuration” to a custom EndDateTime if needed.
If you want to activate the eligible roles, change the Action from “AdminAssign” to “AdminActivate”.
Similarly, to bulk remove eligible or active role assignments, just update the script’s Action parameter as “ AdminRemove”.
This method drastically cuts down manual efforts and ensures consistent role governance in large environments.
If you need to activate an eligible PIM role for a user due to immediate access requirements, you can use PowerShell to perform this task quickly and efficiently.
Use the following script to assign the eligible role as active for the user:
|
1 2 3 4 5 6 7 8 9 10 11 12 13 14 15 16 17 18 19 20 21 22 23 24 25 26 27 28 29 30 31 |
$params = @{ "PrincipalId" = "<ObjectId>" "RoleDefinitionId" = "<RoleDefinitionId>" "Justification" = "Activate assignment" "DirectoryScopeId" = "/" "Action" = "AdminAssign" "ScheduleInfo" = @{ "StartDateTime" = Get-Date "Expiration" = @{ "Type" = "AfterDuration" "Duration" = "PT5H" } } } New-MgRoleManagementDirectoryRoleAssignmentScheduleRequest -BodyParameter $params | Format-List Id, Status, Action, AppScopeId, DirectoryScopeId, RoleDefinitionID, IsValidationOnly, Justification, PrincipalId, CompletedDateTime, CreatedDateTime, TargetScheduleID |
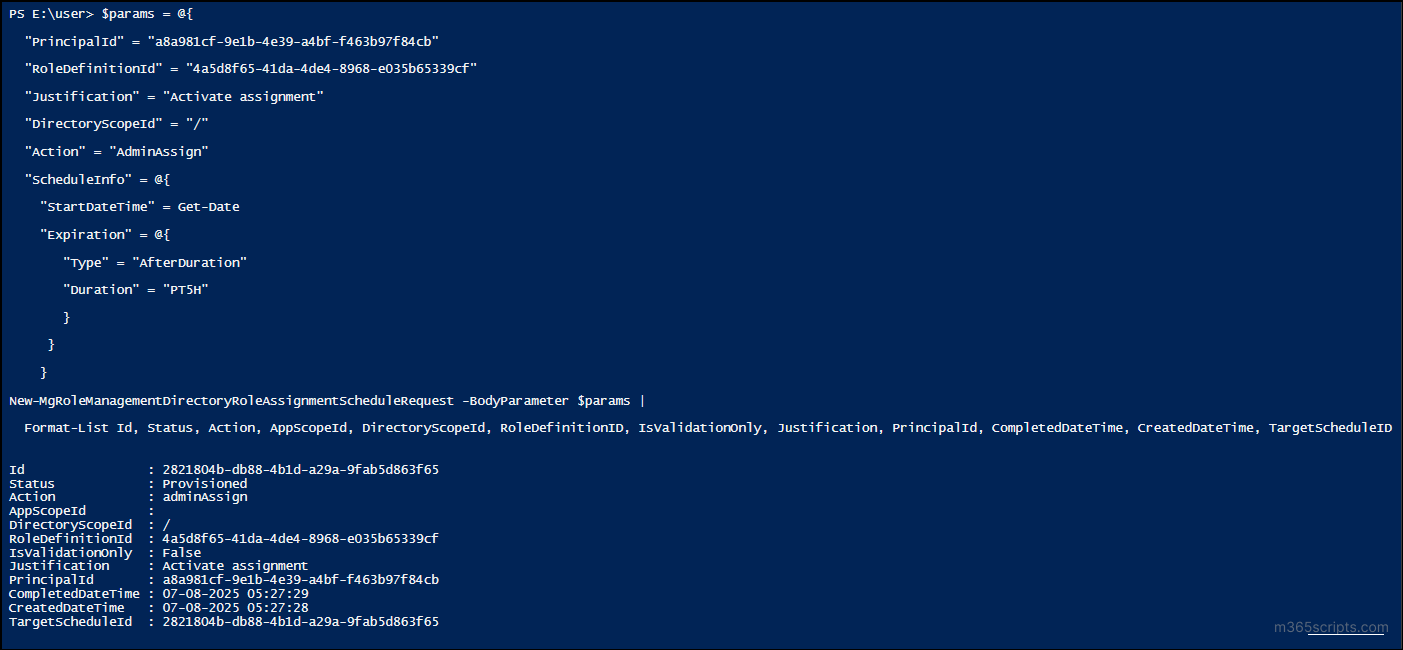
This way, you can effortlessly manage PIM role activations based on your organization’s operational needs.
Once a role is assigned to a user, it’s important to verify if the role was applied correctly. You can easily check both eligible and active role assignments using the following PowerShell cmdlets.
To list all eligible PIM roles assigned to a user and their properties:
|
1 |
Get-MgRoleManagementDirectoryRoleEligibilityScheduleInstance -Filter "principalId eq '<ObjectId>'" | Format-List |

To view all active PIM role assignments, use:
|
1 |
Get-MgRoleManagementDirectoryRoleAssignmentScheduleInstance -Filter "principalId eq '<ObjectId>'" | Format-List |
Replace <ObjectId> with the object ID of the user.
This helps ensure that the correct roles have been assigned and are properly reflected in Microsoft Entra ID.
If you want to completely remove a user from an eligible or active PIM role assignment, you can do so using the following PowerShell snippet.
Here’s an example for removing the user from an eligible PIM role:
|
1 2 3 4 5 6 7 8 9 10 11 12 13 14 15 16 17 |
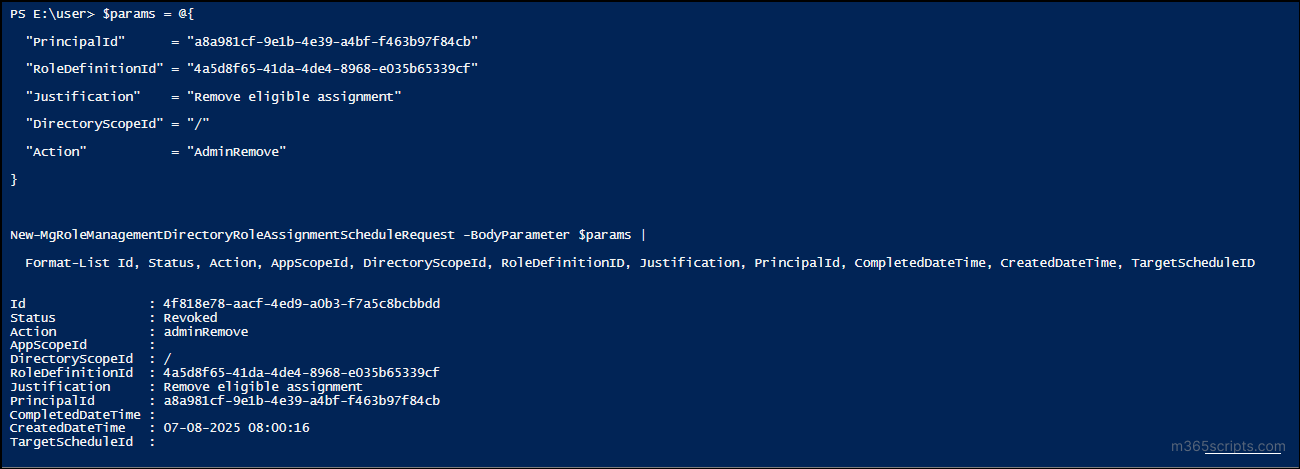
$params = @{ "PrincipalId" = "<ObjectId>" "RoleDefinitionId" = "<RoleDefinitionId>" "Justification" = "Remove eligible assignment" "DirectoryScopeId" = "/" "Action" = "AdminRemove" } New-MgRoleManagementDirectoryRoleEligibilityScheduleRequest -BodyParameter $params | Format-List Id, Status, Action, AppScopeId, DirectoryScopeId, RoleDefinitionID, Justification, PrincipalId, CompletedDateTime, CreatedDateTime, TargetScheduleID |
Using the “AdminRemove” action ensures the eligible assignment is revoked at the directory scope level, helping maintain least privilege access within your environment.
To remove an active assignment, you can reuse the same snippet, changing the justification to “Remove active assignment” and using the New-MgRoleManagementDirectoryRoleAssignmentScheduleRequest cmdlet instead.
So far, we’ve covered how to manage PIM policies for all Microsoft Entra roles and assign policies to users. Additionally, you can also manage PIM policies for groups and Azure resource roles, which will be covered in the upcoming blogs.
We hope this blog helped you manage PIM policies in Microsoft Entra more efficiently. Feel free to share your thoughts or questions in the comments below. Stay connected for more updates and upcoming blogs.