How to Manage User Licenses Using Microsoft Entra PowerShell
Manage Microsoft 365 user licenses using the Microsoft Entra PowerShell module as a simpler alternative to Graph PowerShell. Assign, remove, and audit licenses efficiently with intuitive cmdlets. Set usage locations, identify unlicensed users, and optimize license costs by replacing deprecated MSOnline module commands with modern Entra PowerShell operations.
Managing Microsoft 365 licenses means quickly identifying which users need which licenses and removing any that are no longer required. With the retirement of the MSOnline module, modern alternatives like Microsoft Graph API and Microsoft Graph PowerShell have become the preferred tools for admins. However, Graph PowerShell can be complex for common license management tasks, requiring multiple commands and deeper knowledge of Graph endpoints.
Microsoft Entra PowerShell addresses these challenges by providing a simpler, more intuitive way to manage licenses, users, groups, and applications. In this blog, we’ll explore how to manage user licenses using Entra PowerShell effectively to optimize license usage and cut down unwanted costs.
Before diving into managing user licenses with Microsoft Entra PowerShell, make sure that the following prerequisites are in place:
- Module: Install the Microsoft Entra PowerShell module, if it’s not already available.
- Role requirement: You must have the License Administrator role or a higher privileged role assigned.
- Microsoft Graph API Permissions: Connect to the Entra PowerShell with the scopes User.ReadWrite.All and Organization.Read.All.
- Assign usage location to users: Since certain Microsoft services are not available in some region, make sure that your users have been assigned a usage location. Without this, license assignments for region-specific services may fail. You can identify users without a usage location using the following cmdlet:
1Get-EntraUser | Where-Object {$_.UsageLocation -eq $null -and $_.UserType -eq 'Member'} | Select-Object UserPrincipalName, Id
After identifying users without a defined location, assign each user an appropriate usage location using the following command.
1Set-EntraUser -UserId "<UserPrincipalName>" -UsageLocation "<UsageLocation>"
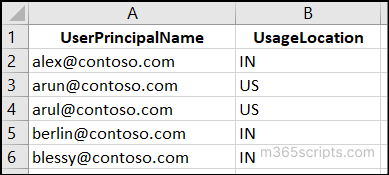
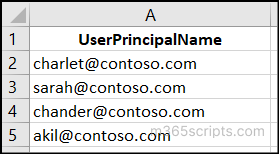
Replace <UserPrincipalName> with the user’s principal name and <UsageLocation> with the correct code of the country or region, such as IN for India, US for the United States, etc. This method is convenient when updating the location for a few users.However, to assign usage locations to multiple users at once, you can create a CSV file containing the UserPrincipalName and UsageLocation columns, as shown in the sample below. Make sure to use the same column names in both the CSV file and the script to avoid errors during execution.
 Save the created file and run the following PowerShell snippet to assign the usage locations to all users in the CSV.12345$BulkUpdateUsageLocation = Import-CSV –Path "<FilePath>"foreach ($user in $BulkUpdateUsageLocation) {Set-EntraUser –UserId $user.UserPrincipalName –UsageLocation $user.UsageLocationGet-EntraUser –UserId $user.UserPrincipalName | Select-Object DisplayName, UserPrincipalName, UsageLocation}
Replace <FilePath> with the CSV file’s path to automatically set the usage location for each user.
Once these prerequisites are met, you can start managing user licenses with Entra PowerShell for the following tasks:
- Get a list of all Microsoft 365 licenses
- List all users assigned to a specific license
- Export users assigned to selected licenses using CSV
- View all Microsoft 365 licenses assigned to a user
- View all Microsoft 365 services assigned to a user
- Assign a specific Microsoft 365 license to a user
- Assign a specific Microsoft 365 license to multiple users
- Assign multiple licenses to a user
- Bulk assign licenses to multiple users
- Copy Microsoft 365 licenses from one user to another
- Identify licenses assigned to disabled users
- Remove all Microsoft 365 licenses from a user
- Bulk remove Microsoft 365 licenses from multiple users
- Remove specific licenses from a user account
When organizations keep purchasing new Microsoft 365 licenses without reviewing existing allocations, unused licenses pile up and drive unnecessary costs. Regularly checking license status helps determine if additional licenses are actually required. Overall, this review helps optimize resource management.
To view all Microsoft 365 license plan details, use the Get-EntraSubscribedSku cmdlet as below:
|
1 |
Get-EntraSubscribedSku | Select-Object -Property Sku*, ConsumedUnits -ExpandProperty PrepaidUnits | Format-Table -AutoSize |

This command retrieves details such as:
- SkuId: Unique ID of the license plan.
- SkuPartNumber: Identifier name of the license plan (for example, EMS for Enterprise Mobility + Security).
- Enabled: Total number of licenses available for the purchased plan.
- ConsumedUnits: Number of licenses currently assigned to users under the plan.
- LockedOut, Suspended, Warning: Indicators that show the license health status.
Now that you have details of available Microsoft 365 licenses, the next step is to identify which users are assigned to a specific license. This helps ensure that no user has unwanted or elevated licenses.
To view the users assigned to a particular license, you first need to find the SKU ID of that license plan. You can use the Get-EntraSubscribedId cmdlet to get the list of available license plans and their corresponding SKU IDs.
|
1 |
Get-EntraSubscribedSku | Select-Object -Property Sku* |
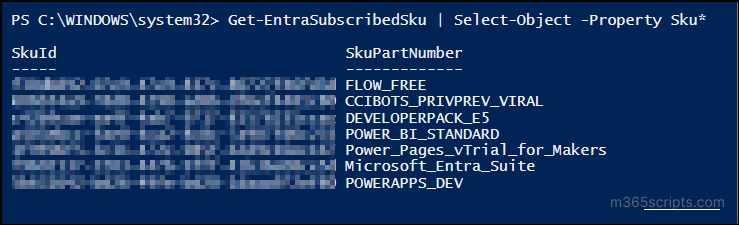
This cmdlet retrieves all available license plans along with their names and IDs. Once you have the required SKU IDs use the snippet below to list all Microsoft 365 users assigned to a specific license.
|
1 2 |
Get-EntraUser –All | Where-Object { $_.AssignedLicenses.SkuId -contains "<SkuId>" } | Select-Object DisplayName, UserPrincipalName, Id, AccountEnabled | Format-Table -AutoSize |
Replace <SkuId> with the SKU ID of the desired license plan to retrieve details such as display name, user principal name, ID, and account status. In the example below, the users assigned to the ‘CCIBOTS_PRIVPREV_VIRAL’ license plan are retrieved.

Sometimes, you may need to review user assignments across multiple Microsoft 365 license plans to detect duplicate license assignments.
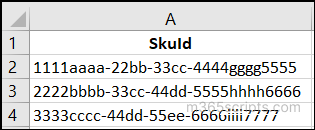
In such cases, you can use a CSV file containing the required SKU IDs as shown in the example below. Make sure that the same column name is used in both the CSV file and the script to avoid errors during execution.
Once the file is ready, save it and run the following PowerShell snippet to export all users assigned to the selected license plans.
|
1 2 3 4 5 6 7 8 9 10 11 |
$SkuIds = Import-CSV -Path "<FilePath>\SkuIds.csv" $AllLicenseAssignments = @() foreach ($id in $SkuIds) { $SkuId = $id.SkuId $SkuName = $id.SkuPartNumber $Users = Get-EntraUser -All | Where-Object { $_.AssignedLicenses.SkuId -contains $SkuId } | Select-Object DisplayName, UserPrincipalName, Id, AccountEnabled, @{Name = "SkuId"; Expression = { $SkuId }} $AllLicenseAssignments += $Users } $AllLicenseAssignments | Export-Csv -Path "<FilePath>\AllLicenseAssignments.csv" |
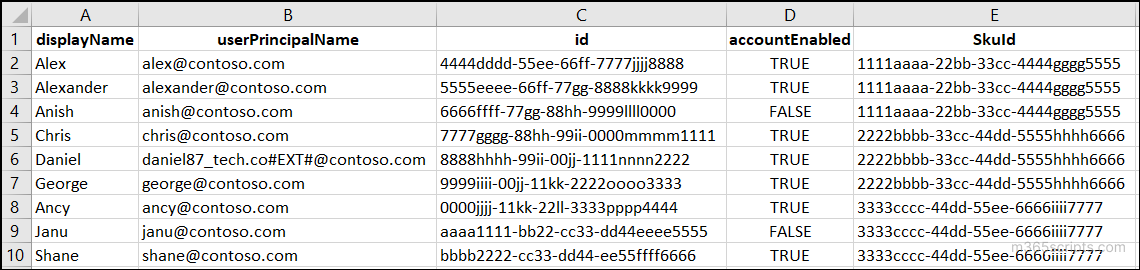
This retrieves all users assigned to the license plans listed in the CSV file. In the example below, users assigned to the FLOW_FREE, POWERAPPS_DEV, and POWER_BI_STANDARD licenses are displayed.
Before assigning a license to a user, it’s important to check which licenses are already allocated to them. This prevents duplicate allocations from group-based license assignments and ensures that users don’t receive unnecessary or elevated privileges. To view the licenses assigned to a user, use the Get-EntraUserLicenseDetail cmdlet as below:
|
1 |
Get-EntraUserLicenseDetail -UserId '<UserPrincipalName>' | Select-Object Sku* |
Replace <UserPrincipalName> with the UPN of the target user whose assigned licenses you want to check.

This command retrieves all the license plans currently assigned to the user, along with their SKU ID and SKU part number.
In addition to checking licenses, it’s also important to view all the service plans included within a user’s license. But before that, let’s understand what a service plan actually is. Think of license plan as a big package, for example, Microsoft 365 E5, Microsoft 365 E3, or Power BI Pro. Each of these packages includes several Microsoft 365 products, such as Exchange Online, SharePoint, Teams, and more. These individual components are called services, also known as service plans.
By checking all the service plans within a user’s license, you can ensure that each service is provisioned (enabled or disabled) correctly for the user.
To list all service plans available in a user’s assigned licenses, run the following cmdlet:
|
1 2 |
$UserLicense = Get-EntraUserLicenseDetail -UserId '<UserPrincipalName>' | Select-Object Sku* $userLicenses.ServicePlans | Select-Object ServicePlanName, ProvisioningStatus |
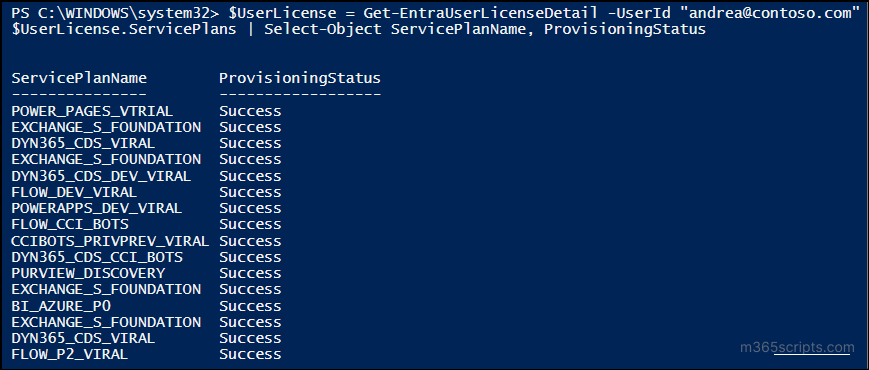
This command retrieves all the service plans included in the licenses assigned to the specified user, along with their provisioning status.
When onboarding a new employee, they’ll need access to Microsoft 365 apps like Outlook, Teams, and OneDrive. You can easily grant these by assigning the appropriate Microsoft 365 license to their account.
To assign a specific license to a user, use the Set-EntraUserLicense cmdlet as shown below:
|
1 2 3 4 5 6 7 |
$user = Get-EntraUser -UserId '<UserPrincipalName>' $license = New-Object -TypeName Microsoft.Open.AzureAD.Model.AssignedLicense $license.SkuId = (Get-EntraSubscribedSku | Where-Object { $_.SkuPartNumber -eq '<SkuPartName>' }).SkuId $licenses = New-Object -TypeName Microsoft.Open.AzureAD.Model.AssignedLicenses $licenses.AddLicenses = $license Set-EntraUserLicense -UserId $user.Id -AssignedLicenses $licenses Get-EntraUserLicenseDetail -UserId $user.UserPrincipalName | Select-Object Sku* | Format-Table -AutoSize |
Replace <UserPrincipalName> with the UPN of the target user and <SkuPartNumber> with the SKU name of the required license.
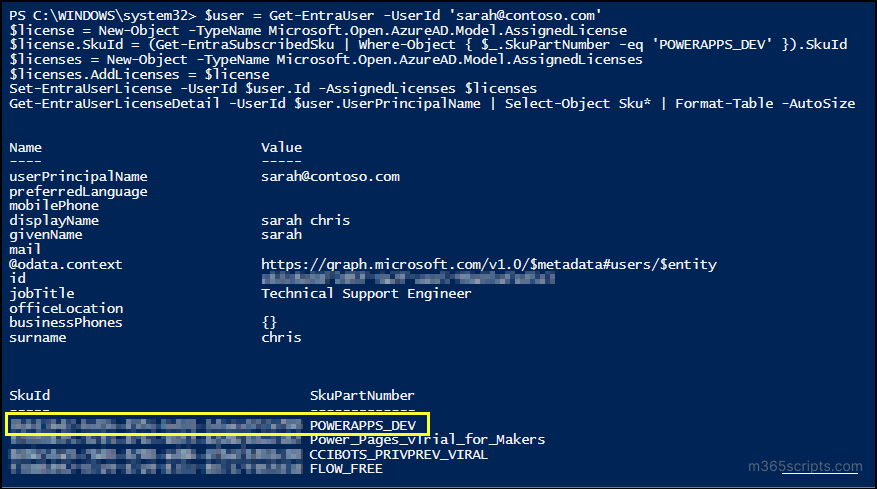
This snippet assigns the specified Microsoft 365 license to the user and verifies the assignment using the Get-EntraUserLicenseDetail cmdlet.
In this example, Sarah is assigned the Power Apps Developer (POWERAPPS_DEV) license plan. The final command verifies that the license was successfully applied to her account.
Assigning Microsoft 365 licenses manually can be time-consuming, especially when managing a large number of users. For example, if multiple users, such as contractors or external users are added to a new project, assigning licenses one by one becomes inefficient. To simplify this process, you can bulk assign Microsoft 365 licenses to multiple users at once using a CSV file as input.
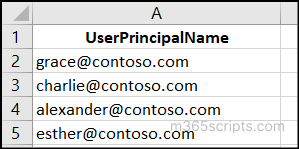
To get started, create a CSV file containing the UserPrincipalName values of the users who need licenses as below:
Then, run the following PowerShell snippet, replacing <SkuPartNumber> with the required license plan.
|
1 2 3 4 5 6 7 8 9 10 11 12 |
$users = Import-CSV -Path "E:\Users.csv" $skuPartName = "POWERAPPS_DEV" $skuId = (Get-EntraSubscribedSku | Where-Object { $_.SkuPartNumber -eq $skuPartName }).SkuId $license = New-Object -TypeName Microsoft.Open.AzureAD.Model.AssignedLicense $license.SkuId = $skuId $licenses = New-Object -TypeName Microsoft.Open.AzureAD.Model.AssignedLicenses $licenses.AddLicenses = $license foreach ($user in $users) { $userId = $user.UserPrincipalName Write-Host "Assigning license to $userId..." -ForegroundColor Cyan Set-EntraUserLicense -UserId $userId -AssignedLicenses $licenses } |
Suppose you need to assign more than one license to a user due to a role change that requires additional licenses. You can assign multiple licenses to the user in a single operation using the PowerShell snippet below:
|
1 2 3 4 5 6 7 8 9 10 |
$skuId1 = (Get-EntraSubscribedSku | Where-Object { $.SkuPartNumber -eq '<SkuPartNumber1>' }).SkuId $skuId2 = (Get-EntraSubscribedSku | Where-Object { $.SkuPartNumber -eq ' <SkuPartNumber2> ' }).SkuId $user = Get-EntraUser -UserId '<UserPrincipalName>' $license1 = New-Object -TypeName Microsoft.Open.AzureAD.Model.AssignedLicense $license1.SkuId = $skuId1 $license2 = New-Object -TypeName Microsoft.Open.AzureAD.Model.AssignedLicense $license2.SkuId = $skuId2 $licenses = New-Object -TypeName Microsoft.Open.AzureAD.Model.AssignedLicenses $licenses.AddLicenses = $license1, $license2 Set-EntraUserLicense -UserId $user.Id -AssignedLicenses $licenses |
Replace <SkuPartNumber1>, <SkuPartNumber1> with the appropriate SKU part names for the licenses and <UserPrincipalName> with the UPN of the target user.
During a migration or license upgrade, you might need to replace existing plans with new ones for a large set of users. You can do this by importing a list of users from a CSV file and assigning the required licenses using PowerShell.
Create a CSV file containing the users’ principal names, as shown in the sample below:

Save the file and then run the snippet provided.
|
1 2 3 4 5 6 7 8 9 10 11 12 |
$users = Import-CSV -Path "<FilePath>\Users.csv" $skuId1 = (Get-EntraSubscribedSku | Where-Object { $_.SkuPartNumber -eq '<SkuPartNumber1>' }).SkuId $skuId2 = (Get-EntraSubscribedSku | Where-Object { $_.SkuPartNumber -eq '<SkuPartNumber2>' }).SkuId $license1 = New-Object -TypeName Microsoft.Open.AzureAD.Model.AssignedLicense $license1.SkuId = $skuId1 $license2 = New-Object -TypeName Microsoft.Open.AzureAD.Model.AssignedLicense $license2.SkuId = $skuId2 $licenses = New-Object -TypeName Microsoft.Open.AzureAD.Model.AssignedLicenses $licenses.AddLicenses = @($license1, $license2) foreach ($user in $users) { Set-EntraUserLicense -UserId $user.UserPrincipalName -AssignedLicenses $licenses } |
Replace <SkuPartNumber1>, <SkuPartNumber2>, and <FilePath> with your actual license SKU names and CSV file path. Once done, you can verify the assignment.
Let’s say a new employee joins the HR department. If you already have an existing HR with all the necessary licenses assigned, you don’t need to manually assign licenses one by one to the new hire.
Instead, you can copy and apply the same licenses from the existing (template) user to the new (target) user.
To assign licenses to a new user based on a template user in Microsoft Entra ID, run the following PowerShell snippet:
|
1 2 3 4 5 6 7 8 9 10 |
$templateUser = Get-EntraUser -UserId '<TemplateUser>' $targetUser = Get-EntraUser -UserId '<TargetUser>' $sourceUserLicenses = $templateUser.AssignedLicenses $licensesToAssign = New-Object -TypeName Microsoft.Open.AzureAD.Model.AssignedLicenses foreach ($license in $sourceUserLicenses) { $assignedLicense = New-Object –TypeName Microsoft.Open.AzureAD.Model.AssignedLicense $assignedLicense.SkuId = $license.SkuId $licensesToAssign.AddLicenses = $assignedLicense Set-EntraUserLicense -UserId $targetUser.Id -AssignedLicenses $licensesToAssign } |
Replace <TemplateUser> and <TargetUser> with the user principal names (UPNs) of your template and target users, respectively.
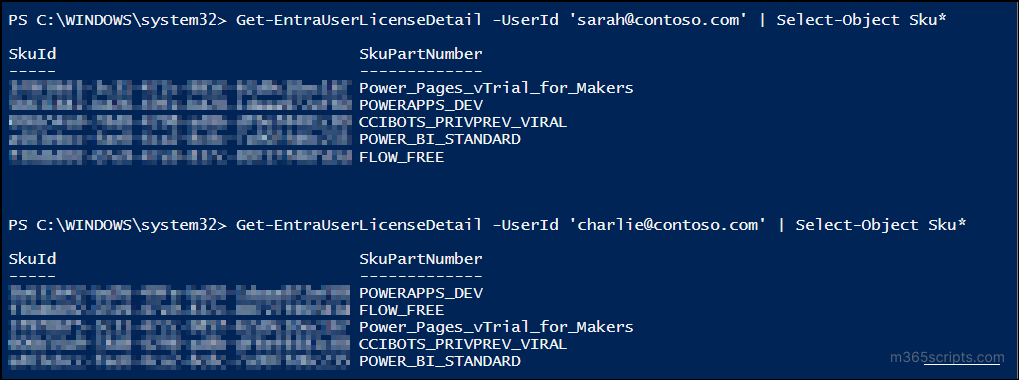
In this example, Sarah (template user) and Charlie (target user) end up with the same set of licenses after the script runs.
In certain cases, user accounts may be disabled due to resignation, role changes, or security reasons. Such accounts may still hold assigned licenses, increasing costs and impacting overall license management. Therefore, it is essential to review disabled accounts regularly to ensure that no active licenses remain assigned to them.
To list all inactive users with active licenses, use the PowerShell snippet below:
|
1 2 |
Get-EntraUser -Filter "accountEnabled eq false" -All | Where-Object { $.AssignedLicenses -ne $null -and $.AssignedLicenses.Count -gt 0 } | Select-Object Id, DisplayName, UserPrincipalName, AccountEnabled | Format-Table -AutoSize |

This cmdlet retrieves all disabled users who still have active licenses and allows you to reassign them to required accounts as needed.
When a user is offboarded, it’s important to remove any licenses still assigned to them. You can use the following PowerShell snippet to remove all licenses from a single user.
|
1 2 3 4 5 |
$user = Get-EntraUser -UserId '<UserPrincipalName>' $skuId = (Get-EntraUserLicenseDetail -UserId $user.Id).SkuId $licensesToRemove = New-Object -TypeName Microsoft.Open.AzureAD.Model.AssignedLicenses $licensesToRemove.RemoveLicenses = $skuId Set-EntraUserLicense -UserId $user.Id -AssignedLicenses $licensesToRemove |
Replace <UserPrincipalName> with the UPN of the user whose licenses you need to remove.
When several employees leave your organization due to layoffs or contract completion, removing licenses one by one can be time-consuming. In such cases, you can use a CSV file to remove multiple users at once.
First, create a CSV file listing the users like the sample image given below:
Then, run the following PowerShell snippet to remove all licenses for the listed users.
|
1 2 3 4 5 6 7 |
$users = Import-Csv -Path "<FilePath>\Users.csv" foreach ($user in $users) { $skuId = (Get-EntraUserLicenseDetail -UserId $user.UserPrincipalName).SkuId $licensesToRemove = New-Object -TypeName Microsoft.Open.AzureAD.Model.AssignedLicenses $licensesToRemove.RemoveLicenses = $skuId Set-EntraUserLicense -UserId $user.UserPrincipalName -AssignedLicenses $licensesToRemove } |
Replace <FilePath> with the path to your CSV file. The licenses will be removed for all users listed in the file.
When users no longer need certain services like Power BI or Visio, instead of removing all licenses, you can remove only the specific ones they no longer use. You can use the following PowerShell snippet to remove specific licenses from a user.
|
1 2 3 4 5 6 |
$skuId1 = (Get-EntraSubscribedSku | Where-Object { $.SkuPartNumber -eq '<SkuPartNumber1>' }).SkuId $skuId2 = (Get-EntraSubscribedSku | Where-Object { $.SkuPartNumber -eq '<SkuPartNumber2>' }).SkuId $user = Get-EntraUser -UserId '<UserPrincipalName>' $licensesToRemove = New-Object -TypeName Microsoft.Open.AzureAD.Model.AssignedLicenses $licensesToRemove.RemoveLicenses = @($skuId1, $skuId2) Set-EntraUserLicense -UserId $user.Id -AssignedLicenses $licensesToRemove |
Replace <UserPrincipalName>, <SkuPartNumber1>, and <SkuPartNumber2> with the user’s UPN and the licenses you want to remove.
That’s a wrap! We hope this blog helped you manage M365 user licenses effectively using Entra PowerShell. With these easy-to-use scripts, you can streamline your license management and save both time and costs. Stay tuned for more practical guides, and don’t hesitate to share your questions or experiences in the comments below. We’d love to hear from you!