Difference Between ‘Sync’ and ‘Add Shortcut to OneDrive’ in SharePoint Online
Users are often confused about when to use ‘Sync’ and ‘Add shortcut to OneDrive’ to access SharePoint files offline. Although both options seem to work similar, they differ in how they handle storage, limits, and performance. Choosing the right option is essential to prevent sync issues, reduce unnecessary storage usage, etc. This blog helps to understand their differences and enable users to manage SharePoint files/folders more efficiently.
When users need to work with SharePoint files and folders offline, they usually rely on one of the two options: ‘Sync’ or ‘Add shortcut to OneDrive’. At first glance, both seem to do the same thing by providing easy access to SharePoint files and folders. But under the hood, each option comes with its own behaviour around storage usage, sync limits, performance, and manageability.
Choosing between Sync and Add shortcut to OneDrive without a clear understanding can lead to headaches such as bloated disk space, sync failures, unnecessary network load, etc. In organizations where users work with large libraries comprising thousands of files, these small choices can quickly turn into major problems. 😥That’s why understanding the difference between ‘Sync’ and ‘Add shortcut to OneDrive’ features in SharePoint Online is critical. In this blog, we’ll walk through how both features work, where they differ, and when to use each one.
- What is ‘Sync’ in SharePoint Online
- What is ‘Add shortcut to OneDrive’ in SharePoint
- Conflicts when using both ‘Sync’ and ‘Add shortcut to OneDrive’ in SharePoint
- Move from ‘Sync’ to ‘Add shortcut to OneDrive’ in SharePoint
- [Admin] Disable ‘Sync’ and ‘Add shortcut to OneDrive’ for users in SharePoint
- Quick comparison summary: ‘Sync’ vs ‘Add shortcut to OneDrive’
‘Sync’ in SharePoint is a feature that allows you to store files/folders from SharePoint sites on your local machine so you can access them offline. It is enabled by default and allows you to sync an entire document library or a complete folder, but not individual files.
It works through the OneDrive sync client, which keeps your SharePoint contents synced between your computer & cloud and makes them available in File Explorer. The client comes preinstalled on Windows 10 and 11; otherwise, you must install and configure it manually. When files are synced, they are stored locally on your device using the New Technology File System (NTFS), which preserves rich file metadata while improving security and data management. This is how the ‘Sync’ function works in SharePoint.
The ‘Sync’ option is your best friend when you need offline access to SharePoint files and folders. This is especially helpful if you want an entire document library to appear on your computer, just like a normal folder and access them even without an internet connection.
Sync is a great choice when you’re working with a limited number of files that won’t take up much disk space. Also, it gives you the comfort of local access while still keeping everything connected to SharePoint in the background.
Important: For guest users, Sync is the only supported way to access SharePoint files and folders locally.
To sync your SharePoint files and folders with OneDrive, follow the steps below:
- Open the SharePoint site where you need to sync, select Site contents from the top navigation bar, and then choose the document library.
- Click the three-dot (More options) menu and select Sync. (To sync a specific folder, select the folder, click the three-dot menu, and select Sync.)
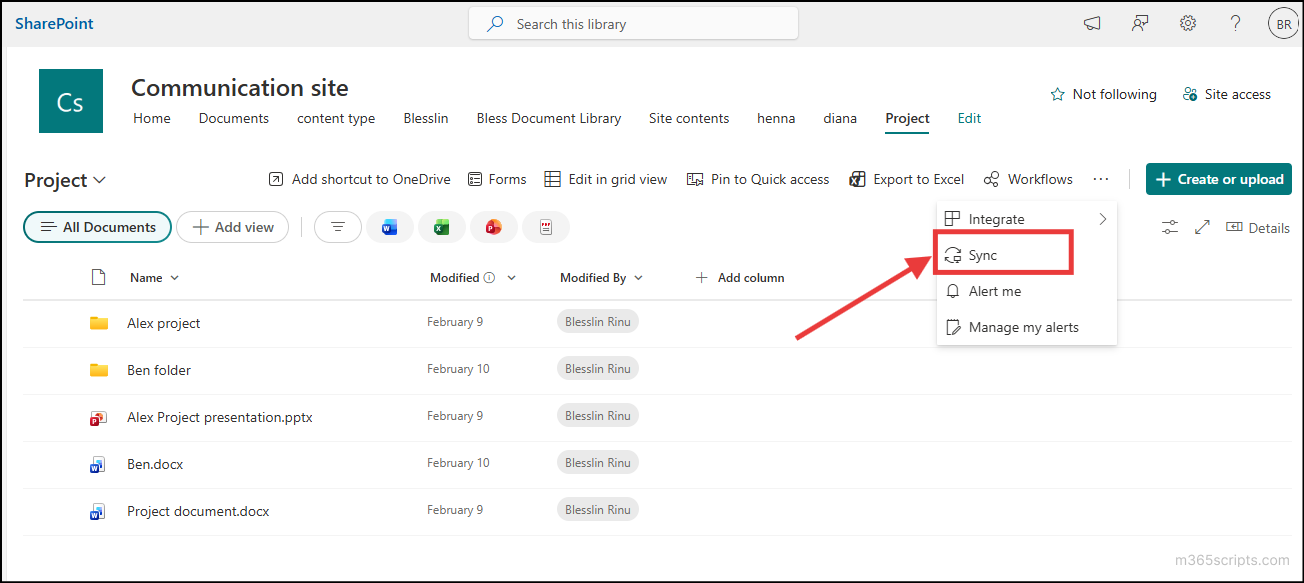
- The OneDrive sync client will start syncing the selected library. Once syncing is complete, a new folder will be created automatically on your computer, and you can access the files directly from File Explorer.
- Each synced file will display a status icon in File Explorer, indicating whether it is online-only, available locally, or always available offline.
After syncing is completed, you can view the files and folders in File Explorer as shown below:
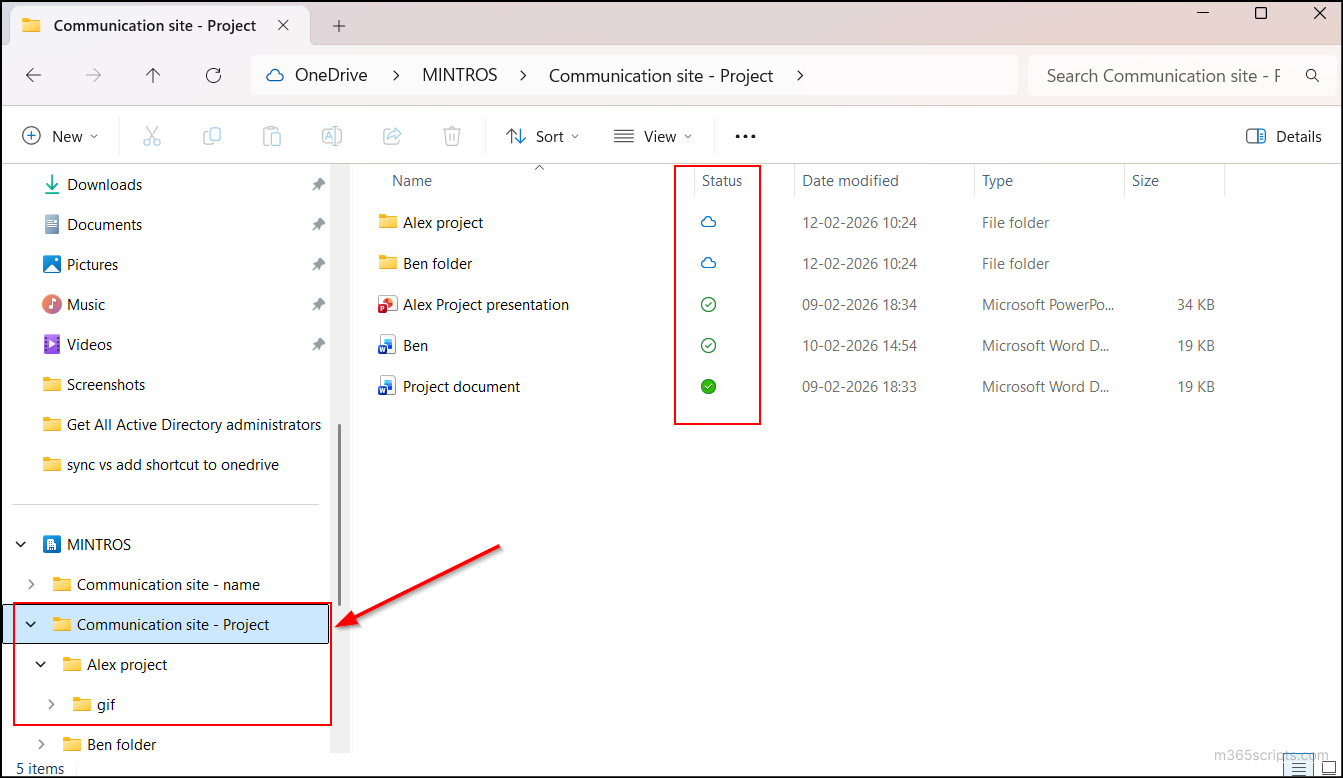
SharePoint files behave like local files once synced. You can open and edit files, add new files & folders, or delete items directly from the File Explorer.
It is important to understand that every change you make locally is immediately reflected in SharePoint, and every change made in SharePoint is reflected on your computer.
For example, if you delete a file in File Explorer, the same file is deleted from the SharePoint document library as well. If you accidentally delete a file, you can restore it from the Recycle Bin (available in the Site contents page) in SharePoint Online.
This real-time connection is powerful, but it also means mistakes can spread quickly.
Note: You can monitor sync status and troubleshoot issues using the OneDrive sync reports available in the Apps admin center.
You might still have questions such as: “I only have read-only access to some files. Can I still sync them? Will the synced files keep the same permissions?”
The answer is yes. You can sync those files, and the original SharePoint permissions will still apply. Syncing files or folders does not change the permissions assigned to them. You can sync any folder or document library you have access to, but your level of access remains the same.
Let’s understand this with an example.
‘User A’ creates a document and shares it with ‘User B’ with View-only permission. This means ‘User B’ can open and read the document, but cannot edit it. Now, ‘User B’ syncs the folder that contains this document. The file is downloaded and stored on User B’s computer through OneDrive sync.
Even though the file is now available locally, the permissions still apply:
- ‘User B’ can open and edit the file locally, but when they try to save it back to the synced folder, they will get an error such as: “We can’t save this file because it’s read-only. To keep your changes, save the document with a new name or in a different location.” ‘User B’ can save the file somewhere else on their computer, but those changes will not sync back to SharePoint.
- If ‘User B’ tries to rename or save the file back into the synced SharePoint folder, they may see an error like: “Sorry, we couldn’t find the location.”
- If ‘User B’ tries to delete the file from the synced folder, they will receive an error such as: “You need administrator permission to delete this file.“
⚠️ Limitations of SharePoint Sync
- Sync is supported only on Windows and macOS, but is not available on Android or iOS devices.
- Microsoft recommends syncing up to 300,000 items at a time. Exceeding this limit can still work, but it often slows down the system and increases the chances of sync errors and delays.
- To avoid any sync issues, file/folder names must not exceed 255 characters, and the full path from the OneDrive root folder must not be more than 520 characters.
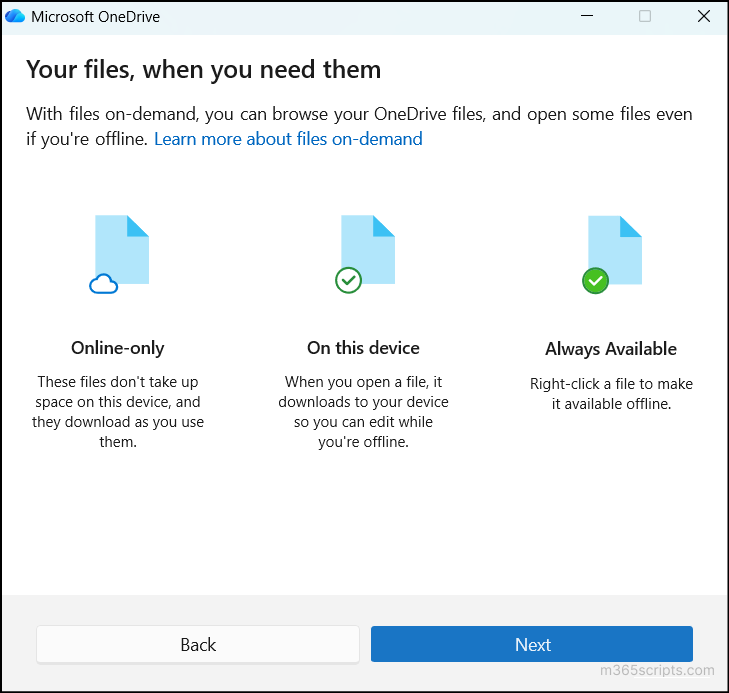
- Since synchronization directly uses the File Explorer, it consumes a significant amount of disk space and internet bandwidth. Its performance also depends on the total number of files being synced and the computer’s capacity. To reduce disk usage and improve sync performance, you can use OneDrive’s Files On-Demand feature (enabled by default in Windows 10 and later) to keep files online until you open them.
- Sync can be interrupted by power failures, weak or unstable internet connections, or very large file volumes. For a clean re-sync, you need to stop the sync process, delete the existing synced folder, and start syncing again.
- Sync works only on the current device. When you move to a new PC, you must resync all folders and libraries. OneDrive Group Policy can automate resyncing, but it is not recommended for libraries with more than 5,000 items or for syncing to more than 1,000 devices.
Now, let’s look at the ‘Add shortcut to OneDrive’ feature in SharePoint.
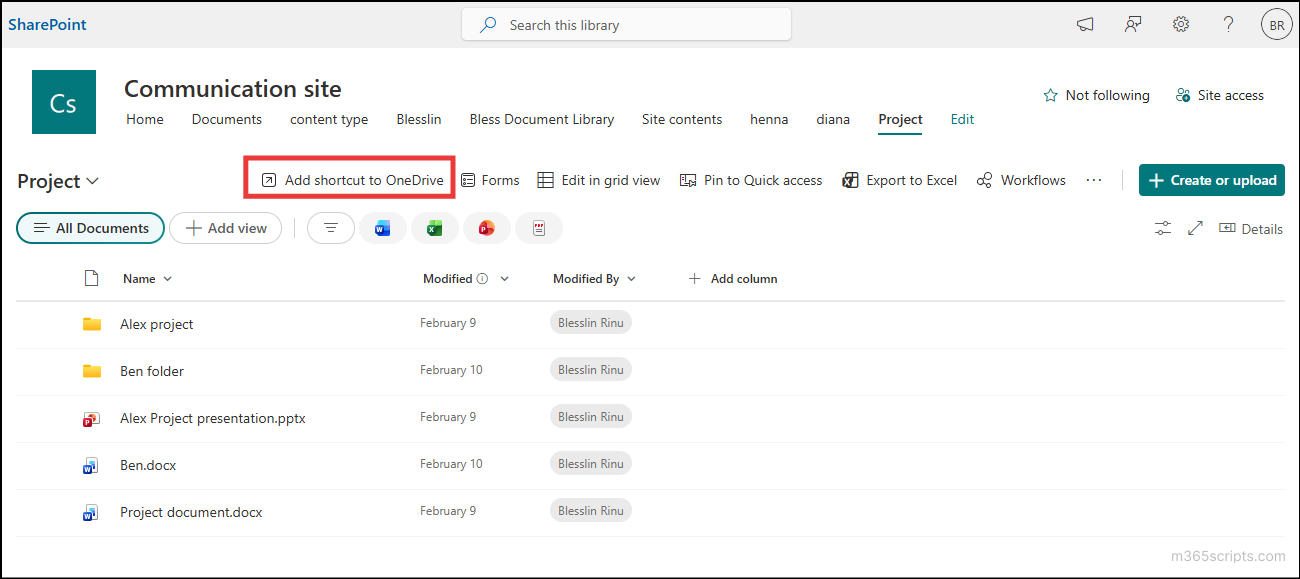
The ‘Add shortcut to OneDrive’ option gives you a simple way to access files and folders from SharePoint directly in your OneDrive while keeping them online. Unlike the Sync option, you can add shortcuts for individual files, folders, or entire document libraries. Think of it as creating a link in your OneDrive rather than downloading everything to your computer.
This feature is designed mainly for easy access. It does not consume local disk space or create sync-related complications. The actual files remain in the cloud, and you can download them with a single click whenever you need them. Once added, the shortcut folder appears in your OneDrive for Business even though the original content still lives in the SharePoint document library. When you add a shortcut to a SharePoint folder, it also appears in your personal OneDrive folder in File Explorer.
Now, let’s see how to add shortcut for files and folders in SharePoint Online.
Add shortcut to OneDrive is a Microsoft-recommended option for accessing SharePoint files and folders. It is especially useful when you need to access a large number of document libraries through OneDrive. Unlike Sync, you can add up to 500,000 shortcuts across files and folders.
It is also useful when you need to access the same files from multiple devices, as the shortcuts appear on every device where you sign in. You can rearrange these shortcuts in OneDrive to create a more intuitive and organized structure for easy access.
Now, let’s see how to add shortcut for files and folders in SharePoint Online.
To add a shortcut, you can open the desired SharePoint site and choose one of the following ways, depending on what you want to access.
- Add shortcut to a document library or folder: Select the target document library/folder and click Add shortcut to OneDrive from the top menu. You can find the added shortcut in the My Files page in OneDrive.
Note: When you add a shortcut to a parent folder or library, any shortcut to its subfolder is removed automatically, and its contents are included under the parent shortcut. This avoids duplicates or using extra storage.
- Add shortcut to an individual file: Select the file and choose Add shortcut → My Files or Other Locations based on your preference.
Note:
If you need to remove a shortcut, go to My Files in OneDrive, select the target file/folder, and select Remove shortcut.
⚠️ Limitations of Add Shortcut to OneDrive
- You can access the shortcut added files only through online; offline access is not supported.
- When you add a shortcut in SharePoint while the OneDrive sync client is running, the linked library usually starts syncing automatically. So practically, “Add shortcut” often triggers a sync operation. Because of this, the OneDrive 300,000-item sync limit still applies to all files and folders accessed via shortcuts as well.
- You cannot add shortcuts for multiple files or folders at the same time.
- If you try to add a shortcut to a folder that already has one, you’ll see an error saying: “You already have a shortcut to this folder.”
- SharePoint permissions still apply to the shortcut added files; you can only access what you’re allowed to see.
Let’s look at the common conflicts that occur when you mix Sync and Add shortcut to OneDrive in SharePoint.
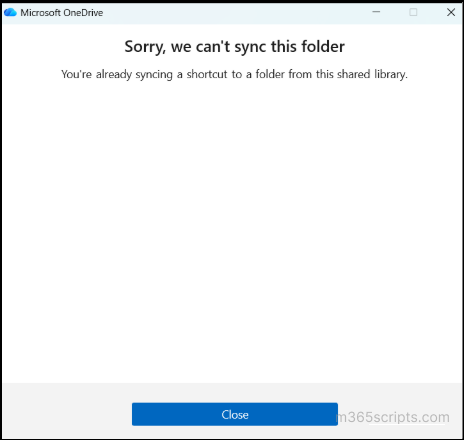
What Happens If a Shortcut Added Folder is Synced?
If you try to sync a shortcut added folder, it will throw an error like: “Sorry, we cannot sync the folder. You’re already syncing a shortcut to a folder from this shared library.”
What Happens If a Synced File is Added Shortcut to OneDrive?
If you add a shortcut to a folder that is already synced, the shortcut will be added without any error. However, the same files will appear in two places in File Explorer — one inside the synced folder and one under OneDrive for Business. This can cause confusion because both locations point to the same content.
To prevent such conflicts, Microsoft recommends moving from ‘Sync’ to ‘Add shortcut to OneDrive’.
To switch from ‘Sync’ to ‘Add shortcut to OneDrive’, follow these simple steps to migrate safely.
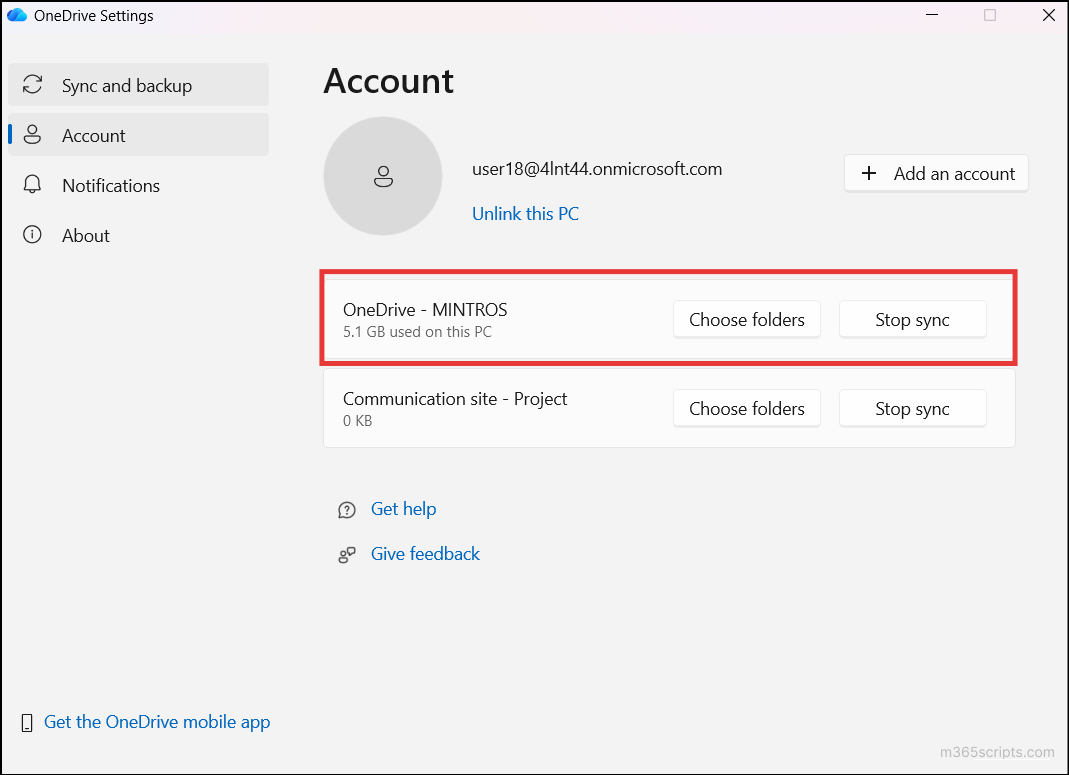
- First, you need to stop syncing on the device.
- To stop syncing for entire tenant: Click the OneDrive icon in the Windows navigation bar, select the gear icon → Settings → Account. Select the tenant (organization name) and click Stop sync.
- To stop syncing for a document library: Go to File Explorer, right-click the target library folder, select Show more options, and then click Stop sync.
- To stop syncing for entire tenant: Click the OneDrive icon in the Windows navigation bar, select the gear icon → Settings → Account. Select the tenant (organization name) and click Stop sync.
- Once sync is stopped, you must add a shortcut for the required file/folder. If you didn’t add shortcut and directly delete the synced files, the files will be removed from SharePoint as well, and you won’t be able to add a shortcut afterward. Now, go to the target SharePoint document library, click Add Shortcut to OneDrive from the top menu.
- Now, you can delete the old, synced folder from the File Explorer. This will remove it only from your computer but not from SharePoint.
This migration helps you manage the disk space and helps you access files/folders safely.
To keep things simple and aligned with your organization’s file-access strategy, admins can disable specific options and guide users toward a single, approved method. This can avoid user confusion between the features and enforce a consistent file access experience.
Let’s see how admins can do that.
If you want to stop users from syncing a specific document library to their local devices, you can do it directly from the library settings. Follow the steps below to disable Sync for a document library.
- Open the SharePoint site and click Settings (⚙️) → Library settings → More library settings.
- Under General settings, click Advanced settings → Offline and sync.
- Set the “Allow people to sync this document library to their computers with Microsoft OneDrive and access it offline?” to No.
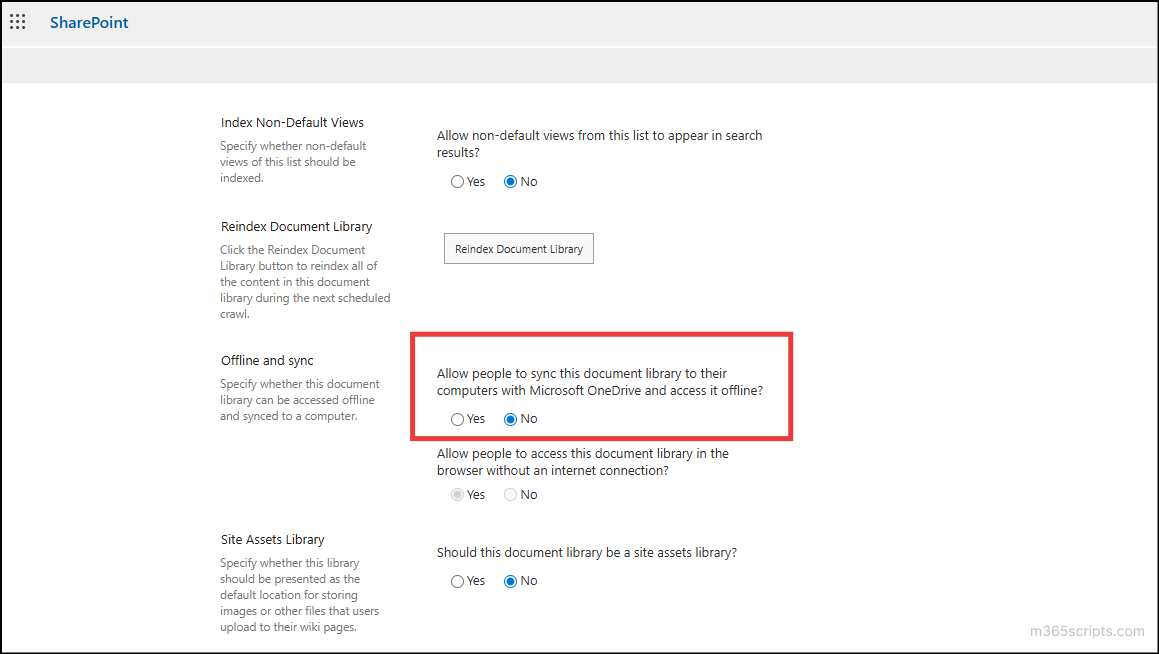
- Click OK. Once done, the Sync button will disappear from that document library.
💡 Tip: This setting is library-specific, so you can selectively allow or block Sync where needed.
If your goal is to prevent users from adding SharePoint files/folders as shortcuts in their OneDrive, this can be controlled at the tenant level using SharePoint Online PowerShell.
Connect to SharePoint Online PowerShell and run the following cmdlet:
|
1 |
Set-SPOTenant -DisableAddShortcutsToOneDrive $True |
This cmdlet disables users from creating new shortcuts in OneDrive while the existing shortcuts continue to work.
Now that you understand how Sync and Add shortcut to OneDrive work in SharePoint, let’s see a quick comparison summary.
Let’s break down the differences between the Sync and Add shortcut to OneDrive options using a simple comparison table.
| Aspect | Sync | Add Shortcut to OneDrive |
| Access level | Can be used only at the document library or folder level. | Can be used at the documentary library, folder, and even file level. |
| Copy location | Copies files locally to File Explorer. | Creates a cloud-based link (bookmark) within OneDrive. |
| Internet requirement | Works offline after syncing. | Requires an internet to open files. |
| Storage usage | Uses your computer’s local storage space because files are downloaded to the device. | Does not consume local storage space unless you open or download the files. |
| Limit | Microsoft recommends syncing up to 300,000 items per library. | You can add up to 500,000 shortcuts for files and folders. |
| Supported devices | Supported on Windows and macOS only. | Supported on Windows, macOS, Android and iOS devices. |
| Device dependency | Sync is tied to the current device and is accessed only on that device. | Shortcuts appear on multiple devices where you sign in to OneDrive. |
| Availability for guest users | Can sync files from a library they have access to | Not available for guest users |
Closing Lines
That’s a wrap! 🎉 We hope this blog helped you understand Sync vs Add shortcut to OneDrive difference in SharePoint Online. This would have given you an idea to decide which option best fits your scenario, while keeping storage secure and efficient in SharePoint Online. Have any queries or real-world experiences to share? Drop them in the comments below. We’d love to hear from you! Stay tuned for more upcoming blogs. 🚀