Manage Groups Using Microsoft Entra PowerShell Module
Manage Microsoft 365 groups using the Entra PowerShell module for creating, updating, and administering group memberships at scale. Add or remove members, assign owners, update properties, and perform bulk operations efficiently. Replace deprecated AzureAD and MSOnline cmdlets with modern Entra PowerShell commands for streamlined group administration.
Managing groups in Microsoft 365 can get tricky as your organization grows and user roles constantly evolve. While the Microsoft 365 admin center provides the basics, it’s not suitable for automation or large-scale changes. That’s where PowerShell shines, giving admins precision and control. But with the deprecation of AzureAD and MSOnline modules, it’s time to switch to the modern solution, the Microsoft Entra PowerShell module. It delivers a unified and secure approach to manage users, groups, apps, licenses, and more. In this blog, we’ll explore how to manage groups using Entra PowerShell, helping you simplify group management.
Before you start managing groups in Entra PowerShell, make sure the following requirements are in place to ensure a smooth execution experience:
- Microsoft Entra account: You’ll need an active Microsoft Entra user account. If you don’t have one, you can sign up for a free account.
- Install the Entra PowerShell module: Ensure Microsoft Entra PowerShell module is installed on your system in the latest version.
- Administrative permissions: You must hold at least the Groups Administrator role to create, modify, or delete groups within your tenant.
Once you meet all the requirements, connect to the Microsoft Entra PowerShell module by running the cmdlet below.
|
1 |
Connect-Entra -Scopes 'Group.ReadWrite.All' |
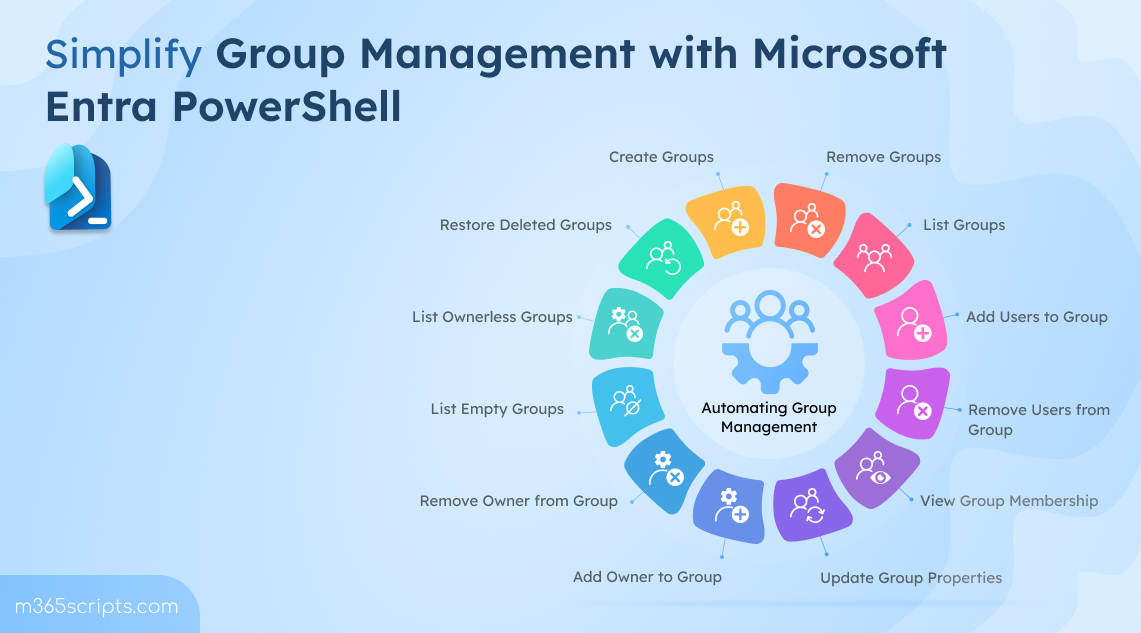
Now, you can use Microsoft Entra PowerShell to perform a wide range of group management tasks. Here are some of the necessary Microsoft 365 group management tasks:
- Create a Microsoft 365 group
- Create groups in bulk
- Get list of all groups
- Get list of all members in a group
- Get groups a user is a member of
- Add user to a group
- Bulk addition of user to a group
- Add a user to multiple groups
- Add user as a group owner
- Remove an owner from a group
- Replace group owner
- Update group properties
- Bulk update group properties
- Get ownerless group in Microsoft 365
- Find all empty groups
- Remove a group
- Remove groups in bulk
- Remove a user from a group
- Remove a user from multiple groups
- Bulk removal of multiple users from a group
- Remove a user from all groups
- Restore deleted groups
To create a new Microsoft 365 group with Entra PowerShell module, you can use the New-EntraGroup cmdlet.
|
1 2 3 4 5 6 7 |
$groupParams = @{ DisplayName = "<GroupName>" MailEnabled = $true MailNickname = "<Nickname>" GroupTypes = @("Unified") } New-EntraGroup @groupParams |
Replace <GroupName> and <Nickname> with appropriate values in the above cmdlet to create a Microsoft 365 group.

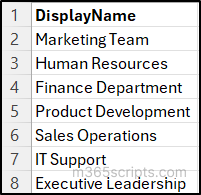
When setting up new projects, departments, or regional teams, manually creating each group can be time-consuming. Instead, prepare a CSV file with each group’s display name. After creating the CSV file, run the below cmdlet.
Sample input file:

Replace the <FileLocation> with your file path to create all groups in one go.
|
1 2 3 4 5 6 7 8 9 |
Import-Csv <FileLocation> | ForEach-Object { $groupParams = @{ DisplayName = $_.DisplayName MailEnabled = $true GroupTypes = @("Unified") } New-EntraGroup @groupParams Write-Host "Created group: $($_.DisplayName)" } |
The output confirms that the corresponding security group has been successfully created using the parameters from the CSV input.
With group creation simplified through Entra PowerShell module, lifecycle visibility is just as important. Group Insights in Entra ID now gives administrators built-in visibility into groups governance metrics. Admins can quickly see newly created groups, groups approaching expiration, soft-deleted groups, and recently restored groups.
To retrieve all groups in your environment, use the Get-EntraGroup cmdlet.
|
1 |
Get-EntraGroup –All |
Running this command will display a list of all groups in your Microsoft 365 environment, including their display names, object IDs, mail nick name and description.

To list all members of a specific group using Microsoft Entra PowerShell, replace <GroupName> and you can use Get-EntraGroup cmdlet as mentioned
|
1 2 |
$group = Get-EntraGroup -Filter "displayName eq '<GroupName>'" Get-EntraGroup -GroupId $group.Id | Get-EntraGroupMember | Select-Object Id, DisplayName, '@odata.type' |
Running this cmdlet will list all members of the specified group, displaying each member’s ID, display name, and object type (user, group, or service principal).

To find list of all groups a user is member of, you can use Get-EntraUserMembership cmdlet as given below.
|
1 |
Get-EntraUserMembership -UserId <UPNAddress> | Select-Object DisplayName, Id |
Replace <UPNAddress> with the user’s UPN to retrieve all the groups they belong to, displaying each group’s display name and ID in the output.

To add members to an existing group in Microsoft 365, you can use Add-EntraGroupMember cmdlet. Replace <GroupName> and <UPNAddress> with the appropriate values and then run the cmdlet below.
|
1 2 3 |
$group = Get-EntraGroup -Filter "displayName eq '<GroupName>'" $user = Get-EntraUser -UserId '<UPNAddress>' Add-EntraGroupMember -GroupId $group.Id -MemberId $user.Id |
After running this cmdlet, the specified user will be successfully added as a member of the chosen group.

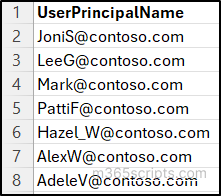
When onboarding new employees, assigning users to project team one by one can be tedious. Instead, create a CSV file with the users’ UPN addresses, then run the below cmdlet.
Sample input file:
|
1 2 3 4 5 |
$group = Get-EntraGroup -Filter "displayName eq '<GroupDisplayName>'" Import-Csv <FileLocation> | ForEach-Object { $user = Get-EntraUser -UserId $_.UserPrincipalName Add-EntraGroupMember -GroupId $group.Id -MemberId $user.Id } |
Replace <GroupDisplayName> and <FileLocation> to add all users to the group in a single step. It displays the confirmation that each user from the CSV file has been successfully added as a member of the specified group.
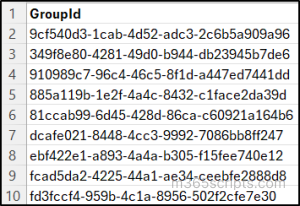
When an employee joins multiple project teams, they often need access to several groups at once. Instead of manually adding them to each group, you can automate the process. Prepare a CSV file listing the group IDs, then run the Entra PowerShell cmdlet replacing <FileLocation> and <UserObjectID> to add the user to all required groups in one go.
Sample input file:
|
1 |
Import-Csv <FileLocation> | ForEach-Object { Add-EntraGroupMember -GroupId $_.GroupId -MemberId <UserObjectId> } |
To get the required user and group Object IDs before running the script, use the following cmdlets respectively:
|
1 2 |
Get-EntraUser -Identity "<UserUPN>" | Select-Object Id, DisplayName Get-EntraGroup -Filter "displayName eq '<GroupName>'" | Select-Object Id, DisplayName |
To assign a group ownership permission, use the Add-EntraGroupOwner cmdlet by replacing <GroupId> and <UserId>.
|
1 |
Add-EntraGroupOwner -GroupId <GroupId> -OwnerId <UserId> |
This cmdlet adds the specified user as an owner of the chosen group, giving them management permissions.

To remove a user as the owner of a specific group, use the Remove-EntraGroupOwner cmdlet with the groups’ name and users’ UPN address.
|
1 |
Remove-EntraGroupOwner -GroupId <GroupId> -OwnerId <UserId> |
Running this cmdlet will successfully remove the specified user’s ownership from the selected group.
When a group owner leaves the organization or changes roles, it’s important to reassign ownership to maintain proper access control and ensure group management continuity. You can easily update the group owner using Microsoft Entra PowerShell by running the cmdlet below.
|
1 2 |
Add-EntraGroupOwner -GroupId <GroupId> -OwnerId <NewOwnerId> Remove-EntraGroupOwner -GroupId <GroupId> -OwnerId <OldOwnerId> |
Replace <GroupId> with the target group’s ID and <NewOwnerObjectId> with the new owner’s object ID. This cmdlet will first assign the new owner and then remove the previous one, ensuring the group retains at least one owner and remains properly managed.
You can update existing group information such as the display name or description directly from Microsoft Entra PowerShell. Replace <GroupName>, <Description> and run the Set-EntraGroup cmdlet below to modify group properties as needed.
|
1 |
Get-EntraGroup -Filter "displayName eq '<GroupName>'" | Set-EntraGroup -Description '<Description>' |
Note: To verify the updated group details, run this cmdlet Get-EntraGroup -Filter “displayName eq ‘ <GroupName>'”
If your organization recently updated security policies, or group settings, you can easily apply those changes in bulk using Microsoft Entra PowerShell. Import a CSV file containing the groups’ display names to update their properties in bulk using this script.
Sample input file:
|
1 2 3 4 |
Import-Csv <FileLocation> | ForEach-Object { $group = Get-EntraGroup -Filter "displayName eq '$($.DisplayName)'" Set-EntraGroup -GroupId $group.Id -Visibility "Private" } |
You can modify properties such as display name, description, mail nickname, visibility (Public/Private), group type, membership rule, and owners, ensuring all groups stay compliant and consistently configured.
In Microsoft 365, when a group is left ownerless, no one can manage membership, update settings, or approve access request, leading to potential security and compliance risks. Identify groups without assigned owners by running the Get-EntraGroupOwner. Run the cmdlet below to list all ownerless groups in your Microsoft Entra environment.
|
1 2 3 4 5 6 7 8 |
$allGroups = Get-EntraGroup –All $groupsWithoutOwners = foreach ($group in $allGroups) { $owners = Get-EntraGroupOwner -GroupId $group.Id -Erroraction SilentlyContinue if ($owners.Count -eq 0) { $group } } $groupsWithoutOwners | Format-Table DisplayName, Id, GroupTypes |
You can easily identify groups without assigned owners by running the Get-EntraGroupOwner as mentioned above.
You can find groups that don’t have any members to help with cleanup or auditing inactive groups. Run the cmdlet below to retrieve all empty groups in your Microsoft 365 environment.
|
1 2 3 4 5 6 7 8 |
$allGroups = Get-EntraGroup –All $groupsWithoutMembers = foreach ($group in $allGroups) { $members = Get-EntraGroupMember -GroupId $group.Id if ($members.Count -eq 0) { $group } } $groupsWithoutMembers | Format-Table DisplayName, Id, GroupTypes |
By running the above cmdlet, you can find all empty groups in your tenant within a seconds!
To remove a group from your environment, you can use Remove-EntraGroup cmdlet after replacing <Groupname> placeholder.
|
1 |
Get-EntraGroup -Filter "displayName eq '<GroupName>'" | Remove-EntraGroup |
This cmdlet permanently deletes the specified group from your directory.
Sometimes old or inactive groups might still have access to sensitive resources, and it’s better to remove them from your directory. To streamline this process, create a CSV file with the groups’ display names and run the below cmdlet.
Sample input file:

|
1 2 3 4 5 |
Import-Csv "<FileLocation>" | ForEach-Object { $group = Get-EntraGroup -Filter "displayName eq '$($_.DisplayName)'" Remove-EntraGroup -ObjectId $group.Id Write-Host "Removed group: $($_.DisplayName)" } |
Replace <FileLocation> in the cmdlet to remove groups in bulk efficiently and ensures quick, consistent cleanup of multiple unwanted groups.
To remove a user from a specific group, use the Remove-EntraGroupMember cmdlet given below by replacing <GroupDisplayName> and <UserDisplayName>.
|
1 2 3 |
$group = Get-EntraGroup -Filter "displayName eq '<GroupDisplayName'" $user = Get-EntraUser -Filter "displayName eq '<UserDisplayName>'" Remove-EntraGroupMember -GroupId $Id -MemberId $user.Id |
Running this script immediately revokes the user’s access to the selected group’s resources
You can remove a single user from several Microsoft 365 groups at once by listing the group display names in a CSV file. After preparing the file, run the below script by replacing <FileLocation> with your CSV path and <UPNAddress> with the user’s UPN. This is useful when offboarding users or revoking access across multiple groups at once.
Sample input file:

|
1 2 3 4 5 6 |
$user = Get-EntraUser -UserId "<UPNAddress>" Import-Csv <FileLocation> | ForEach-Object { $group = Get-EntraGroup -Filter "displayName eq '$($_.DisplayName)'" Remove-EntraGroupMember -GroupId $group.Id -MemberId $user.Id Write-Host "Removed $($user.UserPrincipalName) from group '$($group.DisplayName)'" } |
This cmdlet simplifies user offboarding by removing their membership from all listed groups in one go.
When offboarding a project team or cleaning up outdated memberships, removing several users from a single Microsoft 365 group can be time-consuming if done manually. By listing user display names in a CSV file, you can quickly bulk remove them using the Entra PowerShell cmdlet, just replace <GroupDisplayName> and <FileLocation> with your CSV path.
Sample input file:

|
1 2 3 4 5 6 |
$group = Get-EntraGroup -Filter "displayName eq '<GroupDisplayName>'" Import-Csv "<FileLocation>" | ForEach-Object { $user = Get-EntraUser -Filter "displayName eq '$($_.DisplayName)'" Remove-EntraGroupMember -GroupId $group.Id -MemberId $user.Id Write-Host "Removed $($_.DisplayName) from group '$($group.DisplayName)'" } |
This cmdlet helps maintain group security by efficiently removing inactive or offboarded users.
Note: As of now, tasks like license management and dynamic group management can be only handled via the Microsoft Graph PowerShell SDK.
You can automatically remove a user from all Microsoft 365 & security groups they belong to using the Microsoft Entra PowerShell module.
|
1 2 3 4 5 |
$user = Get-EntraUser -UserId "<UPNAddress>" Get-EntraUserMembership -UserId $user.Id | ForEach-Object { Remove-EntraGroupMember -GroupId $_.Id -MemberId $user.Id Write-Host "Removed $($user.UserPrincipalName) from group '$($_.DisplayName)'" } |
Replace <UPNAddress> and run this script to fully remove a user’s group associations, ensuring no residual access remains.
When a Microsoft 365 group is deleted, it is initially soft deleted, meaning it remains recoverable for a limited period before permanent removal. You can easily restore deleted groups with the Microsoft Entra PowerShell module by running the Get-EntraDeletedGroup cmdlet to check groups currently in the soft-deleted state.
To restore a deleted group, use the Restore-MgDirectoryDeletedItem cmdlet along with the group’s Object ID:
|
1 |
Restore-MgDirectoryDeletedItem -DirectoryObjectId <GroupId> |
If you need to restore multiple deleted groups, create a CSV file containing the Group IDs and use a loop to restore them in bulk.
Note: It’s very important to remember that once a group is hard deleted, it cannot be recovered. You can configure protected actions in Entra ID to prevent accidental permanent deletions of Entra ID objects.
I hope this blog helped you understand how to manage groups effectively using the Microsoft Entra PowerShell module. With these cmdlets, you can easily automate tasks like adding, removing, or restoring groups, saving time and improving accuracy. Keep exploring PowerShell to simplify your Microsoft 365 administration even further. If you have any question, feel free to drop a comment below!