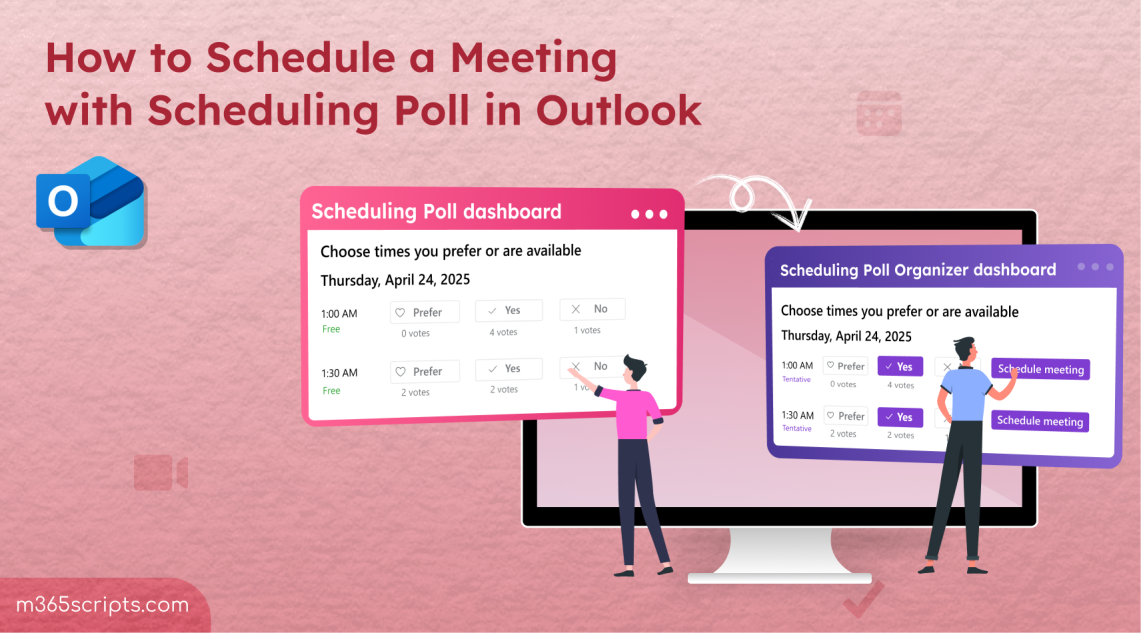
How to Schedule a Meeting with Scheduling Poll in Outlook
Use Scheduling Poll in Outlook to coordinate meeting times by sending time slot options to attendees for voting. Create polls with multiple proposed times, allow attendees to view others’ responses and suggest alternatives. Finalize meetings based on collective availability without endless email exchanges.
When you are part of a large team, finding a time when everyone is available for a meeting can be surprisingly difficult. Tracking each person’s availability, checking room mailbox calendars, booking a meeting room… all while juggling emails that say things like:
- “Sorry, can we reschedule? I’ve got something urgent.”
- “Declined — not available at that time.”
We’ve all been there🤯. Wouldn’t it be easier if you could just schedule a meeting based on attendees’ preferences? That’s exactly what the Scheduling Poll in Outlook is built for. In this blog, let’s explore what a Scheduling Poll is and how it helps with scheduling meetings in Outlook.
We’ve probably used polls in group chats, social media, and more — voting on what to eat or which movie to watch. Similar to that concept, the Scheduling Poll in Microsoft Outlook takes a more practical approach. Instead of casual plans, it’s designed to help you coordinate with your team and find the perfect time for a meeting.
It lets you select several suitable time slots and send them out as a poll to your meeting attendees. They vote based on their availability, and once all responses are in, you can easily choose the time that works best for everyone.
Now that you understand the concept, let’s dive into how it works in practice.
- When an organizer selects Scheduling poll while scheduling a meeting, it checks the calendars of all attendees and suggests suitable meeting time slots.
- The organizer selects multiple time options from the list, creates a poll in Outlook, and sends it to attendees along with the meeting invite.
- Attendees who receive the invite can vote on the poll in the Scheduling Poll dashboard and view the responses of other attendees, making it easier to align preferences.
- If allowed, attendees can also suggest new times for the meeting.
- Once everyone has responded, the organizer can view the poll results in the Scheduling Poll organizer dashboard and choose the time slot where most or all attendees are available.
To simplify the process further, the organizer can enable Auto Scheduling, which automatically finalizes the meeting time once consensus is reached.
Now, let’s explore how to schedule a meeting using Scheduling Poll in Outlook.
Requirements:
The meeting organizer must have an Exchange Online mailbox to use the Scheduling Poll feature. However, anyone with a valid email address can be an attendee in a meeting that utilizes the Scheduling Poll feature for polling.
If you don’t have a mailbox, you can create a mailbox using PowerShell or through the Exchange Online admin center.
Follow the steps below to create a Scheduling Poll in Outlook and schedule a meeting.
- Log in to Outlook and go to the Calendar.
- Click New Event, then select Event.
- Add a title for your meeting and slide the Teams meeting toggle on or off as needed.
- Select the “Invite attendees” icon, then enter the names of individuals you want to invite.
- Click Search for a room or location and enter a meeting location. You can also use Room Finder in Outlook to find available rooms based on your preferences.
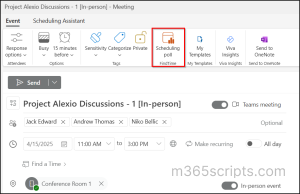
- Click the Scheduling poll in the toolbar to access Scheduling Poll in Outlook.
- On the Scheduling poll page, configure the following options:
- Time zone: Use the dropdown to select the appropriate time zone.
- Duration: Specify the meeting duration.
- Meeting hours: Toggle this option to limit suggested times to working hours. Outlook retrieves default working hours from the organizer’s settings. If not available, it uses the Exchange settings. When no settings are found, the default is 8 a.m. to 5 p.m., Monday through Friday. If you want to schedule meetings outside working hours, you can update working hours in Outlook.
- Date: Pick dates to check availability and add them to the poll. You can add times from different dates to a poll.
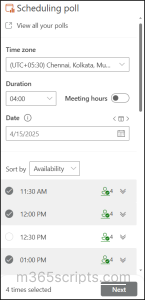
- The Scheduling Poll checks all attendees’ calendars and suggests suitable time slots. You can see availability using the people icons beside each time slot:
- Underlined – Organizer
- Red – Unavailable
- Green – Available
- Purple – Tentative
- Gray – Unknown

- Use the expand/collapse button near the people icon to see a detailed availability list and whether participants are required or optional.
Note: Microsoft recommends turning off calendar sharing with external users, so many organizations disable the external sharing of calendars. As a result, when you invite external users to the meeting, their availability will appear as Gray in the Scheduling Poll. - Select all suitable meeting times, then click Next.
- On the next screen, you’ll see the list of selected time slots. You can delete any if needed.
- The Teams meeting is enabled by default; you can toggle it off or back on.
- Under Manage poll settings, configure the following options:
- Schedule when attendees reach consensus: If you enable this option, Scheduling Poll automatically schedules the meeting when all attendees vote for the same time. If everyone selects multiple time slots, it schedules the earliest one
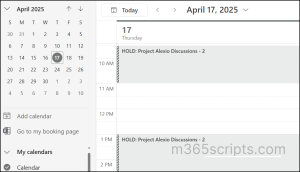
- Hold selected times on my calendar: Places tentative holds on all selected time slots in attendees’ calendars. These holds are removed once the meeting is scheduled or the poll is cancelled.
- Notify me about poll updates: Sends the organizer an email whenever an attendee votes.
- Require attendees to verify their identity: Ensures only authenticated users can vote to prevent anonymous user access in Teams meetings.
- Lock poll for attendees: Prevents attendees from suggesting new times or adding new attendees.
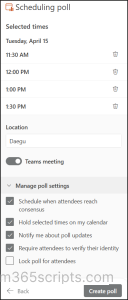
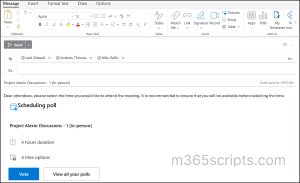
- Click Create poll. The poll is inserted into the meeting invite, which includes a link to the voting page.
- If necessary, you can customize the meeting invites to protect your organization from impersonation and provide a more secure scheduling experience for all attendees. Then, click Send to send the invite and start the scheduling poll voting.
Once you send the invite, the meeting is created in Outlook. As soon as the invite reaches attendees’ mailboxes, they can click the link to the Scheduling Poll and vote for their preferred time.
Handy Tip: You can apply a sensitivity label to meeting invites in Outlook to encrypt the body and attachments and restrict unauthorized access.
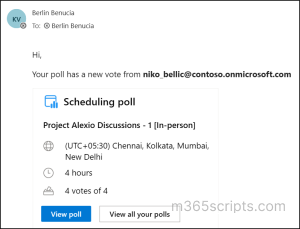
Let’s take a look at how Scheduling Poll works from the attendee’s perspective. When attendees log in to Outlook, they will see an email in their inbox that looks like the image below.
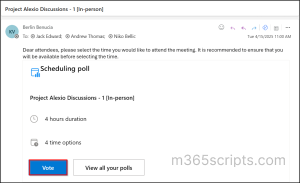
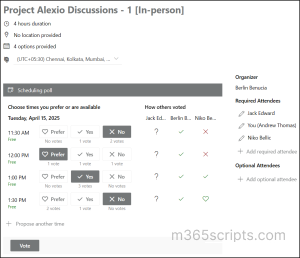
They should click Vote in the email to open the Scheduling Poll dashboard. On the voting page, they’ll see the meeting details, available time slots, and how others have responded. When other attendees have voted, you can see their vote status in the ‘How others voted‘ section.
Each vote is represented by a visual indicator to make it easy to understand availability at a glance:
- Red “X” — The attendee voted NO.
- Grey “?” — The attendee hasn’t responded yet.
- Green checkmark “✅” — The attendee voted YES.
- Green heart “💚”— The attendee prefers that time slot.
Based on their availability, attendees can select the time slots that work for them and click Vote to submit their preferences.
Note: If you didn’t select the checkbox “Lock poll for attendees” when creating the poll, attendees can propose new times, add or remove other attendees, and edit existing attendees.
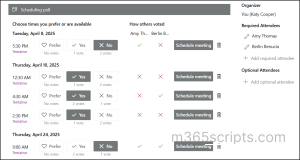
Once attendees begin voting, the organizer receives a confirmation email. In this email, the organizer can click the View poll button to access the Scheduling Poll organizer dashboard.
In the dashboard the organizer can see:
- The number of votes each proposed time slot received
- Which attendees responded with Yes, No, or Prefer
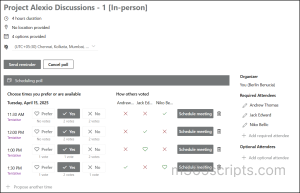
Now, the organizer can schedule the meeting by clicking Schedule meeting next to the time slot with the most Yes, then hit Send to confirm the meeting time and notify all attendees. If needed, the organizer can cancel the poll by selecting Cancel poll on the voting page.
Note: If you enabled “Schedule when attendees reach consensus” during setup, Scheduling Poll will automatically schedule the meeting once all attendees agree on a time. However, the organizer can still choose to manually schedule the meeting at any point before attendees reach consensus.
Scheduling meetings with Outlook’s Scheduling Poll feature can significantly enhance productivity by making it easier to find a time that works for everyone. By following the steps in this guide, organizers can quickly set up meetings and eliminate the usual back-and-forth of scheduling conflicts.
If you have any questions or need further assistance, don’t hesitate to drop a comment below. We’re here to help!


