How to Manage Channel Policies in Microsoft Teams
Create and manage Microsoft Teams channel policies to control private and shared channel creation permissions. Configure messaging policies through Teams admin center or PowerShell to govern who can create private channels, invite external participants, and join shared channels from external organizations.
Microsoft Teams gives users and owners a lot of freedom to create channels. That’s great for collaboration, but without limits, this can become a security risk. Imagine a user creates a private channel and shares sensitive information without any admin oversight. Since private channels are hidden from the rest of the team, this lack of visibility can lead to data leaks, policy violations, or unintentional shadow IT. Without proper controls, these channels can turn into blind spots for IT admins.
That’s why Teams channel policies are essential. They let the admins control who can create private and shared channels and invite external users. With these settings in place, organizations can prevent misuse, protect sensitive information, and maintain strong governance within Teams.
In this blog, we’ll walk you through how to create and manage channel policies in Microsoft Teams. This helps to keep collaboration secure and strengthens your Microsoft Teams security.
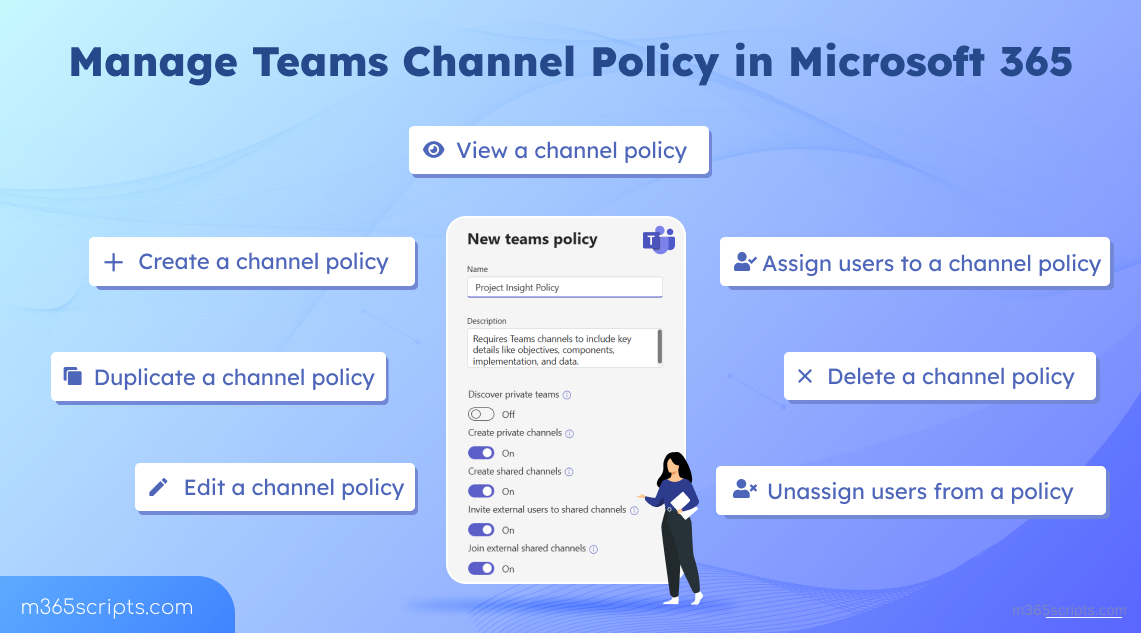
As an admin, you can use Microsoft Teams policies to define what users can and can’t do within Teams and channels. These policies specifically control Microsoft Teams channel permissions and help you manage what users can do inside a team:
- Manage private team discovery – Allow users to search for and discover private teams within your organization.
- Create private channels in Teams – Allow users to set up private spaces for focused discussions.
- Create shared channels in Microsoft Teams – Enable collaboration across teams without switching tenants.
- Collaborate with external participants in shared channels – Let users invite people outside your organization to work securely.
- Join shared channels from external organization – Give users the ability to access shared channels created by trusted external partners.
These permissions are essential for enabling secure and effective collaboration. However, if not properly configured, they can lead to potential security risks. That’s why it’s critical for admins to actively manage Teams channel policies.
You can manage Teams channel policies in two ways:
A) Manage Teams Channel Policy Using Teams Admin Center
B) Control Teams Channel Policy Using PowerShell
You can manage channel policies directly from the Microsoft Teams admin center. Below are the key actions you can take and the steps to perform them in the portal.
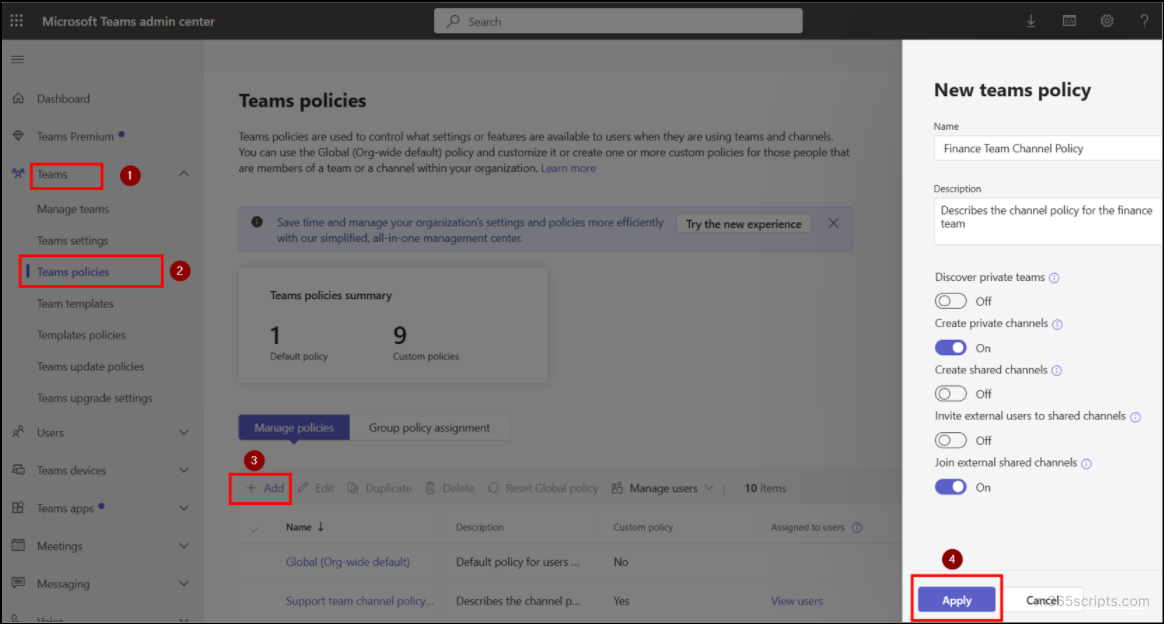
The Global (Org-wide default) policy applies the same settings to all users, which may not be ideal for every role. Giving everyone equal access can create security and compliance risks. To better align with user roles and organizational needs, it’s best to create custom Teams channel policy. Follow the steps below to create a new custom channel policy:
- Sign in to the Microsoft Teams Admin Center.
- Navigate to Teams and select Teams policies.
- Click Add to create a new policy and enter a Name and Description.
- Toggle the channel permissions as required and click Apply to save your policy.
Creating a channel policy is just the first step. Next, you need to assign the right users to the policy to ensure they receive the correct permissions. Follow these steps to assign users to a Teams channel policy:
- Go to the Teams policies in the Microsoft Teams admin center.
- Select the policy you want and click the Manage Users appears at the top.
- From the dropdown, select Assign Users option.
- Add one or more users as needed and click Apply to save the changes.

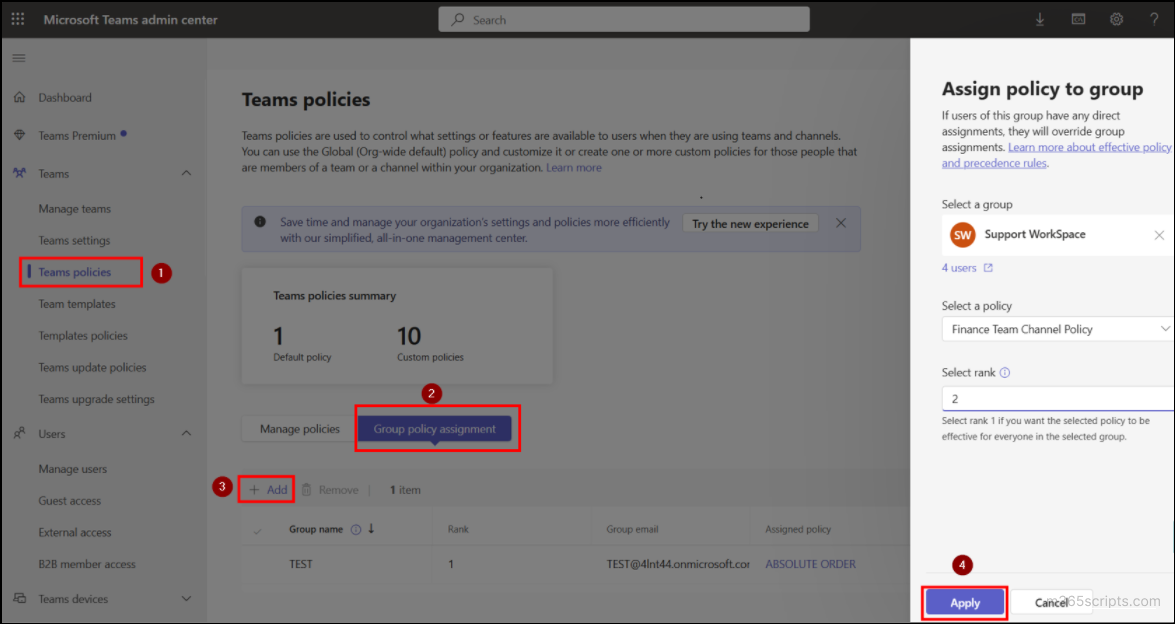
To assign a Teams channel policy to a group, follow these steps:
- Go to Teams policies page and select the Group policy assignment tab.
- Click Add and select a group to which you want to assign the policy.
- Select the desired channel policy and specify its Rank (priority number).
- Click Apply to save the changes.
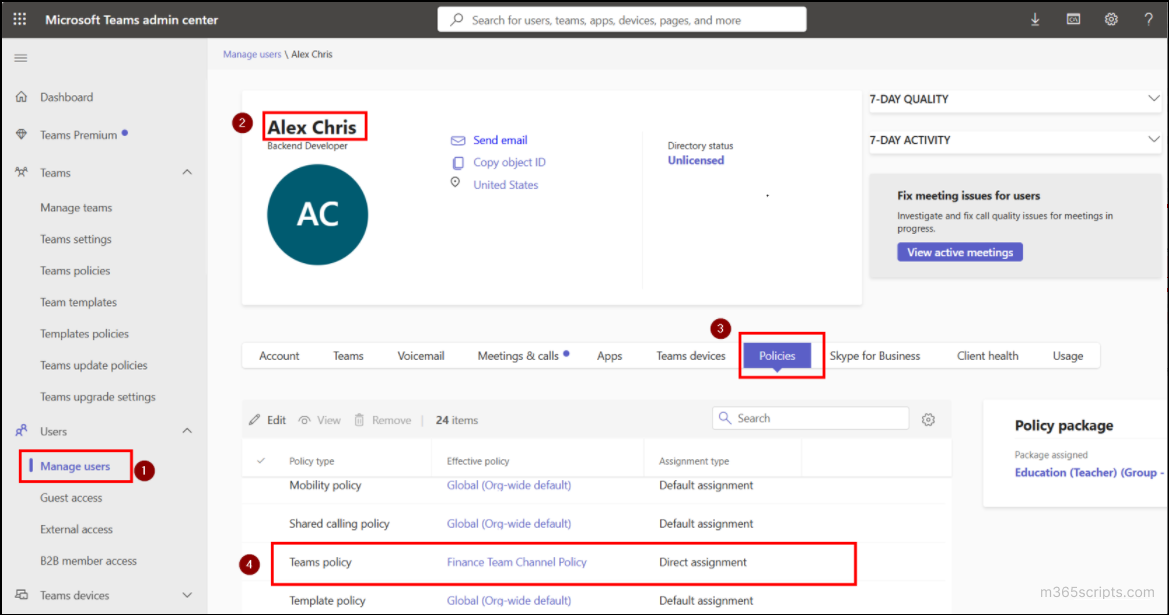
After assigning policies to users or groups, it’s important to verify the assignments. This helps ensure that users have the right set of permissions. In order to view the channel policy assigned to a user, follow the steps below:
- Navigate to the Manage users and select the user whose policy you want to review.
- Then head to Policies tab to check whether the appropriate Teams channel policies are correctly assigned to the user.
If a user has moved to a different department or taken on a new role, their existing channel policy may no longer align with their current collaboration needs. In such cases, it’s advisable to remove the existing policy assignment.
To remove a user from a specific Teams channel policy, follow these steps:
- Sign in to the Manage users in the Microsoft Teams Admin Center.
- Select the desired user and navigate to the Policies tab.
- Locate the policy listed under Assignment type as Direct assignment.
- Click Remove to unassign the channel policy from the user.

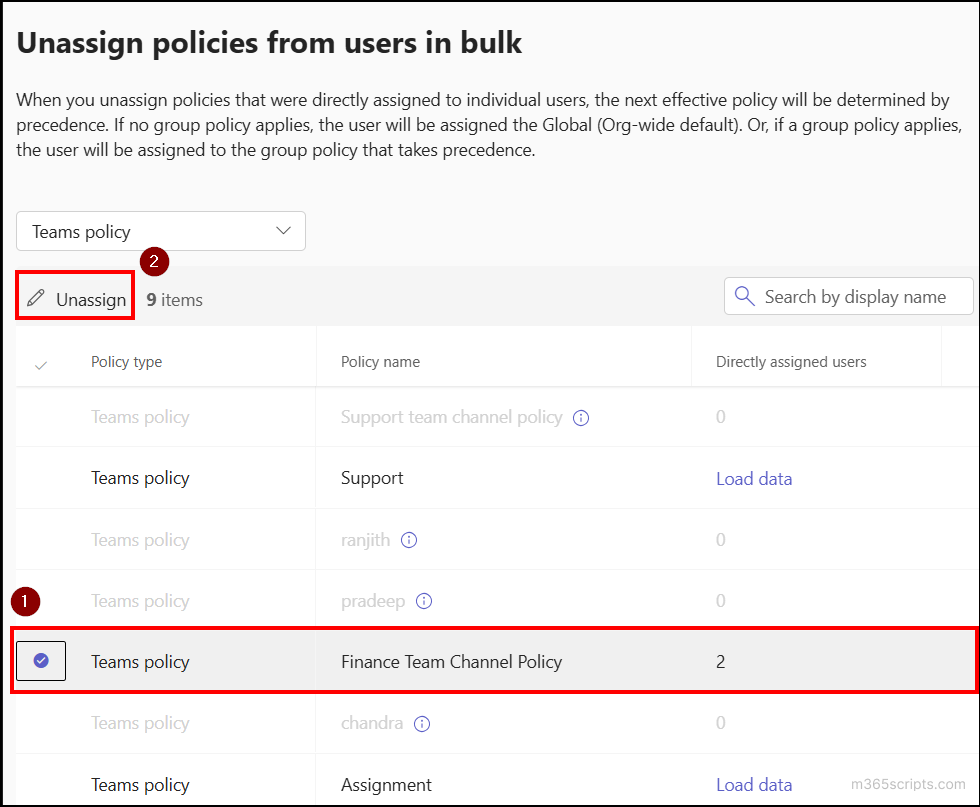
If you need to remove all users from a specific policy, there’s no need to edit each profile individually. Teams Admin Center allows bulk unassignment to save time. Follow these steps to unassign bulk users:
- Navigate to Teams policies and select the policy from which you need to remove the users.
- Click Manage Users. From the dropdown, choose Bulk unassign users.
- Select the policy and click Unassign. All users assigned to that policy will be removed in a single action.
Note: The Global (Org-wide default) policy is system-defined and cannot be removed from any user or group.
If you notice multiple channel policies with similar permissions assigned to the same users, it’s best to consolidate them by keeping one and deleting the redundant ones.
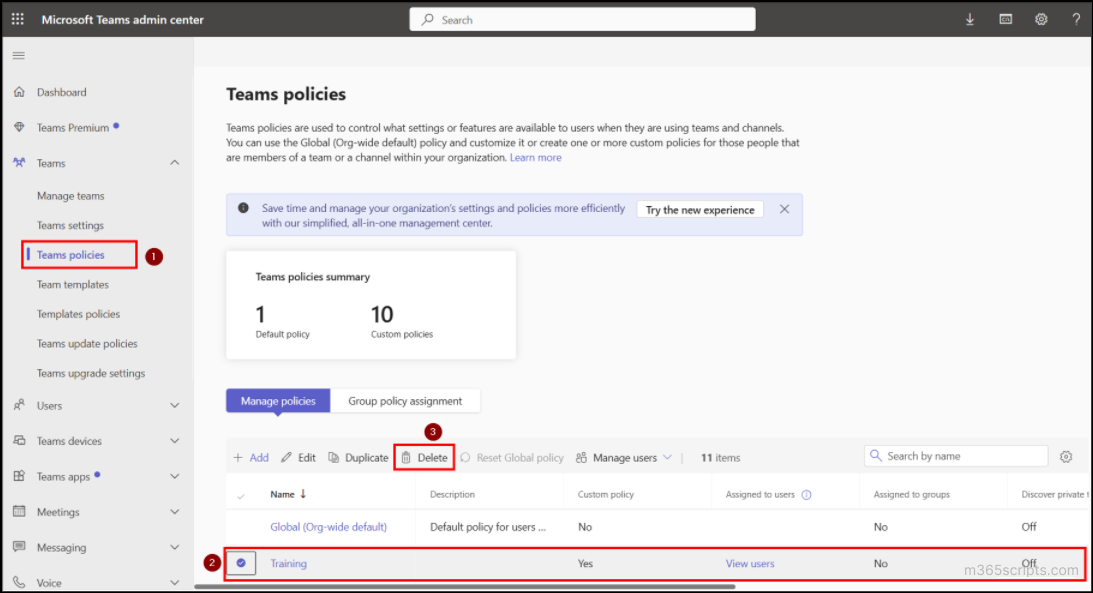
To delete a custom Teams channel policy, follow these steps:
- Go to the Teams policies page in the Microsoft Teams Admin Center.
- Select the custom policy you want to delete.
- Click Delete from the options at the top. Once deleted, the policy is removed, and all associated users and groups are automatically unassigned.
You also have additional options when managing Teams channel policies. For instance, you can Edit an existing channel policy to update permissions as needed or Duplicate a policy instead of creating a new one from scratch with the same settings.
In addition, if the default (Global) policy has been modified, you can restore it to its original configuration using the Reset Global Policy option.
Instead of navigating through multiple tabs in the Teams admin center, you can efficiently manage Teams channel policies using PowerShell.
To get started, connect to the Microsoft Teams PowerShell module, and execute the appropriate cmdlets to streamline management actions across users or groups with minimal effort.
To create a new channel policy and define specific permissions, run the following PowerShell cmdlet.
|
1 |
New-CsTeamsChannelsPolicy -Identity “<PolicyName>” -AllowPrivateChannelCreation $false -AllowSharedChannelCreation $true -AllowUserToParticipateInExternalSharedChannel $true -AllowChannelSharingToExternalUser $false |
Here’s the breakdown of the parameters used:
- Identity – Name of the policy you want to create.
- AllowPrivateChannelCreation – Users can create private channels when set to true.
- AllowShareChannelCreation – Allows owners to create shared channels when set to true.
- AllowUserToParticipateInExternalSharedChannels – Lets users join shared channels hosted by external (other tenant) organizations.
- AllowChannelSharingToExternalUser – When set to true, users can invite external users to shared channels.
You can define these values based on your organization’s needs while executing the command.
For example, if you need to create a policy that restricts private channel creation, run the following cmdlet.
|
1 |
New-CsTeamsChannelsPolicy –Identity “Block Private Channel Creation” -AllowPrivateChannelCreation $false |
This cmdlet restricts users from creating private channels.
To assign a channel policy to an individual user, run the following PowerShell cmdlet.
|
1 |
Grant-CsTeamsChannelsPolicy –Identity “<UserUPN>” -PolicyName “<PolicyName>” |
The parameters can be described as below:
- Identity – Specifies the UPN of the user to whom the policy should be assigned.
- PolicyName – Name of the channel policy the user is being assigned.
In the same way, use this cmdlet to assign a channel policy to groups:
|
1 |
Grant-CsTeamsChannelsPolicy –Group “<EmailID>” -PolicyName “<PolicyName>” |
Here, the -Group parameter is used to specify the email address of the group to which the policy should be applied.
Once these cmdlets are executed, the specified users or groups will have the designated policy assigned.
To check which policies are assigned to a user, run the following PowerShell cmdlet;
|
1 |
Get-CsUserPolicyAssignment -Identity "<UserUPN>" | Where-Object {$_.PolicyType -eq "TeamsChannelsPolicy"} |
Here the -Identity parameter specifies the User Principal Name (UPN) of the user whose assigned Teams channel policy you want to view.

In case you need to assign the policy to multiple users or groups, rather than applying it one by one, PowerShell allows you to bulk-assign using a CSV file.
Create a CSV file with the header User, and list the User Principal Names (UPNs) of users, each on a separate line, as shown below:

Once the file is ready, execute the following cmdlet:
|
1 2 3 4 |
$users = Import-Csv D:\UserChannelAssignment.csv foreach ($user in $users) { Grant-CsTeamsChannelsPolicy -Identity $users.User -PolicyName "Finance Team Channel Policy" } |
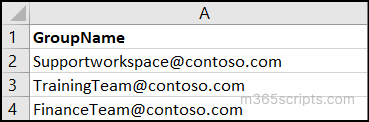
In the same way, list the email IDs of the groups in a CSV file using the header GroupName, with each entry on a separate line as shown below.
Once done, run the following cmdlet.
|
1 2 3 4 |
$groups = Import-Csv D:\GroupPolicyAssignment.csv foreach ($group in $groups) { Grant-CsTeamsChannelsPolicy -Group $group.GroupName -PolicyName "Finance Team Channel Policy" } |
This method helps efficiently assign a channel policy to multiple users and groups in a single execution, saving time and effort.
To remove a specific channel policy from multiple users and revert them to the Global (Org-wide default) policy, use the same CSV containing the User Principal Names (UPNs). Once done, run the following PowerShell cmdlet:
|
1 2 3 4 |
$users = Import-Csv D:\UserBulkUnassign.csv foreach ($user in $users) { Grant-CsTeamsChannelsPolicy -Identity $users.User -PolicyName $null } |
In the same way, to remove multiple groups from a policy, execute the following cmdlet.
|
1 2 3 4 |
$groups = Import-Csv D:\BulkGroupUnassign.csv foreach ($group in $groups) { Grant-CsTeamsChannelsPolicy -Group $group.GroupName -PolicyName $null } |
This cmdlet removes the assigned policy from the group, reverting its users back to the Global policy.
If you need to remove a custom channel policy from a user or group and revert them back to the Global (Org-wide default) policy, you can do so using PowerShell.
To remove a policy from a user, use the following cmdlet:
|
1 |
Grant-CsTeamsChannelsPolicy -Identity "<UserUPN>" -PolicyName $null |
To remove a policy from a group, run the following cmdlet.
|
1 |
Grant-CsTeamsChannelsPolicy –Group “<GroupUPN>” -PolicyName $null |
Setting -PolicyName $null removes all custom assigned policies, and the user or group will fall back to the organization’s default channel policy configuration.
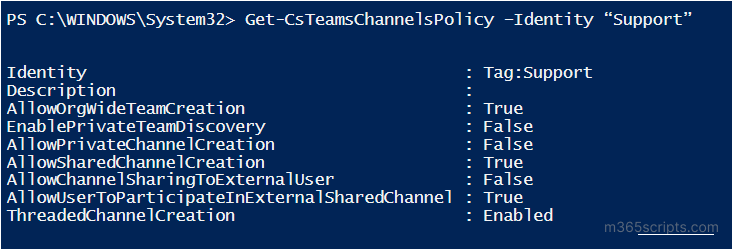
To get all the settings assigned of a channel policy, run the following snippet.
|
1 |
Get-CsTeamsChannelsPolicy –Identity “<PolicyName>” |
Here, the –Identity parameter specifies the name of the channel policy whose policy settings you want to know.
To update the permissions of an existing Teams channel policy, use the following PowerShell cmdlet:
|
1 |
Set-CsTeamsChannelPolicy –Identity "<PolicyName>" -AllowChannelSharingToExternalUser $true |
Here, the parameter Identity denotes the name of the policy and AllowChannelSharingToExternalUser allows team owners under this policy to share shared channels with external users. You can also modify other permissions using additional parameters, such as those controlling private and shared channel creation.
With all the settings we’ve covered, you can manage how people collaborate in Microsoft Teams both inside and outside your organization. These policy actions help you control permissions, prevent unwanted changes, and keep things secure and organized.
While configuring channel policies ensures focused and secure collaboration, it’s equally important to apply all the best practices to manage large teams in Microsoft Teams ensures consistent collaboration, control, and scalability across your organization. We hope this guide helps you manage channel policies in Microsoft Teams smoothly and set up collaboration rules that fit your organization’s needs. If you have any questions, feel free to connect with us through the comments section below.