
Limit Application Permissions to Specific Mailboxes
Restrict Entra application permissions to specific Exchange Online mailboxes instead of granting tenant-wide access. Configure application access policies or RBAC for applications using Exchange Online PowerShell to limit Mail.Read and Mail.ReadWrite permissions. Reduce security risks from compromised applications by enforcing scoped mailbox access.
In many M65 organizations, applications integrate with Microsoft 365 services to access Exchange Online mailboxes and related resources. This integration helps to automate email workflows, mailbox monitoring, reporting, etc. To support these operations, applications rely on permissions, such as read and write permissions. When these permissions are granted without scopes, they can result in unrestricted mailbox access, which poses serious security risks.
So here, let’s explore why restricting application permissions in Exchange Online matters and how to allow apps to access only the required mailboxes.
Normally, assigning application permissions such as Mail.Read or Mail.ReadWrite to an app can give broader access for all mailbox data in Exchange Online. However, a person with app credentials can access multiple mailboxes and their data. So, if an app gets compromised, it can lead to unauthorised access and sensitive data loss. To mitigate these risks, you should limit the application permissions to specific mailboxes. Thus, it reduces unnecessary access and helps maintain better control over organizational data.
You can limit access to specific mailboxes in Exchange Online by using the following methods.
- Set Application Access Policies in Exchange Online
- Configure RBAC for applications in Exchange Online
Both methods enforce scoped access and reduce unintended data exposure. Now, we will see how to configure these settings to limit application permission to specific Exchange Online mailboxes.
Before configuration, make sure you have the following requirements.
- Ensure you have registered the Entra application with application permissions, such as Mail.ReadWrite, Mail.Send and admin consent. Note down the Application ID and Object ID.
- Make sure you have installed and connected to the Exchange Online management PowerShell module to apply the application access policy.
- Ensure you have the Exchange Administrator role to assign the application permissions.
Application Access Policies are the legacy method used to restrict application permissions to specific Exchange Online mailboxes. Though Microsoft plans to replace this approach with RBAC for Exchange Online mailboxes, this method remains widely used and supported.
Follow the below steps for creating an application access policy.
- Execute the below cmdlet to create a mail-enabled security group to include the required mailboxes.
1New-DistributionGroup -Name "<GroupName>" -Alias <AliasName> -Type security - Replace <GroupName> and <AliasName> with the appropriate name.
Output:

- Run the following cmdlet to add individual mailboxes that the application must access.
1Add-DistributionGroupMember -Identity "<GroupName>" -Member "<UserName>"
Replace <GroupName> with the created mail-enabled security group and <UserName> with the specific username accordingly. - To add multiple mailboxes, create a CSV file that contains the user principal names. Then run the following script after replacing <FilePath> with the exact file location and <GroupName> with the created mail-enabled security group name.
|
1 2 3 4 5 |
$groupName = "<GroupName>" $members = Import-Csv -Path "<FilePath>" foreach ($member in $members) { Add-DistributionGroupMember -Identity $groupName -Member $member.UserPrincipalName } |
CSV input: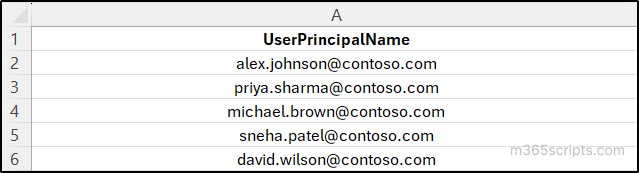
Now, run the following cmdlet after replacing <AppID> with the Application (Client) ID and <GroupName> with the name of the mail-enabled security group created to grant scoped access.
|
1 |
New-ApplicationAccessPolicy -AccessRight RestrictAccess -AppId "<AppID>" -PolicyScopeGroupId <GroupName> -Description "Restrict this app's access to members of security group " |
Run the following cmdlet and confirm that the policy has been created successfully.
Output:

The output above confirms that the application permissions are restricted to specific mailboxes in Exchange Online.
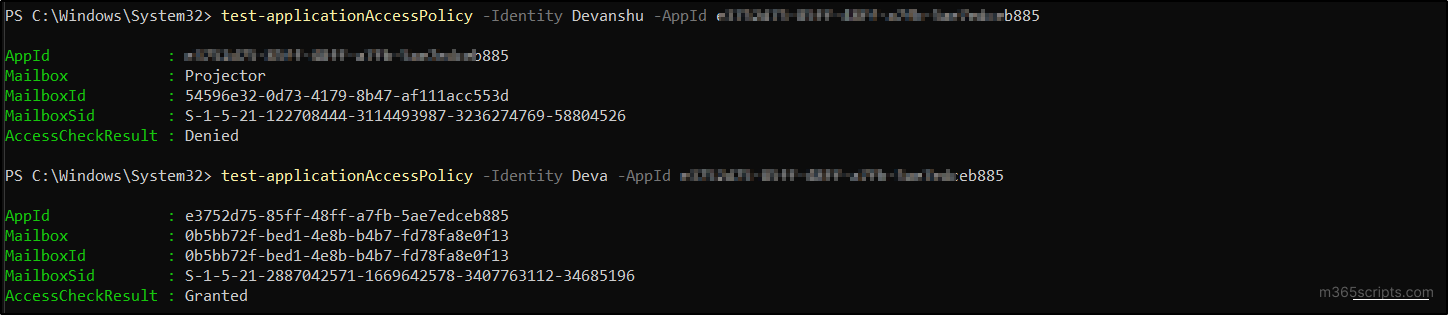
To verify whether the application access policy is applied, run the below cmdlet. The output displays AccessCheckResult as Granted or Denied based on the scoped mailboxes.
|
1 |
Test-ApplicationAccessPolicy -Identity "<UserName>" -AppID <AppID> |
Output:
As Application Access Policies are being retired, RBAC becomes the authoritative method to control application permissions in Exchange Online at the mailbox level. RBAC operates through management role assignments, which define application access using three core elements: what, who, and where.
- Who identifies the application, represented by its service principal.
- Where defines the management scope, which limits the mailboxes the application is permitted to access.
- What specifies the permissions granted, such as the Exchange roles that determine allowed actions.
By correlating these components, RBAC enables granular, mailbox-level enforcement of application access. Let’s walk through how to configure this RBAC control for application in Exchange Online in the following.
Note: Microsoft is deprecating EWS API support from October 1, 2026. To stay supported, move your applications to Microsoft Graph and use RBAC to securely scope mailbox access in Exchange Online.
Requirements to Limit Application Permissions Using RBAC
- Make sure you are assigned with organization management role to create new Application RBAC roles.
- Ensure you have the Exchange Administrator role to assign the application permissions.
First, you need to create a service principal reference for the application in Exchange Online.
- To create a service principal, execute the following cmdlet after replacing the <AppID> with the Application ID and <ObjectID> with the Object ID of the respective Application.
1New-ServicePrincipal -AppId "<AppID>" -ObjectId "<ObjectID>" -DisplayName "RBAC"
Output:

- Make sure that you have chosen the App ID and Object ID from the enterprise application page or use use Get-MgServicePrincipal cmdlet.
To grant scoped access based on department-specific mailboxes, create a management scope using the following cmdlet.
|
1 |
New-ManagementScope -Name "<ScopeName>" -RecipientRestrictionFilter "Department -eq '<DepartmentName>'" |
Output:

To assign a scope for a specific mail-enabled security group, use the cmdlet below after replacing the scope name and group name.
|
1 2 |
$group =(Get-Group -identity "<GroupName>"). DistinguishedName New-ManagementScope -Name "<ScopeName>" -RecipientRestrictionFilter {memberofGroup -eq $group} |
Output:

So, if you need to add scope for a specific mailbox, you can use the “RecipientRestrictionFilter” attribute with the same cmdlet.
Now, create the management role assignment by specifying the Application ID, management role, and management scope.
|
1 |
New-ManagementRoleAssignment –name "<AssignmentName>" -App "<AppID>" -Role "Application Mail.ReadWrite" -CustomResourceScope "<ScopeName>" |
Output:

To verify that the new management policy is configured correctly, you can use the Test-ServicePrincipalAuthorization cmdlet in Exchange Online PowerShell.
|
1 |
Test-ServicePrincipalAuthorization -Identity " <AppID>" -Resource <UPN> |
Output:

Execute the cmdlet after replacing the <AppID> with the respective Application ID and <UPN> with the username to know whether the user is allowed or not based on the inscope status as true or false.
Note: When RBAC permissions are modified, Exchange Online may require up to 2 hours to reflect the changes.
Even though RBAC replaces the application access policy, there are some limitations.
- Role groups allow only users or service principals as members. Because of this, applications cannot be added to role groups to apply management scopes directly.
- Application permissions are assigned to the service principal, not the app itself. This separation makes role visibility and management less straightforward.
- Exclusive scopes restrict only user access. Applications with application permissions can still access mailboxes outside those scopes.
So, make sure to set the correct roles and policies for the apps to limit application permission for specific mailboxes.
We hope this blog really helped you understand how to securely limit application permission to specific mailboxes in Exchange Online. Feel free to share your questions or feedback in the comments below, and stay tuned for more Microsoft 365 management blogs.


