How to Export Emails From Microsoft 365 Outlook as EML Files
Export emails from Microsoft 365 Outlook as EML files for offline storage, legal submissions, or backup purposes. Save individual email messages with complete content, attachments, and metadata. Use EML format for portable single-message exports across email clients.
Whether for business or personal communication, Outlook stands as a foundational element in Microsoft 365 for effective correspondence and collaboration. Users and administrators often export emails to create offline copies and safeguard important messages. In this blog, we will explore the methods to export emails as EML files from Outlook in Microsoft 365.
EML (Electronic Mail) is a standard file extension format supported by various email clients. This file format is widely used to store email messages for its versatility and compatibility. An EML file contains the complete content of an email, including text, attachments, and metadata.
You may wonder why we choose to export emails as EML files when we have the option to export Office 365 mailbox to PST. The preference to export emails from Office 365 to EML lies in the fact that EML is a highly advanced file extension designed to store individual emails. In contrast, the PST format encompasses all Outlook mailbox data, including various item types, folder structure, and settings. This makes EML files more suitable for a focused email export.
Here, we have listed a few major and important reasons why users and admins export emails as EML files:
- Exporting mail as EML files can prevent the loss of data if the email is accidentally deleted.
- As single email message files, EMLs are easily shareable and portable during any submission or investigation. The EML files can be accessed offline, and it also supports multiple desktop-based email clients.
- During the M365 user offboarding, exporting some essential emails from the employee’s mailbox can be helpful for future reference.
- If your organization has applied a retention policy that deletes emails at certain intervals, exporting important emails as EML can be useful for future use.
As a Microsoft 365 user or admin, you can save emails from Outlook in EML format using the following methods. While all three methods help users export their emails, the final method provides admins the capability to export any user emails.
- Save an email as an EML file in Outlook on the web
- Convert a message to an EML file in the Outlook desktop client
- Export emails from Exchange Online using PowerShell
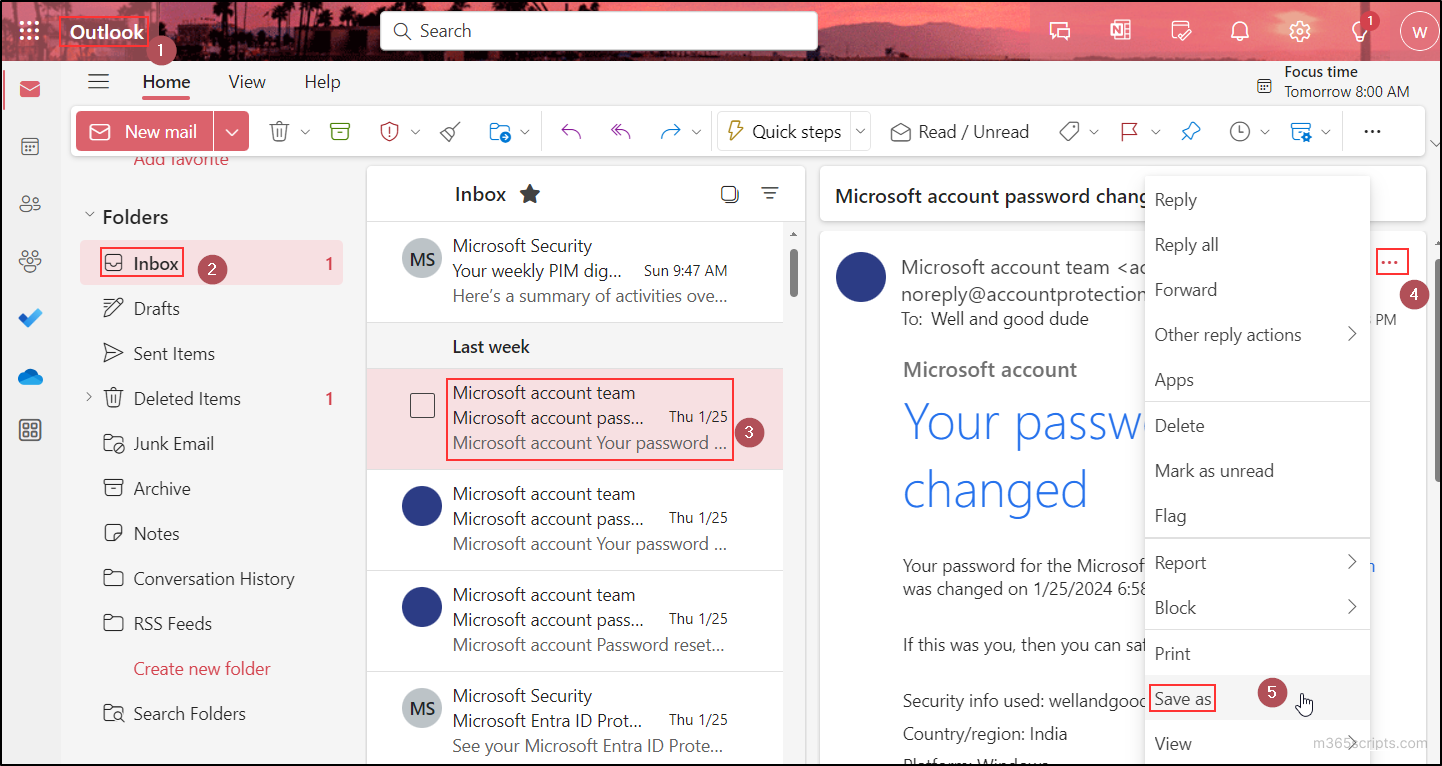
Outlook Web provides a straightforward method for exporting emails to EML. Follow these step-by-step instructions to seamlessly export your emails:
- First, log in to Outlook on the web.
- Once logged in, go to the respective folder of the mail.
- Choose the respective mail you want to export as EML from that specific folder.
- In the mail preview area, select the ellipses (…) and choose the Save as option.
- Finally, the email will be saved as an EML file in the respective download location.
 Note: The procedure for exporting emails from the new Outlook client application is the same as the above approach to export emails from Outlook on the web.
Outlook Clients, the desktop version of Microsoft Outlook, offers a convenient and accessible way to export emails to EML format. Using the older Outlook app on your Windows operating system prohibits the direct export of emails as EML files. However, you have the flexibility to export them in formats such as MSG, TXT, HTML, and more.
The MSG file format is only supported by Microsoft Outlook, whereas the EML format is supported by multiple email clients such as Outlook Express, Thunderbird, Windows Live Mail. etc. If you initially save your email as an MSG file, you can later convert it to EML format using online converters or third-party tools.
Now, we are going to focus on the process of exporting emails as TXT and subsequently converting them to EML files. This approach eliminates the need for third-party tools or online converters. Here’s a general guide:
- Launch the old Outlook application on your computer.
- Navigate to the folder containing the emails you want to export and select the email.
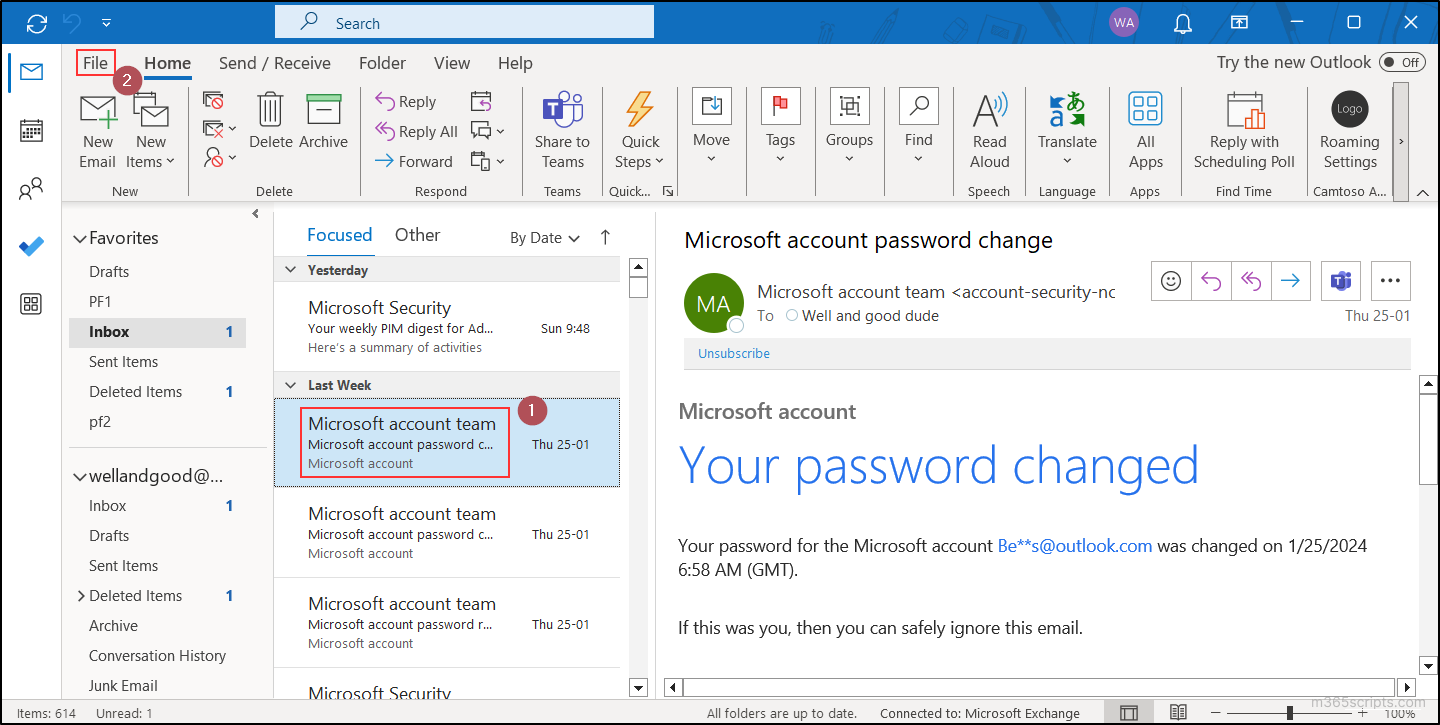
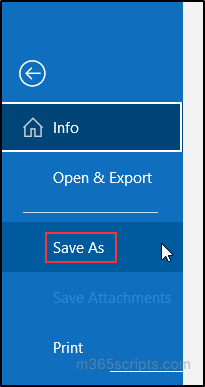
- In the top menu, go to File and select Save As.
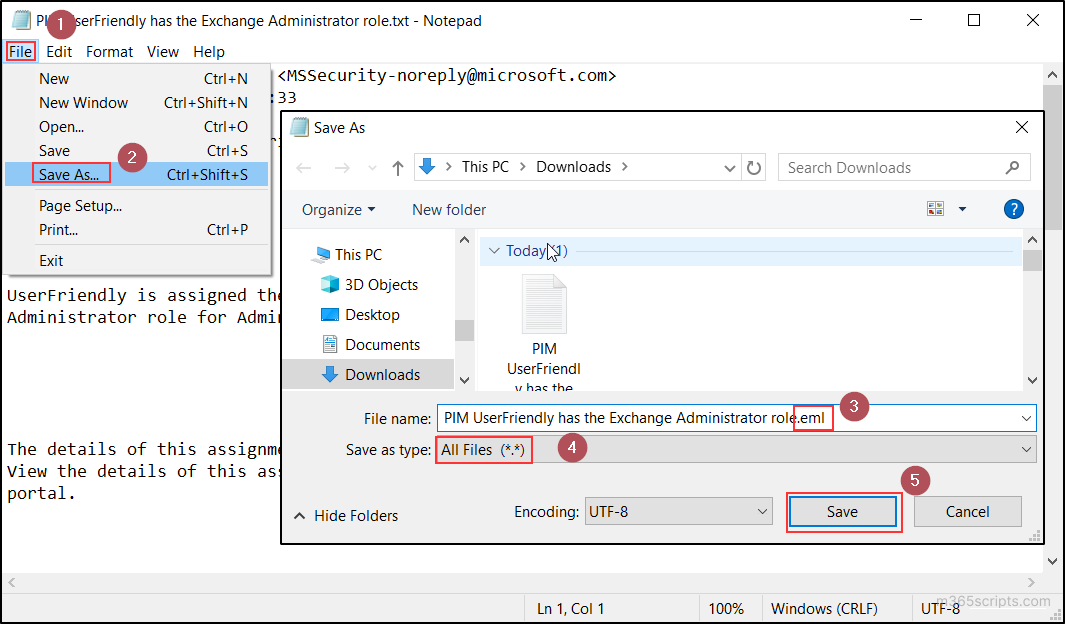
- In the Save As dialog box, select a location to save the files and choose Text Only (*.txt) from the Save as type drop-down menu.
- Click on the Save button to save the selected emails to the chosen location.
- After that, open the saved text file and save it in the EML file format.
Unlike the UI approach, PowerShell helps you to export multiple emails or entirely export the Exchange Online mailbox at a single execution. Before getting started to export emails from Outlook in Microsoft 365 using PowerShell, connect to the Microsoft Graph PowerShell using the scope “Mail.Read”.
|
1 |
Connect-MgGraph -Scopes Mail.Read |
Note: To export emails from other M365 user accounts as EML files with admin consent, connect to Graph PowerShell using certificate-based credentials through an Azure AD app with “Mail.Read” permission.
The process of exporting mail as EML files consists of two steps:
The first step for exporting emails from Outlook is selecting the required emails and assigning the selection to a variable. Here are various options for selecting email messages in Outlook based on specific needs. Select the emails with the “Get-MgUserMessage” cmdlet using any one of the following appropriate methods.
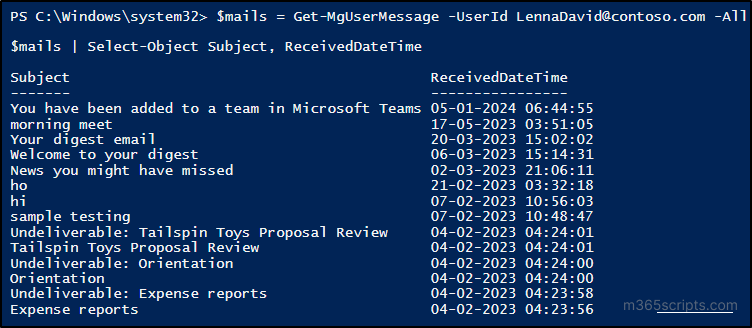
1. Select entire mailbox: To select the entire emails from a particular Exchange Online mailbox and store them in a variable, execute the following code snippet with the user’s UPN.
|
1 2 |
$mails = Get-MgUserMessage -UserId <User’sUPN> -All $mails | Select-Object Subject, ReceivedDateTime |
2. Select emails between the specific dates: For selecting the emails between the specific dates, execute the following code. Replace the starting date, ending date, and user’s UPN in the cmdlet.
|
1 2 |
$mails = Get-MgUserMessage -UserId <User’s UPN> -All -Filter "ReceivedDateTime ge <YYYY-MM-DD> AND ReceivedDateTime le <YYYY-MM-DD>" $mails | Select-Object Subject, ReceivedDateTime |
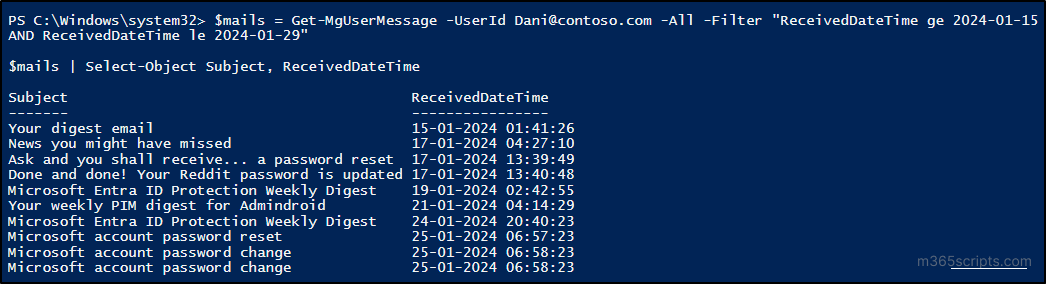
Note: To get only the emails received on a particular day, use the same date in two conditions.
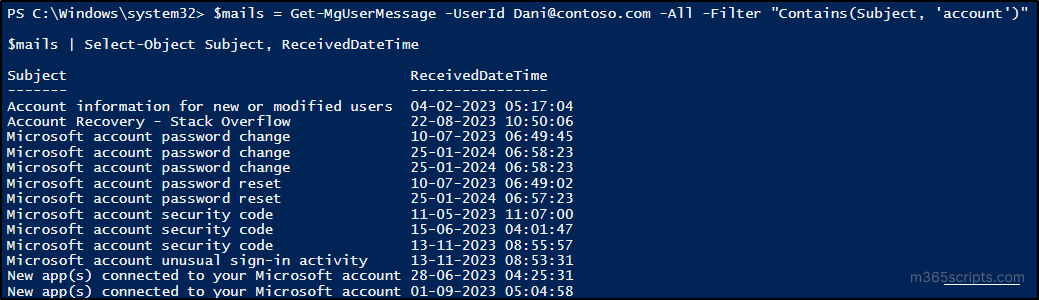
3. Select emails based on subject: To select and export only the emails based on words or phrases present in the subject line, utilize the following code. Replace the user’s UPN and subject line keyword in the cmdlet.
|
1 2 |
$mails = Get-MgUserMessage -UserId <User’sUPN> -All -Filter "Contains(Subject, '<Word(s) in Subject Line>')" $mails | Select-Object Subject, ReceivedDateTime |
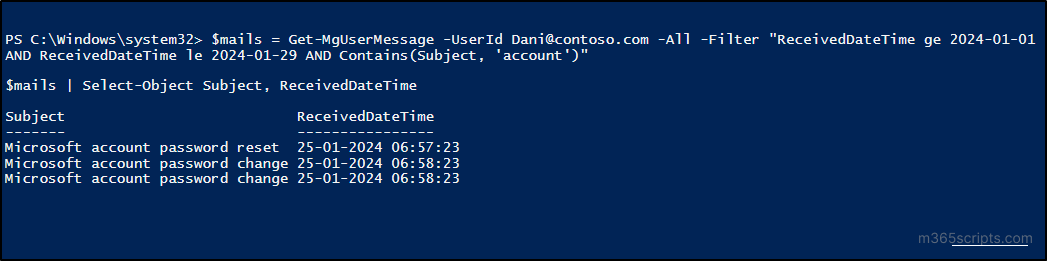
4. Select emails based on subject between specified dates: To select mails between the specific dates based on words present in the subject line, utilize the following code. Replace the user’s UPN, starting, ending date, and subject line keyword in the cmdlet.
|
1 2 |
$mails = Get-MgUserMessage -UserId <User’s UPN> -All -Filter "ReceivedDateTime ge <YYYY-MM-DD> AND ReceivedDateTime le <YYYY-MM-DD> AND Contains(Subject, '<Word(s) in Subject Line>')" $mails | Select-Object Subject, ReceivedDateTime |
After selecting the required emails and storing them in a variable, you can export those selected emails using the “Get-MgUserMessageContent” cmdlet. Replace the folder path with the path of the folder where the exported emails need to be saved and the user’s UPN with the UPN of the appropriate in the following PowerShell script.
|
1 2 3 4 5 6 7 8 9 10 |
ForEach ($mail in $mails) { $filename = "$($mail.subject) $($mail.ReceivedDateTime).eml".Split([IO.Path]::GetInvalidFileNameChars()) -join '-' $filepath = "<Folder Path>" + $filename Try { Get-MgUserMessageContent -UserId <User’s UPN>-MessageId $mail.id -OutFile $filepath -ErrorAction Stop } Catch { Write-Host "Mail export failed:" $mail.Subject } } |
Note: To export emails from on-premises Exchange, utilize the “Export-Message” cmdlet in Exchange Online PowerShell.
Overall, we hope that this comprehensive resource helps you to export emails as EML from Outlook. If you have any further questions, feel free to connect with us. Thank you for reading!