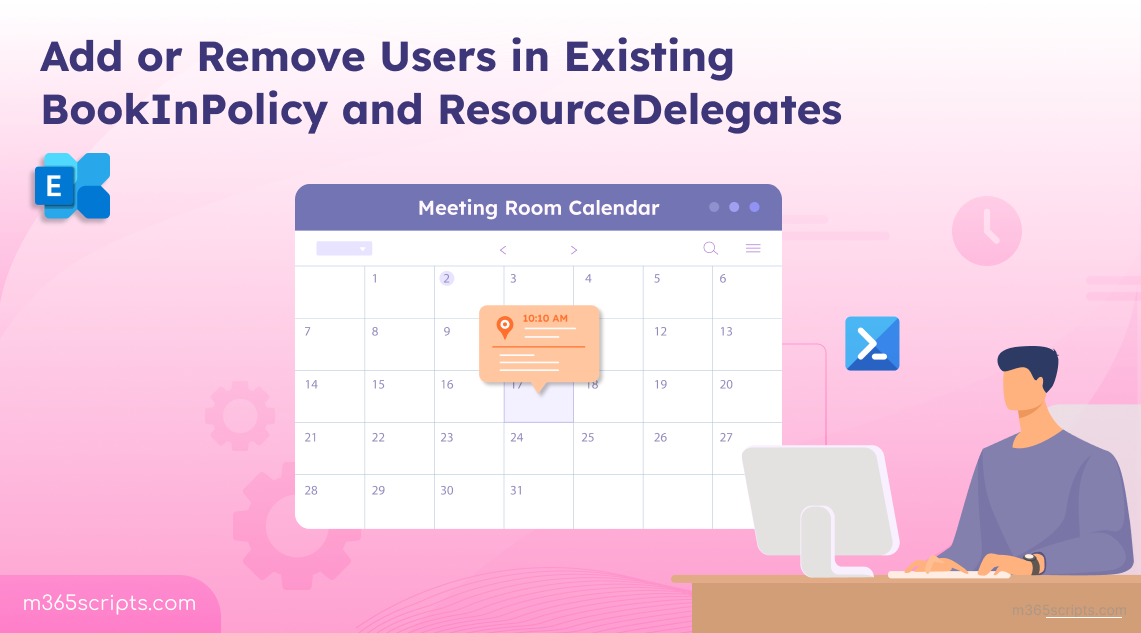
How to Add/Remove Users in Existing BookInPolicy and ResourceDelegates
Manage Exchange Online room mailbox BookInPolicy and ResourceDelegates using PowerShell without overwriting existing settings. Add or remove users from booking policies by retrieving current lists first, then appending new entries. Perform bulk operations using CSV files for efficient conference room access management.
Managing meeting rooms efficiently in Exchange Online is crucial to prevent booking conflicts and ensure smooth scheduling. A common challenge administrators face is adding users to an existing BookInPolicy. Attempting to add new users directly often triggers “overwritten” errors because the -BookInPolicy parameter replaces the existing list instead of appending to it. To avoid these issues, administrators need to understand how to safely manage existing BookInPolicy and ResourceDelegates using PowerShell!
In organizations, meeting rooms are managed using room mailboxes in Exchange Online. These are resource mailboxes designed specifically for scheduling and managing resources such as conference rooms, projectors, or shared equipment.
To control who can book these rooms and who can manage booking requests, Exchange provides two powerful properties:
- BookInPolicy – Determines which users are allowed to book a room.
- ResourceDelegates – Determines who can approve or decline meeting requests on behalf of the room.
To manage these settings effectively, the Set-CalendarProcessing cmdlet becomes essential. By exporting all room mailbox booking options in Microsoft 365, you can review how each room is configured. This makes it easy to adjust BookInPolicy and ResourceDelegates, ensuring rooms are booked efficiently and securely.
Firstly, connect to the Exchange Online PowerShell module before proceeding further with calendar BookInPolicy settings.
- Add a user to existing BookInPolicy
- Bulk add users to Existing BookInPolicy
- Remove a user from Existing BookInPolicy
- Bulk remove users from Existing BookInPolicy
When an employee’s role changes and they now require access to a restricted room, you need to add them to the policy.
To add a new user to the existing BookInPolicy, execute the following. The following script safely updates a user by first checking the existing list to avoid duplicates.
|
1 2 3 4 5 6 7 8 9 10 |
function Add-CalendarBookInPolicy { Param( $roomName, $newUser ) $bookInPolicy = (Get-CalendarProcessing -Identity $roomName).BookInPolicy $bookInPolicy += $newUser Set-CalendarProcessing -Identity $roomName -BookInPolicy $bookInPolicy } Add-CalendarBookInPolicy -roomName "<ConferenceRoom>" -newUser "[email protected]" |
The new user “Harvey” can now directly book the room. Replace –roomName and –newUser parameters with the room mailbox name and email of the person you want to grant access to.
Note: This script is specifically designed to enable the room mailbox bookings only for users within your Microsoft 365 tenant. It cannot be used to grant permission for external users, even if the room mailbox is configured to allow external users to book meeting rooms.
In organizations with many employees or teams, manually adding users to a room’s BookInPolicy is inefficient. Bulk operations allow admins to update multiple users in a single step using a CSV file.
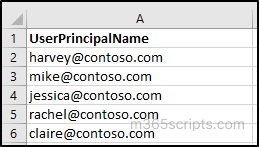
Before running the script, prepare a CSV file with a column named UserPrincipalName containing the email addresses of users to be added.
|
1 2 3 4 5 6 7 8 9 10 11 |
#Import the CSV file containing users to add $usersToAdd = Import-Csv -Path "<FilePath>.csv" #Specify the room name $roomName = "<RoomName>" #Get current BookInPolicy list $bookInPolicy = (Get-CalendarProcessing -Identity $roomName).BookInPolicy #Loop through each user and add them if not already present foreach ($user in $usersToAdd) { if ($bookInPolicy -notcontains $user.UserPrincipalName) { $bookInPolicy += $user.UserPrincipalName } } #Update the room's BookInPolicy with the new list Set-CalendarProcessing -Identity $roomName -BookInPolicy $bookInPolicy Write-Host "Bulk addition completed for $($usersToAdd.Count) users to $roomName." |
Replace <FilePath>.csv with your CSV file location and <RoomName> with the room you’re managing. This script goes through each email and adds it to the existing BookInPolicy list (without duplicates). This approach simplifies large-scale updates, saving administrators time and effort while maintaining accuracy in access permissions.
Input CSV file format:

Tip: If you prefer tighter control, limit booking access only to selected users. Others will be denied direct access and must rely on a delegate’s approval.
Sometimes, you may need to remove an individual user from a room’s existing BookInPolicy. This can happen if an employee leaves a project or department but remains in the organization. To block Exchange room bookings for a user, you can remove them from BookInPolicy by running the below script.
|
1 2 3 4 5 6 7 8 9 10 11 12 |
function Remove-CalendarBookInPolicy { Param( [Parameter(Mandatory=$true)] $roomName, [Parameter(Mandatory=$true)] $userToRemove ) $bookInPolicy = (Get-CalendarProcessing -Identity $roomName).BookInPolicy $updatedBookInPolicy = $bookInPolicy | Where-Object { $_ -ne $userToRemove } Set-CalendarProcessing -Identity $roomName -BookInPolicy $updatedBookInPolicy } Remove-CalendarBookInPolicy -roomName "<ConferenceRoom>" -userToRemove [email protected] |
Replace <ConferenceRoom> with the room mailbox name and “[email protected]” with the email of the user to remove.
This script retrieves the current BookInPolicy list, removes the specified user, and updates the room mailbox to enforce the change.
In other scenarios, multiple users may need to be removed at once, such as when several employees leave the company or department simultaneously, or when roles change across a team, requiring updates to room access. Instead of removing users one by one, bulk removal allows administrators to process an entire list at once.
Ensure you have a CSV file ready with a UserPrincipalName column containing the email addresses of users to be removed before running the script.
|
1 2 3 4 5 6 7 8 9 10 11 |
#Import the CSV file $usersToRemove = Import-Csv -Path "<FilePath>.csv" #Room name $roomName = "<RoomName>" #Get current BookInPolicy list $bookInPolicy = (Get-CalendarProcessing -Identity $roomName).BookInPolicy #Loop through each user and remove them foreach ($user in $usersToRemove) { $bookInPolicy = $bookInPolicy | Where-Object { $_ -ne $user.UserPrincipalName } } #Update the room's BookInPolicy Set-CalendarProcessing -Identity $roomName -BookInPolicy $bookInPolicy Write-Host "Bulk removal completed for $($usersToRemove.Count) users from $roomName." |
Update <FilePath>.csv to your CSV path and <RoomName> to the target room mailbox.
Input CSV format:
Using this method, administrators can efficiently revoke access for multiple users in one go, ensuring policies remain up to date with minimal manual work.
Resource delegates are users who can manage a room’s meeting requests, such as accepting or declining bookings. Let’s see how to update users to the existing ResourceDelegates list in meeting rooms.
- Add a user to existing ResourceDelegates list
- Bulk Add Users to Existing ResourceDelegates list
- Remove a User from Existing ResourceDelegates list
- Bulk Remove Users from Existing ResourceDelegates list
Adding a resource delegate allows them to manage meeting requests on behalf of a room. This means they can accept or decline meeting invitations, helping ensure that high-demand rooms are scheduled efficiently without conflicts. The following PowerShell script adds a new delegate to an existing delegate list.
|
1 2 3 4 5 6 7 8 9 10 11 12 |
function Add-CalendarResourceDelegate { Param( [Parameter(Mandatory=$true)] $Identity, [Parameter(Mandatory=$true)] $newDelegate ) $resourceDelegates = (Get-CalendarProcessing -Identity $Identity).ResourceDelegates $resourceDelegates += $newDelegate Set-CalendarProcessing -Identity $Identity -ResourceDelegates $resourceDelegates } Add-CalendarResourceDelegate -Identity “<ConferenceRoom>" -newDelegate [email protected] |
Replace -Identity with the room name, and –newDelegate parameters with the new delegate’s email.
The script first retrieves the current list of resource delegates for the room, then adds the new delegate to this list, and finally updates the room mailbox with the revised list. This method ensures that specific users gain the authority to handle meeting requests, keeping scheduling efficient and conflict-free.
When a high-traffic meeting room needs additional managers to handle requests, you can expand the existing delegate list by adding multiple users at once.
Before running the script, prepare a CSV file with a column named UserPrincipalName listing the delegates to add.
|
1 2 3 4 5 6 7 8 9 10 11 |
#Import the CSV file $delegatesToAdd = Import-Csv -Path "<FilePath>.csv" #Room mailbox $roomName = "<RoomName>" #Get current ResourceDelegates $resourceDelegates = (Get-CalendarProcessing -Identity $roomName).ResourceDelegates #Loop through each user and add if not already present foreach ($delegate in $delegatesToAdd) { if ($resourceDelegates -notcontains $delegate.UserPrincipalName) { $resourceDelegates += $delegate.UserPrincipalName } } #Update the room's ResourceDelegates Set-CalendarProcessing -Identity $roomName -ResourceDelegates $resourceDelegates Write-Host "Bulk addition completed for $($delegatesToAdd.Count) delegates to $roomName." |
Input CSV file format:
Bulk addition saves time for admins and guarantees that multiple delegates can be assigned at once, improving responsiveness for busy rooms.
Removing a resource delegate revokes their ability to manage meeting requests for a room, and it is an important step to maintain proper control over room scheduling. One common scenario is when an employee changes roles or moves to a different department and no longer requires access to manage a particular room’s calendar. The following PowerShell script can be used to remove a single delegate from existing ResourceDelegates.
|
1 2 3 4 5 6 7 8 9 10 11 |
function Remove-CalendarResourceDelegate { Param( $roomName , $delegateToRemove ) $resourceDelegates = (Get-CalendarProcessing -Identity $roomName).ResourceDelegates $delegateToRemoveIdentity = (Get-Mailbox $delegateToRemove).Identity $resourceDelegates.Remove($delegateToRemoveIdentity) Set-CalendarProcessing -Identity $roomName -ResourceDelegates $resourceDelegates } Remove-CalendarResourceDelegate -roomName “<ConferenceRoom>” -delegateToRemove [email protected] |
Enter the actual room name in place of <ConferenceRoom> and the delegate email you wish to remove instead of “[email protected]”.
By removing outdated delegates, you maintain proper control over room scheduling and ensure only the right people have management privileges.
In larger organizations or during major organizational changes, bulk removal of existing delegates is often required. One common scenario is mass Microsoft 365 offboarding, where several employees leave the organization simultaneously, and their delegate permissions must be revoked to maintain security and compliance.
Using a CSV file containing the delegates to be removed, the following script can handle bulk removal efficiently.
|
1 2 3 4 5 6 7 8 9 10 11 12 13 |
#Import the CSV file $delegatesToRemove = Import-Csv -Path "<FilePath>.csv" # Room mailbox $roomName = "<RoomName>" # Get current ResourceDelegates $resourceDelegates = (Get-CalendarProcessing -Identity $roomName).ResourceDelegates # Loop through each user and remove them if present foreach ($delegate in $delegatesToRemove) { $resourceDelegates = $resourceDelegates | Where-Object { $_ -ne $delegate.UserPrincipalName } } # Update the room's ResourceDelegates Set-CalendarProcessing -Identity $roomName -ResourceDelegates $resourceDelegates Write-Host "Bulk removal completed for $($delegatesToRemove.Count) delegates from $roomName." |
Replace <FilePath>.csv with the CSV containing delegates to remove and <RoomName> with the room mailbox.
Input CSV file format:
Bulk removal provides a quick way to revoke permissions for multiple users, keeping delegate lists current and aligned with organizational changes.
I hope this helped you learn how to add or remove users to the existing BookInPolicy and ResourceDelegates. Feel free to reach us through the comment section if you have any queries.