Automate Microsoft 365 User Onboarding Using Power Automate
Automate Microsoft 365 user onboarding using Power Automate flows with approval workflows and notifications. Create Azure AD users, assign managers, and send automated emails through SharePoint list triggers. Streamline employee provisioning with Azure AD, Outlook, and SharePoint connectors for efficient HR processes.
Are you tired of manually performing your Office 365 user provisioning tasks? It can be a time-consuming and error-prone task, especially for large organizations. Don’t worry! There’s an effortless solution that can automate admin tasks and streamline any of your Microsoft 365 business processes with ease. Yeah, as you may know, it’s Microsoft Power Automate. One of its key usages is creating flows that can automate the entire Microsoft 365 user onboarding process in your organization, ensuring proper approvals and timely notifications.
In this blog, we will see how Power Automate can help automate the Azure AD user onboarding process with its powerful connectors and actions. By using this, we can quickly create new users, and assign managers to them, all while saving time and sending automated approvals and notification emails.
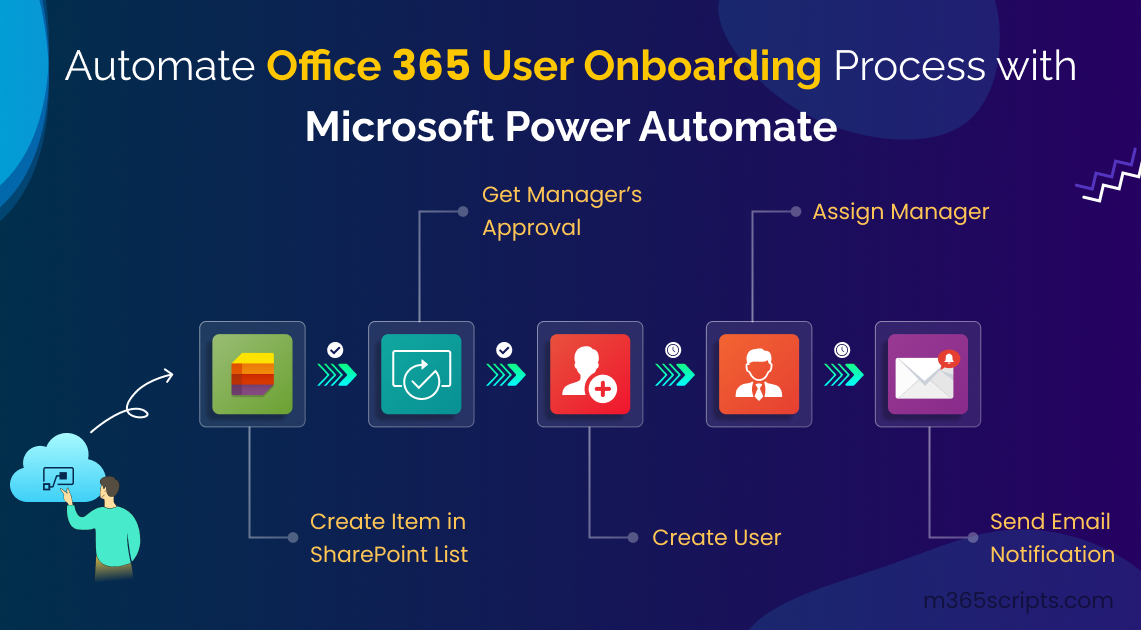
The below picture represents the overall flow of the Power Automate employee onboarding process and the steps involved in the blog are as follows:
- Adding user details to a SharePoint list.
- Creating the flow and setting user’s password.
- Requesting approval from the manager for creating a user.
- Creating the user in Azure AD.
- Assigning manager for the new user.
- Sending final email notification.
- An Office 365 account with User administrator permission (to authorize and use ‘Create User’ action from the Azure AD connections, which can be performed only with either Global admin or User admin permission).
- A Power Automate license to create a flow
Connections enable flow creators to connect and facilitate seamless integration between platforms like Azure AD, SharePoint, Outlook, and more. By signing in with Office 365 credentials, users gain access to specific actions and triggers of each connection.
In this blog, we have used the following connections.
- Approvals
- Azure AD
- Office 365 Outlook
- Office 365 Users
- SharePoint
Now, let’s get into the step-by-step guide to automate the process of creating a new Azure AD user with manager’s approval using Microsoft Power Automate.
Let’s create a dedicated SharePoint site specifically designed for managing the user onboarding details. You can also go with any existing sites.
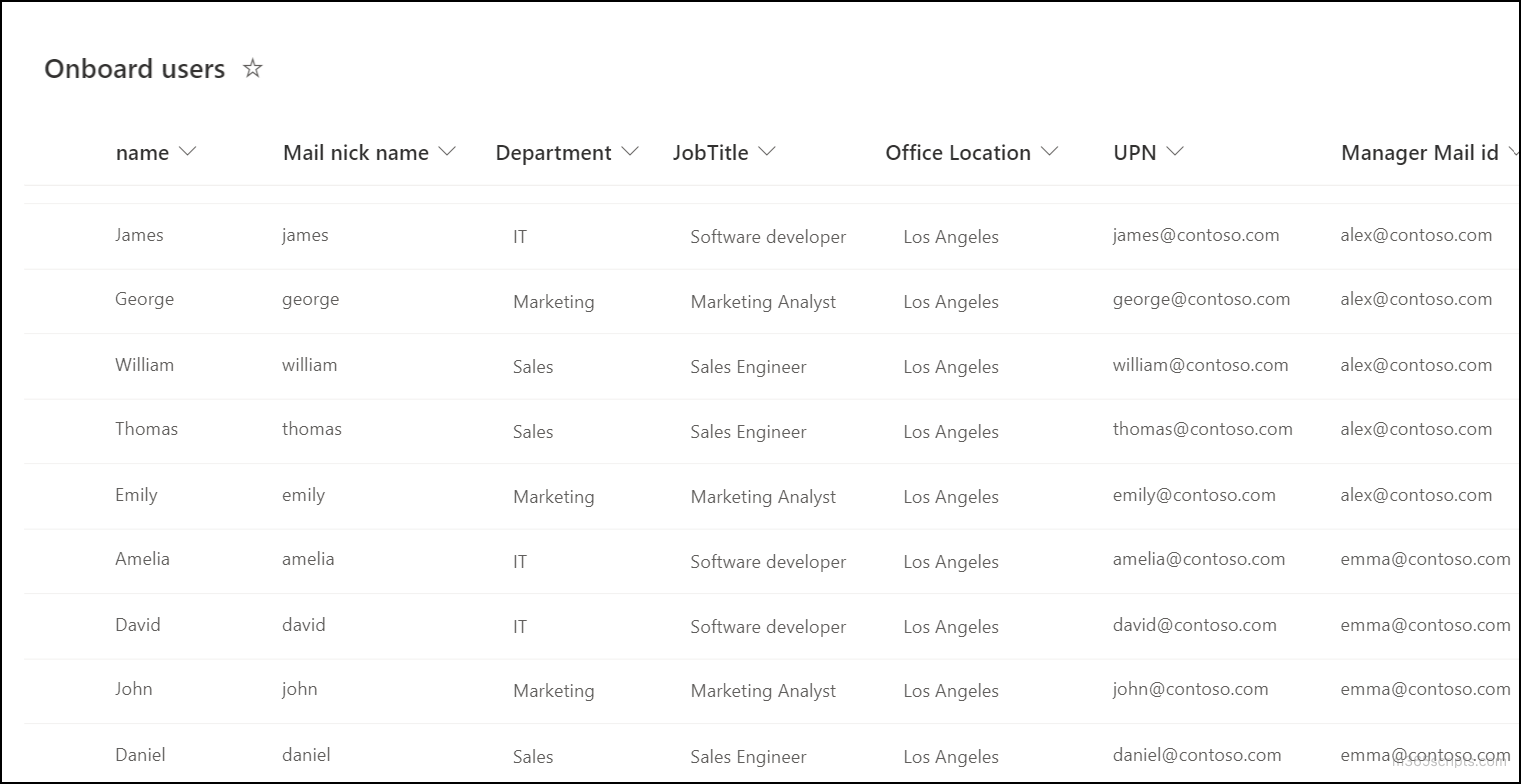
- Within the site, we shall create a SharePoint list with necessary columns required for creating a new user. Here we have added the columns such as display name, mail nickname, department, job title, office location, UPN, and manager’s mail Id.
- In this list, the user creators such as HR personnel, can enter user information in the columns for creating a new user in Office 365.
- Whenever a new item is added to the list, our flow will start to run automatically, and it carries out the designated actions for onboarding new employees.
After the required SharePoint list has been created, let’s proceed to build the flow.
- Sign in to your Power Automate portal, and choose the ‘Automated cloud flow’ type from the ‘Create’ tab in the left pane.
- Once created, add the trigger “When an item is created” as the first step.
Note: If you’re prompted for sign-in, you can sign-in with your credentials to establish connection to SharePoint and use the triggers and actions within it. Likewise, in the upcoming steps, you’ll be prompted to sign-in each time you use a trigger/action from a new service (like Azure AD, Approvals…). You shall sign-in to establish the connection
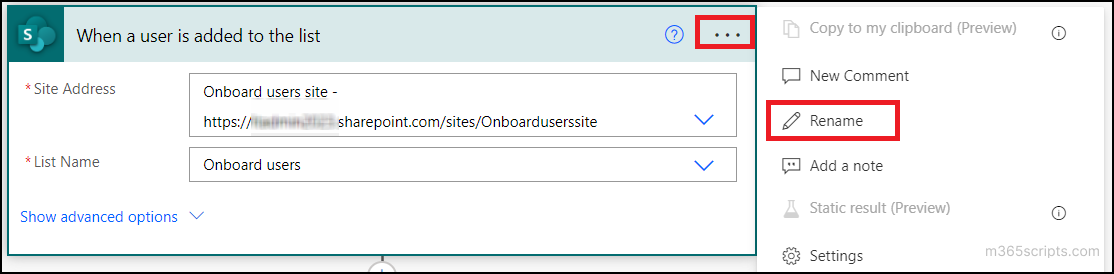
- Now, choose the onboarding site’s address and the list by clicking the dropdown icons.
- You can also click the three dots on the upper right corner in the trigger to rename it as per your requirement. Here, we have renamed it as ‘ When a user is added to the list’ as per our context.
- Next, for the new user, we need to set a password. So, let’s add the “Initialize variable” action (here, renamed as ‘Set password for the user’) to randomly generate a password.
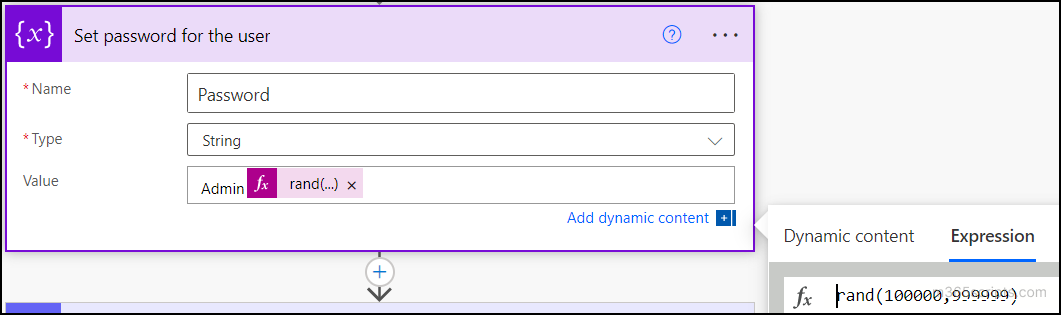
- For the password input, we will consider it as a string-type variable. For the value field, let’s use the expression “rand (100000,999999)” to set random values between the given number to the variable, using the ‘Add dynamic content’ option.
To increase the password’s strength, we can incorporate a combination of upper- and lower-case letters with the expression.
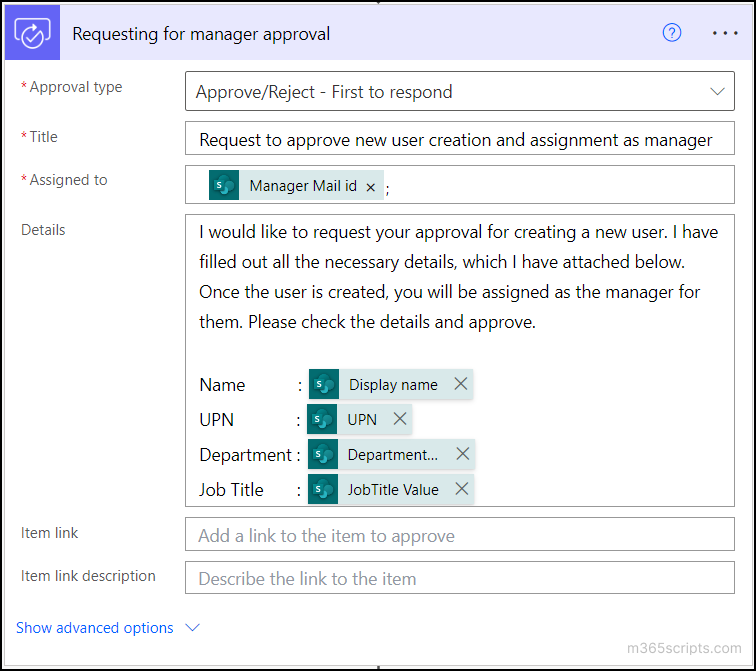
The next step is to send an approval request to the manager for creating a new user. So that the manager can review the user details and decide whether to approve or reject the request.
- For that, we’ll add the action “Start and wait for an approval” to the flow. In this step, fill in the required fields as per your requirements as shown in the below image.
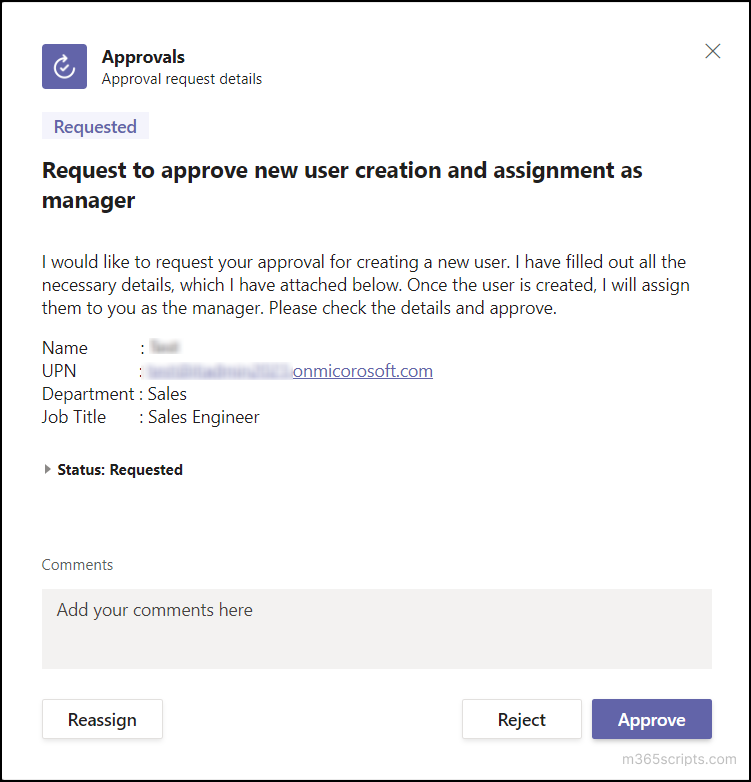
- Once the approval request is sent, the manager will receive the approval notification as shown in the image below.
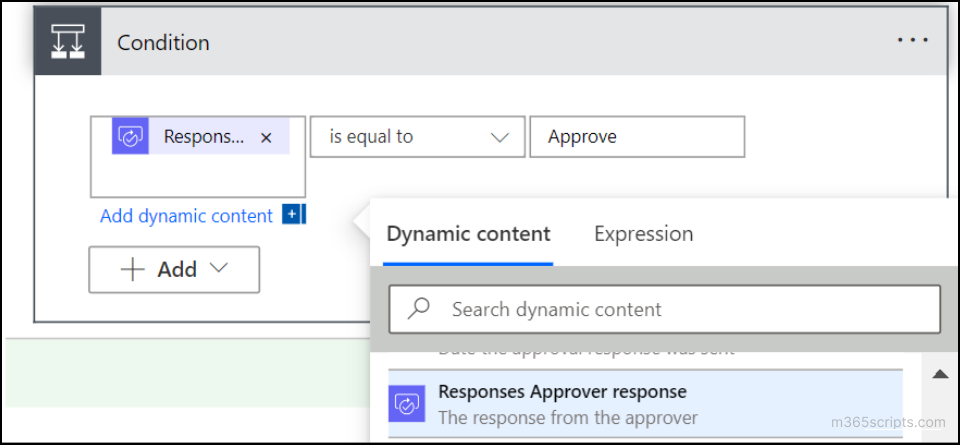
- If there is an approval step, we will be having the outcome as Approve/ Reject.
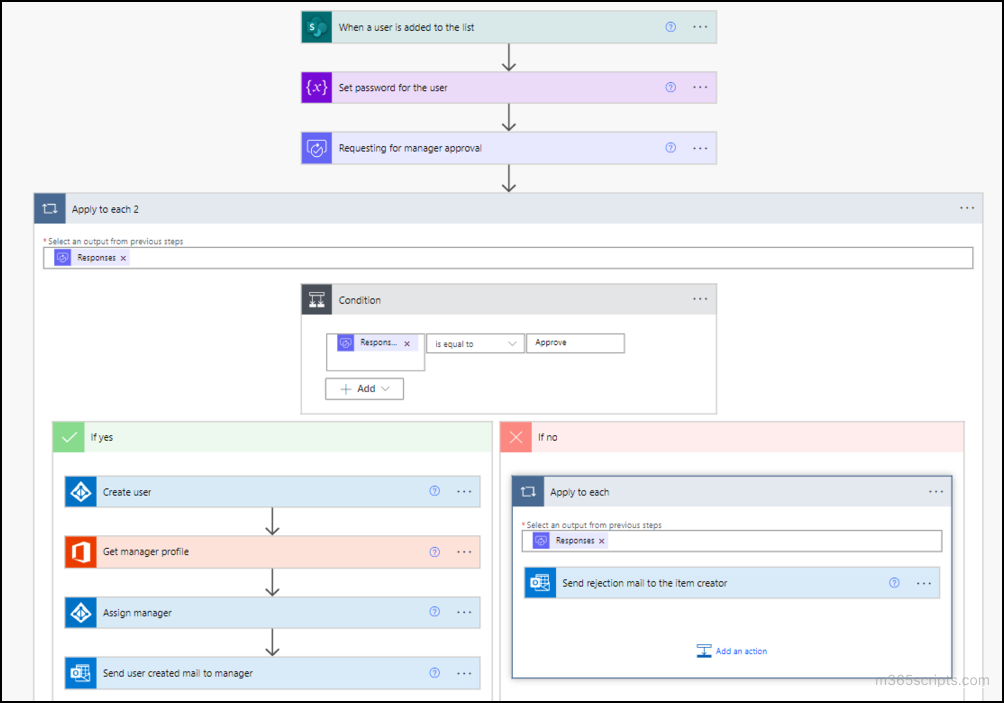
- In the “Condition” action, give the condition as “Responses Approver response” is equal to “Approve” as shown below. This means if the approver’s response is “Approve”, the flow will proceed with the ‘If yes’ branch. If the response is anything other than “Approve”, the flow will follow the ‘If no’ branch.
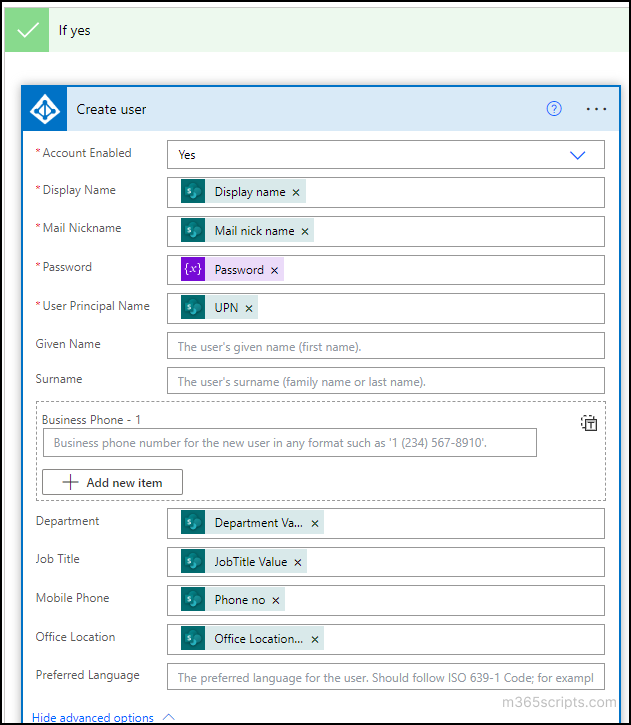
As mentioned above, if the manager approves the user creation, the ‘If yes’ branch will start executing where the user will be created, and the manager will be assigned to that user.
- To implement this, add a step with the “Create user” action from the Azure AD connector.
- Fill in the required fields using the ‘Add dynamic content’ option which takes values that are filled out in the SharePoint list. So that whenever you’re adding an item to the list, the filled-out values in the list will be assigned to the respective fields as shown in the below image.
Next, we have to assign the manager for the new user. So, we now require the manager’s user id.
- Use the action “Get user profile” to fetch the manager’s user profile.
- After fetching the manager’s profile information, in the next step, add the ‘Assign manager’ action to assign the manager for the new user by using the manager’s user id.

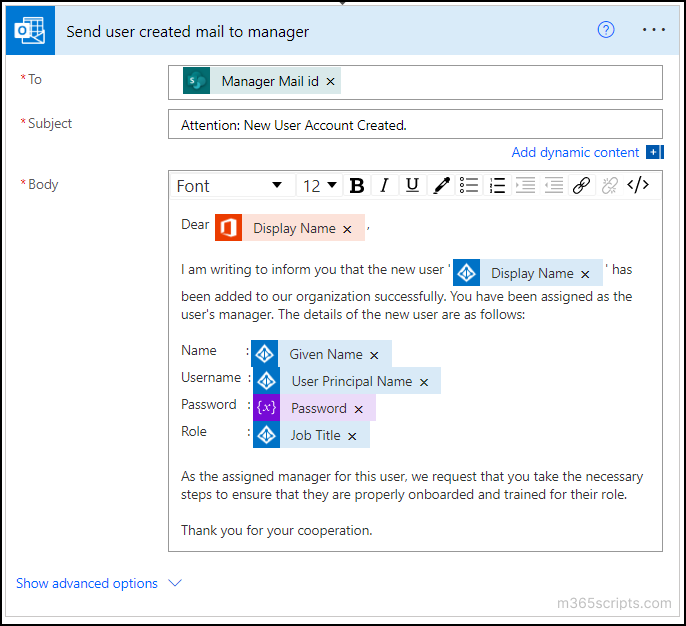
Here comes the end of the approved path with the “Send an email” action. By using this action, we can send the Username and password created for the user to the manager.
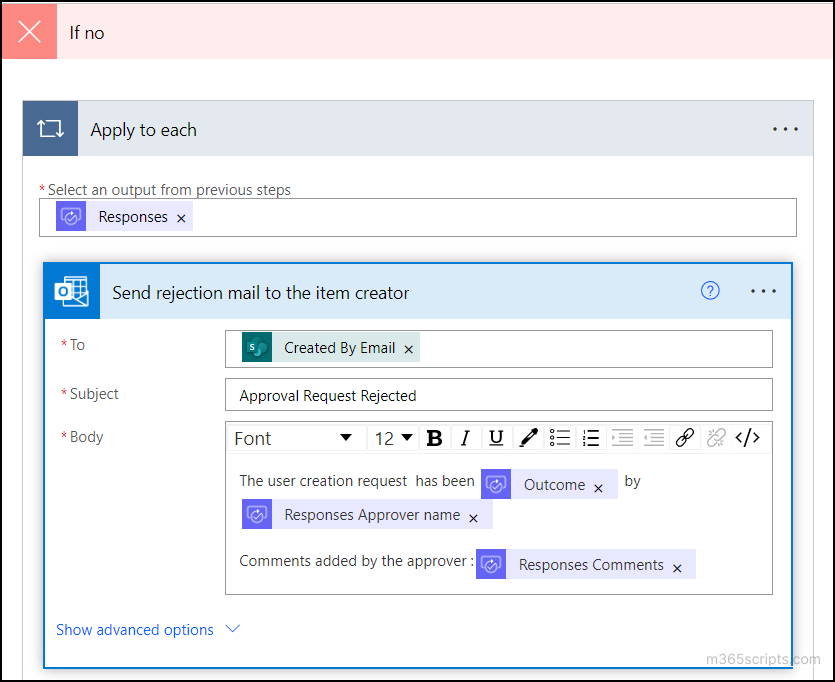
If the manager rejects the approval, then the ‘If no’ branch will start to execute. Here, we can send the rejection notification email to the user who added the new item (new user) to the SharePoint list, saying that the user creation request has been rejected by the manager.
Now that the Microsoft 365 user onboarding flow has been set up, it’s ready to be tested. You can test it by adding a new item to the SharePoint list with the details of a new user. This would initiate the created automated flow. Upon successfully completing each step in the flow, the user creation process will be initiated. Then the manager will be assigned and notified about the same.
Additionally, we can share this SharePoint list with necessary users, such as those in the HR department. This will allow them to add users to the list when required during the onboarding process.
By following the above steps, you can save time by automating the entire Office 365 user provisioning process with Power Automate, along with customizations based on your specific requirements. Power Automate can also be utilized to automate other tasks, such as sending password expiration notifications to M365 users. As Microsoft phases out Office 365 Connectors, you can seamlessly transition to workflow connectors for tasks like receiving SharePoint news in Teams channels, ensuring a smooth and efficient automation experience.
Furthermore, you can automate M365 user offboarding using lifecycle workflows, which streamlines the user management task same as Power Automate. Upon successful offboarding, administrators must ensure that departing employees no longer have access to company resources. In order to do that, use this script to track Microsoft 365 offboarded user activities.
Sure, Power Automate helps with basic automation. But try building an end-to-end onboarding flow and suddenly it’s hours of customization and troubleshooting. This is where the AdminDroid automation tool steps in, taking automation to the next level.
AdminDroid’s pre-built user onboarding flow agent streamlines the process so every new hire gets off to a smooth, organized start. Here’s how it makes onboarding effortless:
- One Agent for Any Scale: Whether onboarding one user or an entire team, a single agent handles it all with ease.
- Single-Click Deployment: Kick off the onboarding process instantly with a single click and skip the complicated setup.
- Bulk Processing Made Simple: Upload a CSV file to onboard multiple users in bulk without manual intervention.
- Smart, Reusable Forms: Auto-generated forms collect all required details and turn into templates for future use.
- Full Audit Trail: Get every flow execution with detailed logs, change history, and status updates for complete transparency.
- Built-In Approvals: Safeguard critical actions by adding approval steps and maintain time-stamped audit trails for compliance.
The agent starts by creating a Microsoft 365 user, updating their details, and assigning licenses & group memberships.
It then sets up MFA, assigns a manager, and securely shares the credentials via email—automating the entire onboarding process from start to finish.
From onboarding and offboarding users to creating groups, lists, Teams, and sites, AdminDroid’s built-in agents simplify every step of Microsoft 365 management. With just a single click, you can deploy powerful agents that handle it all.
And that’s just the start. Beyond automation, AdminDroid 365 serves as your all-in-one Microsoft 365 management hub. With powerful reporting, auditing, and management capabilities, AdminDroid delivers a full view of your Microsoft 365 environment.
- Access 3,500+ actionable reports across Teams, Exchange, SharePoint, OneDrive, and more.
- Execute 450+ built-in actions for managing users, licenses, Teams, and beyond — all without leaving the platform.
- Receive real-time alerts for critical changes.
- Automate reminders for MFA, password expiry, and policy compliance effortlessly.
- Gain deep insights into mailboxes, emails, Teams activities, SharePoint sites, and OneDrive usage with 120+ reports and 10+ dashboards in each module.
- A comprehensive 360° view across Users, Teams, SharePoint, OneDrive, and more, all in one place.
- Active Directory integration with 200+ free reports, dashboards, and basic user management actions.
Get started with a 15-day trial to experience advanced reporting, intelligent auditing, and seamless automation – all in one platform.
Download AdminDroid 365 today!
If you have any questions about the flow, feel free to reach out to us in the comments section. Happy onboarding!