How to Create a Microsoft 365 Tenant Trial Without Using Credit Cards
Create a Microsoft 365 E3 trial tenant without a credit card for testing settings, apps, and services before purchasing. Follow step-by-step instructions to set up a free evaluation environment with full functionality for organization assessment purposes.
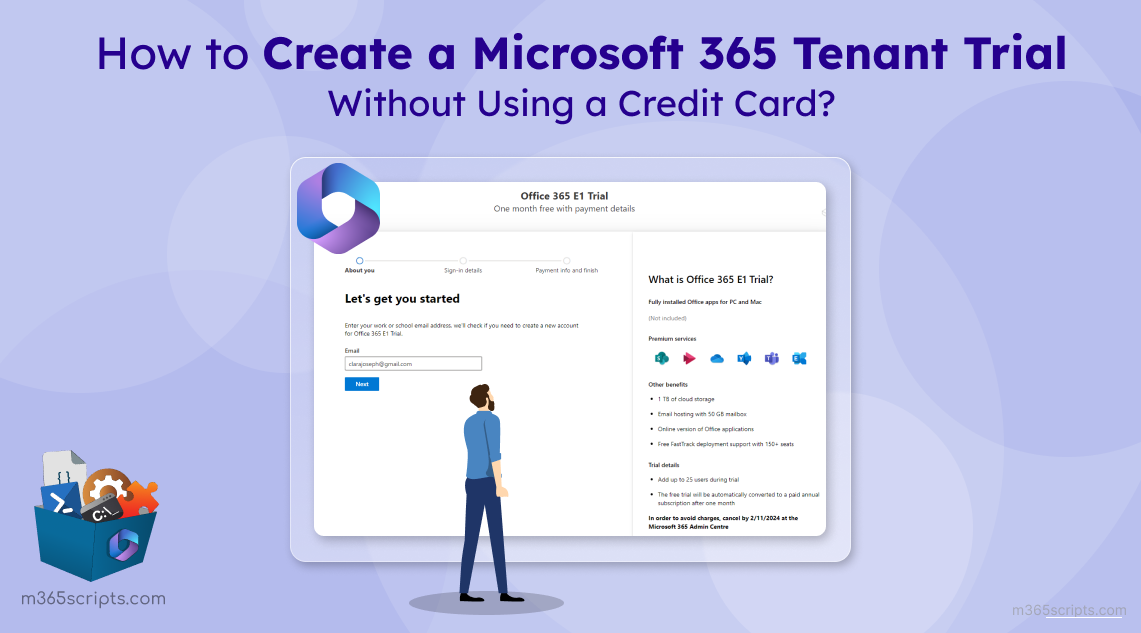
Microsoft provides a range of subscriptions offering different services and apps, varying between each subscription. You can assess your organization’s needs and determine the most suitable subscription. Before committing to a paid subscription, you have the option to explore a trial. This trial allows you to test settings, apps, and services before making a full purchase. In this guide, we’ll walk you through the detailed steps to create Microsoft 365 tenant trial without requiring a credit card. Let’s dive in!
To set up a Microsoft 365 tenant trial, follow the steps below.
- Get into this link.
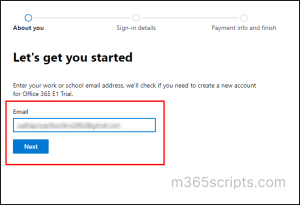
- In the ‘About you’ section, enter your valid email address (You can use your personal Gmail ID). Once done, click “Next”.
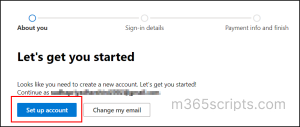
- Click the “Set up account” option. If you need to change the email ID, you can make use of the “Change my email” option.
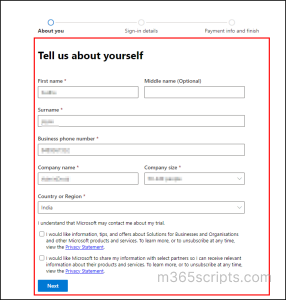
- Fill up your First name, Surname, Business phone number, Company name, and Company Size.
- Leave the privacy statement section as it is and click “Next”.
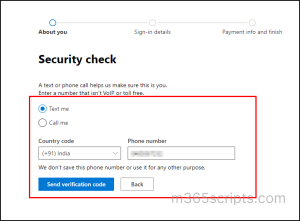
- You can select the “Text me” or “Call me” option to receive a verification code via a text or a call for a security check. Once checked in any of the above two options, verify the phone number once and click “Send verification code”.
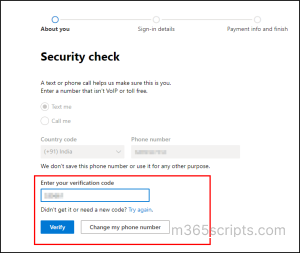
- Enter your received verification code in the ‘Enter your verification code” option. If you didn’t get the verification code for a long time, click “Try again”.
- Once you enter the correct verification code, click “Verify”.
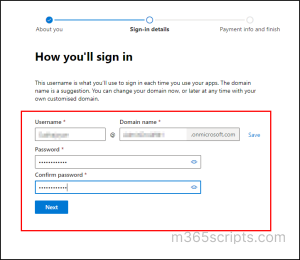
- In the next section, make sure to note down the username and Domain name as it will be used for sign-in purpose.
- After that, proceed to create a password for your account with the two options below.
Note: The password you enter will be used to sign in to the created trial tenant E3. So, make sure to note down the password.
a. Password – Enter a new password with a minimum length of 8 characters, including uppercase and lowercase letters, numbers, and symbols (! @ # $ % ^ & * – _ + = [ ] “|: ‘, . ? / ` ~ “).
b. Confirm password – Enter the same password you configured in the above section. It’s to double check your password. Once done, click Next.
- That’s it, a trial Microsoft 365 tenant gets created. You can stop here and ignore the “payment info and finish” section. You can leave this tab and open a new tab in the same browser.
- In the new tab, enter this link.
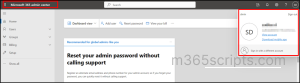
- You will be landed in the Microsoft 365 admin center of your tenant.