Bulk Import Contacts to Office 365 using PowerShell
Bulk import contacts to Office 365 Global Address List using PowerShell with CSV files. Create mail contacts for external vendors, customers, and partners to enable distribution group membership. Migrate contacts from non-Exchange mail infrastructure efficiently using New-MailContact cmdlet.
Here is another blog with one of the required use cases of Microsoft 365 admins, ‘Bulk import contacts to Office 365 Global Address List (GAL) using CSV file’.
Contacts are people from inside or outside your organization. External contacts are vendors, customers, contractors, etc., whose email address is an external email address.
- When the organization has a lot of business contacts that they want to add to the GAL.
- When you want to add external contacts as a member of the distribution group, you must import them to Office 365 first.
- When migrating from non-Exchange mail infrastructure to Exchange Online, you must transfer all the mail contacts to the new setup.
It’s easy to add single contact either through GUI or PowerShell. But it’s always challenging to perform operations in bulk.
Multiple contacts can be added using Microsoft 365 admin center or PowerShell.
Add bulk contacts using Microsoft 365 admin center: Navigate to ‘Contacts’ under ‘Users’, and select ‘Add multiple contacts’. It will show the browse option to upload a CSV file with the contact info. But you can upload up to 40 contacts per CSV. Also, Microsoft 365 contacts and Microsoft Outlook contacts are not the same. To import Outlook contacts from CSV files or to export Outlook contacts to CSV files, there is a separate option “Import/Export” in Outlook interfaces.
Add bulk contacts using PowerShell: PowerShell allows admins to import hundreds and thousands of contacts. It is the easiest way to add multiple contacts to GAL. Let’s see the method in detail.
Content:
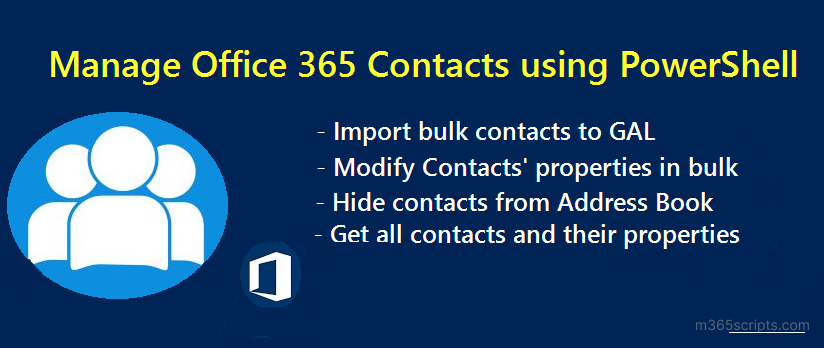
- Create Bulk contacts in Exchange Online
- Update contacts’ properties in bulk
- Hide contacts from Global Address List
- View all contacts with their properties
By using the New-MailContact cmdlet, admins can create contacts in Exchange Online (Office 365). Creating contacts involves two steps.
- Prepare a CSV file with contacts/external contacts info
- Create contacts using PowerShell.
Prepare a CSV file with contacts’ info:
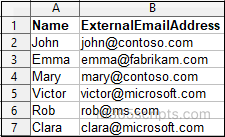
The CSV file must have contacts’ Name and ExternalEmailAddress info. Additionally, you can have properties like FirstName, LastName, StreetAddress, City, Phone, Company, Title, etc. You can also set properties after the contact creation.
Example CSV input file:
If you want to create contacts with additional properties, you can use the format below.
|
1 2 3 |
ExternalEmailAddress,Name,FirstName,LastName,StreetAddress,City,StateorProvince,PostalCode,Phone,MobilePhone,Pager,HomePhone,Company,Title,OtherTelephone,Department,CountryOrRegion,Fax,Initials,Notes,Office,Manager [email protected],Dan Park,Dan,Park,1234 23rd Ave,Golden,CO,80215,206-111-1234,303-900-1234,555-1212,123-456-7890,Fabrikam,Shipping clerk,555-5555,Shipping,US,123-4567,R.,Good worker,31/1663,Dan Park [email protected],Pilar Pinilla,Pilar,Pinilla,1234 Main St.,Seattle,WA,98017,206-555-0100,206-555-0101,206-555-0102,206-555-1234,Contoso,HR Manager,206-555-0104,Executive,US,206-555-0105,P.,Technical decision maker,31/1000,Dan Park |
Each row shows the property values of a single external contact. You can add or remove properties based on your requirement.
Create Bulk Contacts using PowerShell:
To create contacts, you must install the Exchange Online PowerShell module and run the following code snippet in Windows PowerShell.
|
1 2 3 4 5 6 7 8 9 10 11 12 13 14 15 |
Connect-ExchangeOnline Import-CSV <Filepath> | foreach { $Name=$_.Name $ExternalEmailAddress=$_.ExternalEmailAddress Write-Progress -Activity "Creating contact $ExternalEmailAddress in Office 365..." New-MailContact –Name $Name –ExternalEmailAddress $ExternalEmailAddress | Out-Null If($?) { Write-Host $ExternalEmailAddress Successfully created -ForegroundColor Green } Else { Write-Host $ExternalEmailAddress - Error occurred –ForegroundColor Red } } |
After creation, you can view the newly created contacts in Microsoft 365 admin center and Exchange admin center.
To set or modify contact properties, you can use the Set-Contact cmdlet. If you want to modify properties for bulk contacts, you can use the code below.
Before running the code, you must prepare a CSV file with the required contact properties. For example, if you want to modify company and city details, the CSV file must contain ExternalEmailAddress, Company, and City.
|
1 2 3 4 5 6 7 8 9 10 11 12 13 14 |
Connect-ExchangeOnline Import-CSV <FileName> | foreach { $ExternalEmailAddress=$_.ExternalEmailAddress Write-Progress -Activity "Updating contact $ExternalEmailAddress properties..." Set-Contact -Identity $ExternalEmailAddress –Company $_.Company -City $_.City If($?) { Write-Host $ExternalEmailAddress Successfully updated -ForegroundColor Green } Else { Write-Host $ExternalEmailAddress - Error occurred –ForegroundColor Red } } |
There are some situations in which external mail contacts shouldn’t be visible in the address book. To hide a specific external contact from GAL, you can use the Set-MailContact cmdlet.
|
1 |
Set-MailContact –Identity [email protected] - HiddenFromAddressListsEnabled $true |
Here, mail contact ‘[email protected]’ won’t appear in your organization’s address book and other address lists.
Hide Bulk Contacts from GAL:
To hide bulk contacts from a shared address book, run the following code.
Note: The CSV file must contain the external email address of contacts to be hidden from the address book.
|
1 2 3 4 5 6 7 8 9 10 11 12 13 14 |
Connect-ExchangeOnline Import-CSV <FileName> | foreach { $ExternalEmailAddress=$_.ExternalEmailAddress Write-Progress -Activity "Updating contact $ExternalEmailAddress..." Set-MailContact -Identity $ExternalEmailAddress -HiddenFromAddressListsEnabled $true If($?) { Write-Host $ExternalEmailAddress Successfully updated -ForegroundColor Green } Else { Write-Host $ExternalEmailAddress - Error occurred –ForegroundColor Red } } |
To view all the external mail contacts, run the Get-MailContact cmdlet as shown below.
|
1 |
Get-MailContact –Resultsize Unlimited | Select Name,ExternalEmailAddress,HiddenFromAddressListsEnabled |

I hope this blog will help you manage mail contacts in Exchange Online using PowerShell. If you have any queries, you can send them through the comment section.

