Archive and Deletion Policy for Exchange Online Mailboxes
Configure archive and deletion policies for Exchange Online mailboxes using Messaging Records Management retention. Enable archive mailboxes to gain 100GB additional storage and auto-expanding archives up to 1.5TB. Automate mailbox optimization through the Exchange admin center or PowerShell for efficient email storage management.
When it comes to Microsoft 365 Exchange Online administration, mailbox storage management is a major concern. Expanding the user’s mailbox storage using an advanced license or archiving & deleting emails are possible solutions here. Rather than obtaining an advanced license, many organizations opt to optimize their email storage by securely backing up numerous old emails that aren’t crucial.
Now, Microsoft 365 administrators can effortlessly automate mailbox optimization by leveraging the archive and deletion policy through Messaging Records Management (MRM) retention.
In this blog, let’s explore the intricacies of the archive and deletion policy for Exchange Online mailboxes. Below is a flowchart that illustrates the complete configuration of the archive and deletion policy in an easy-to-understand format.
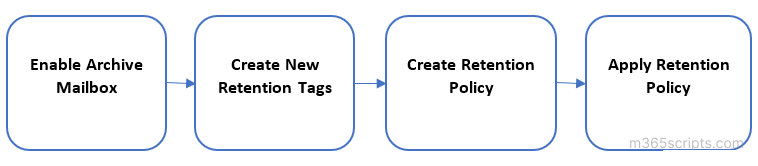
Before customizing an archive and deletion policy for mailboxes in your organization, you must enable archive mailbox for each user in your organization as a first step.
You may have already noticed a folder named ‘Archive’ in the Outlook app or OWA. But it doesn’t mean that the mailbox is archived, it is simply a folder in your mailbox. It won’t save any space in the mailbox; it just helps you better organize your emails. On the other hand, enabling online archives not only enhances organization but also provides a substantial increase in storage, contributing +100 GB to the mailboxes nearing warning quota limits. In addition to this, you can get additional storage of up to 1.5 TB, if you enable auto-expanding archiving in your organization.
To enable online archive for Outlook mailboxes, you can either use the Exchange admin center or PowerShell.
Using Exchange Admin Center:
- First, log in to the Exchange admin center as a global or an Exchange administrator. Then, head to the ‘Recipients’ section, and select the ‘Mailboxes’ page.
- Select the user mailbox in which you want to enable archive and switch to the ‘Others’ tab. Shared mailboxes can also be selected, but it’s essential to note that the shared mailbox must be assigned with a license to enable archiving for it.
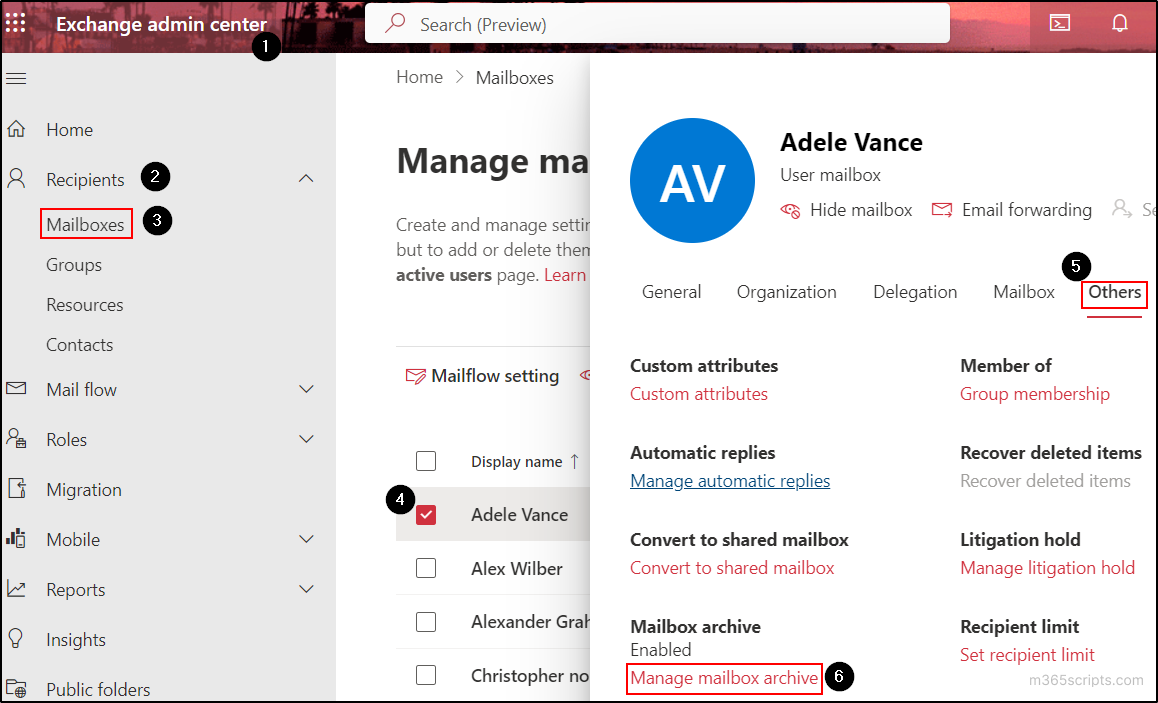
- Click on the ‘Manage mailbox archive’ option and enable the ‘Mailbox archive status’ toggle.
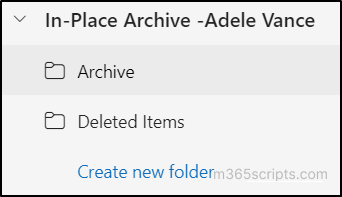
- Input the name for the archive mailbox in the ‘Name’ textbox. If you don’t provide any name, a default name will be created in the format “In-Place Archive -<UserDisplayName>”.

- Finally, click on the ‘Save’ button. The archive mailbox will be created for the user.
You can’t enable the archive mailbox for multiple users at the same time using the Exchange admin center. To quickly enable the archive mailbox for all users in your organization, you can use the Exchange Online PowerShell as follows.
Enable Using PowerShell:
- First, ensure to connect to the Exchange Online PowerShell using an Exchange administrator account.
- Execute the “Enable-Mailbox” cmdlet with the respective username of the mailbox or with the UPN as demonstrated below.
1Enable-Mailbox -Identity <Username/UPN> -Archive

- To enable archive mailboxes for all the user accounts in your tenant, use the following cmdlet. The execution will create an archive mailbox for all users in your organization.
1Get-Mailbox -Filter {ArchiveGuid -Ne "00000000-0000-0000-0000-000000000000" -AND RecipientTypeDetails -Eq "UserMailbox"} | Enable-Mailbox –Archive
Note: You can also check the archive mailbox size using PowerShell to retain business data for your users.
After enabling online archive for the mailboxes, the next step is to configure an archive policy in Microsoft 365.
Whenever you assign an Exchange Online license to a user, a mailbox is created with a default retention policy, named Default MRM policy. This default policy is configured to transfer items to the archive mailbox after a two-year period. Additionally, the policy incorporates various personal tags, enabling users to effortlessly apply them to folders or mailbox items to automate the process of moving or deleting messages.
If you want to restrict users from accessing or modifying retention tag settings in their mailbox, you can manage this by customizing the user role assignment policy in Exchange Online.
To modify archive policies for Exchange Online Mailboxes, adhere to the following steps:
- Create new retention tags for the archive and deletion policies
- Create a retention policy to archive or delete mailboxes
- Assign the new retention policy to user mailboxes in Microsoft 365
- Make the new retention policy default for your mailboxes (optional)
- Enforce retention policy progress with managed folder assistant (optional)
Retention tags are the primary components for applying retention or archive settings to the folders of M365 mailboxes. These tags determine the lifespan of the emails to be kept within the folders. After that time limit, the mail will be either moved to the archive mailbox or deleted.
Using Microsoft Purview Compliance Portal:
To create retention tags (retention or archive rule) for the archive policies, jump into the steps below:
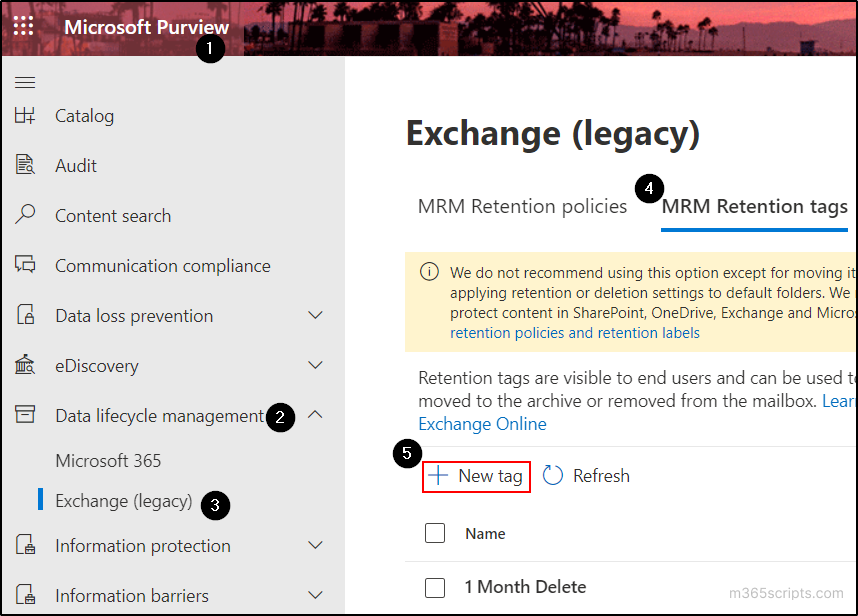
- Begin with signing into the Microsoft Purview compliance portal with the appropriate admin account.
- Navigate to the ‘Data lifecycle management’ tab under the ‘Solutions’ category and select ‘Exchange (legacy)’ option.
- Head to the ‘MRM Retention tags’ section and select the ‘New tag’ option.
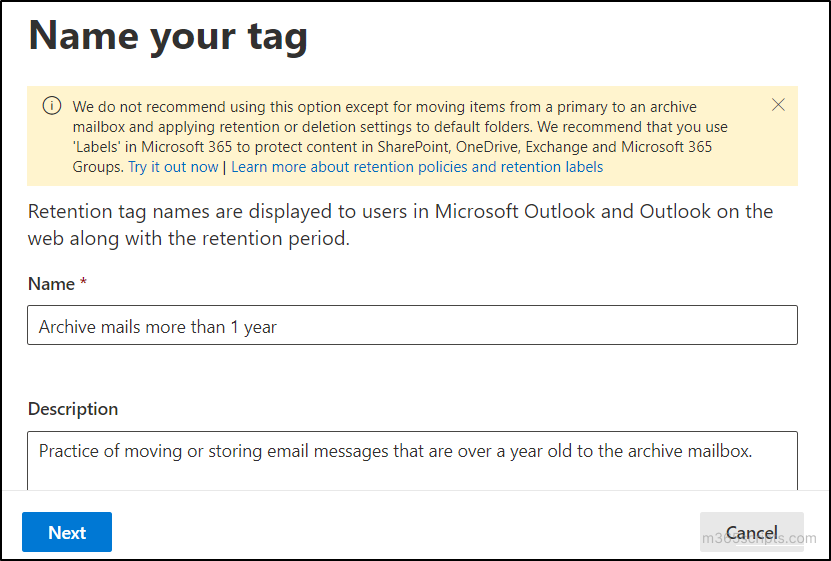
- Input the name you’d like for the retention tag and add a description (optional). Then, proceed by selecting ‘Next’.
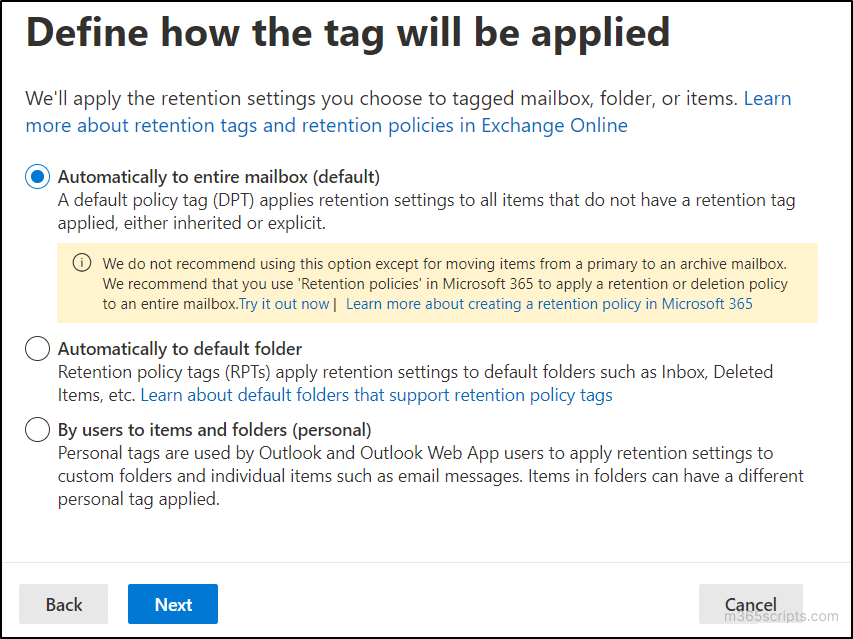
- You will be now redirected to the ‘Define how the tag will be applied’ page, where you need to select how the retention rule is to be applied to the mailboxes. Select the options based on your requirements. and click on ‘Next’.
- Automatically to entire mailbox (default): Selecting this option will apply the archive or the retention setting to the entire mailbox.
- Automatically to default folder: This option lets you apply archive or retention settings to the selected folder. Selecting this radio button will prompt you to select the default folder where the archive policy configuration in Microsoft 356 is going to be applied.
- By users to items and folders (personal): This option lets your Microsoft 365 users utilize the retention tag to apply settings to custom folders and individual items.
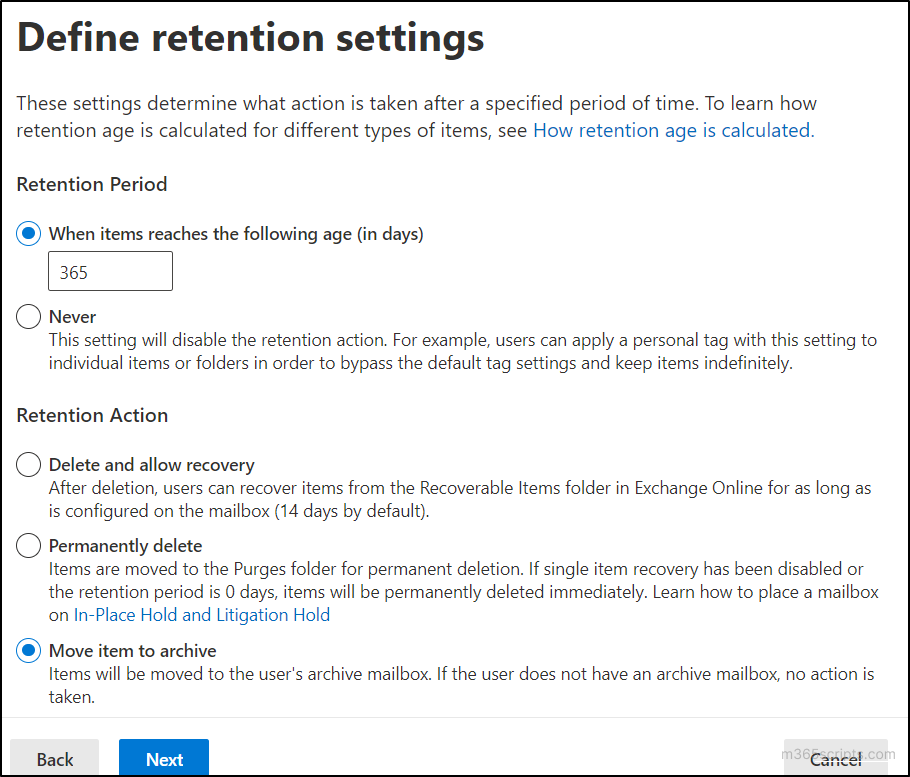
- On the ‘Define retention settings’ page, choose the ‘Retention Period’ option:
- Retention Period: Select this option and enter the number of days from which the appropriate action such as deletion or archive should have taken place.
- Never: Disables the retention action. This option is particularly applicable for personal tags (By users to items and folders) to let users use archive or retention immediately.
- Next, select the ‘Retention Action’ for archive or deletion based on your necessity and select the ‘Next’ button.
- Delete and allow recovery: Allows recovery of deleted items from the ‘Recoverable Items’ folder for a configured period.
- Permanently delete: Moves items to the Purges folder for permanent deletion. If single item recovery is disabled or the retention period is 0 days, items are permanently deleted right away.
- Move item to archive: Transfers items to the user’s archive mailbox; no action is taken if the user lacks an archive mailbox.
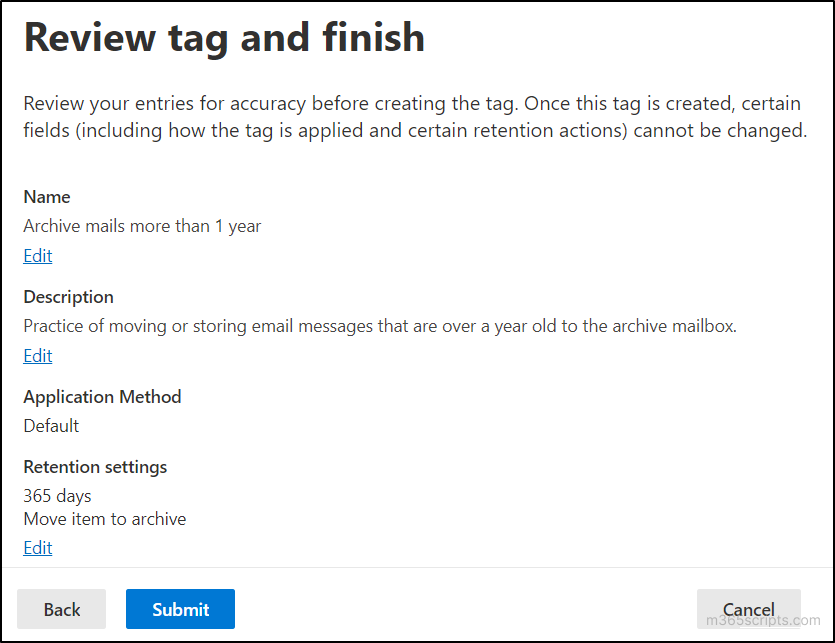
- After that, you will be brought to the ‘Review tag and finish’ page. Here, check all the settings you have configured for the retention tag and select ‘Submit’.
- Next, repeat these steps to create additional retention tags based on your requirement.
Using Exchange Online PowerShell:
Employ the following cmdlet as described to create retention tags using Exchange Online PowerShell.
|
1 |
New-RetentionPolicyTag -Name <String> -Comment <String> -Type <ElcFolderType> -RetentionEnabled <Boolean> -AgeLimitForRetention <EnhancedTimeSpan> -RetentionAction <RetentionAction> |
Refer to the below table and replace the values in the above cmdlet according to your needs.
| Parameter | Description |
Values |
| -Name | The Name parameter specifies the name of the tag. | String (Name of the tag) |
| -Comment | The Comment parameter specifies a comment for the tag. | String (Description of the tag) |
| -Type | The Type parameter specifies the type of retention tag being created. | All, Archive, Calendar, Clutter (Available in Exchange Online only), Contacts, ConversationHistory, DeletedItems, Drafts, Inbox, Journal, JunkEmail, LegacyArchiveJournals, ManagedCustomFolder, Notes, Outbox, Personal, RecoverableItems, RssSubscriptions, SentItems, SyncIssues, Tasks |
| -RetentionEnabled |
|
$true, $false |
| -AgeLimitForRetention |
|
Integer (no of days) |
| -RetentionAction | The RetentionAction parameter specifies the action for the retention policy. | DeleteAndAllowRecovery, MarkAsPastRetentionLimit, MoveToArchive, PermanentlyDelete |
The next step is to create the MRM retention policy to achieve the configured retention tags to take effect on mailboxes. Follow the steps below to establish the archive and retention policy.
Using Microsoft Purview Compliance Portal:
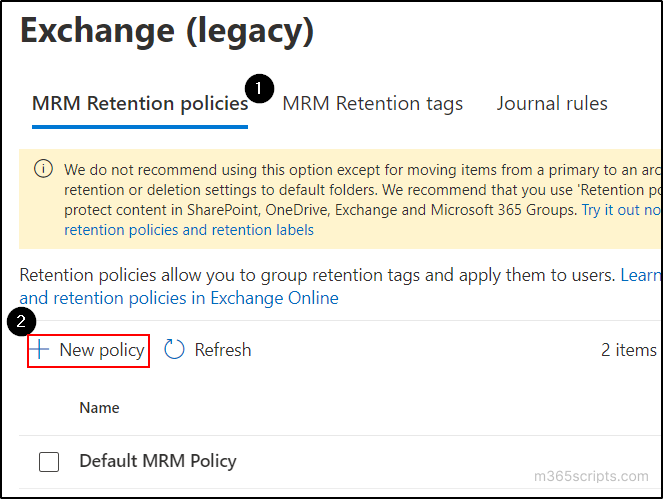
- Switch to the ‘MRM Retention policies’ section and select the ‘New policy’ option.
- In the ‘Configure your policy’ page, enter the name for the new policy and select the ‘Add tag’ button.
- Choose the configured retention tags and click on the ‘Add’ button.
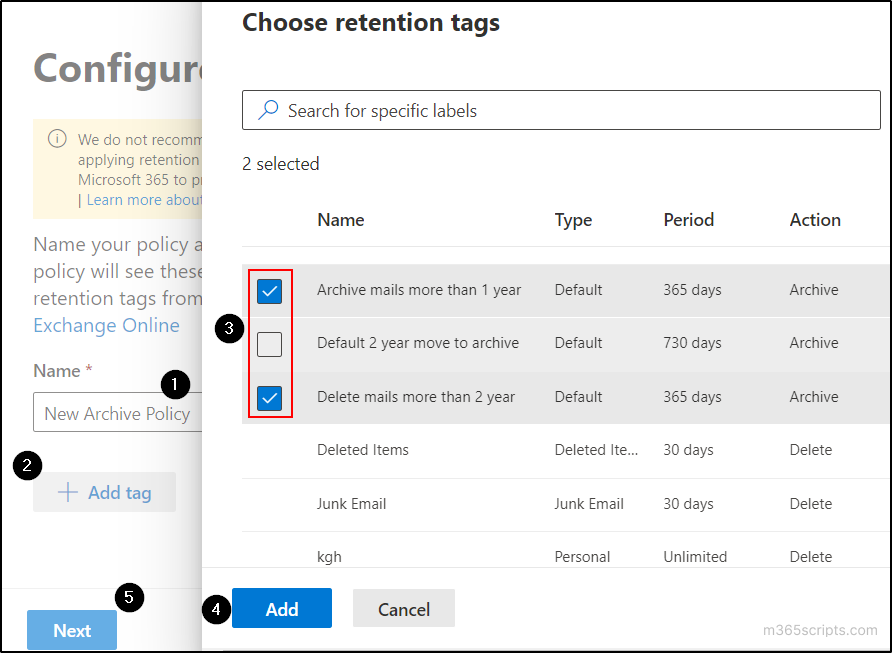
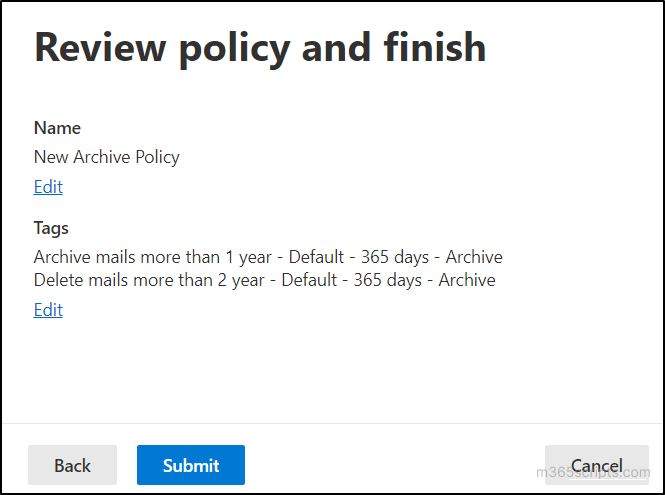
- Select the ‘Next’ button to proceed to the ‘Review policy and finish’ page.
- Here, review the details of the policy and select the ‘Submit’ button.
Using Exchange Online PowerShell:
To perform the above same operation with the Exchange Online PowerShell module, you can use the forthcoming cmdlet.
|
1 |
New-RetentionPolicy “<New Retention Policy Name>” -RetentionPolicyTagLinks “<Retention tag(s) separated by comma>” |

To activate the configured deletion and archive policy, you must assign the policy to your organization’s mailboxes. To do so, stick to the following steps:
Using Exchange Admin Center:
- Go to the Exchange admin center and navigate to the ‘Mailboxes’ tab.
- Select those mailboxes where you want to apply the configured retention policy. If you intend to apply the retention policies to all mailboxes, select all the mailboxes. Then, choose the ‘Mailbox policies’ option from the list of above-displayed options.
Note: To apply the policy specifically to one user, click on the user’s mailbox name, switch to the ‘Mailbox’ tab, and select ‘Manage mailbox policies’.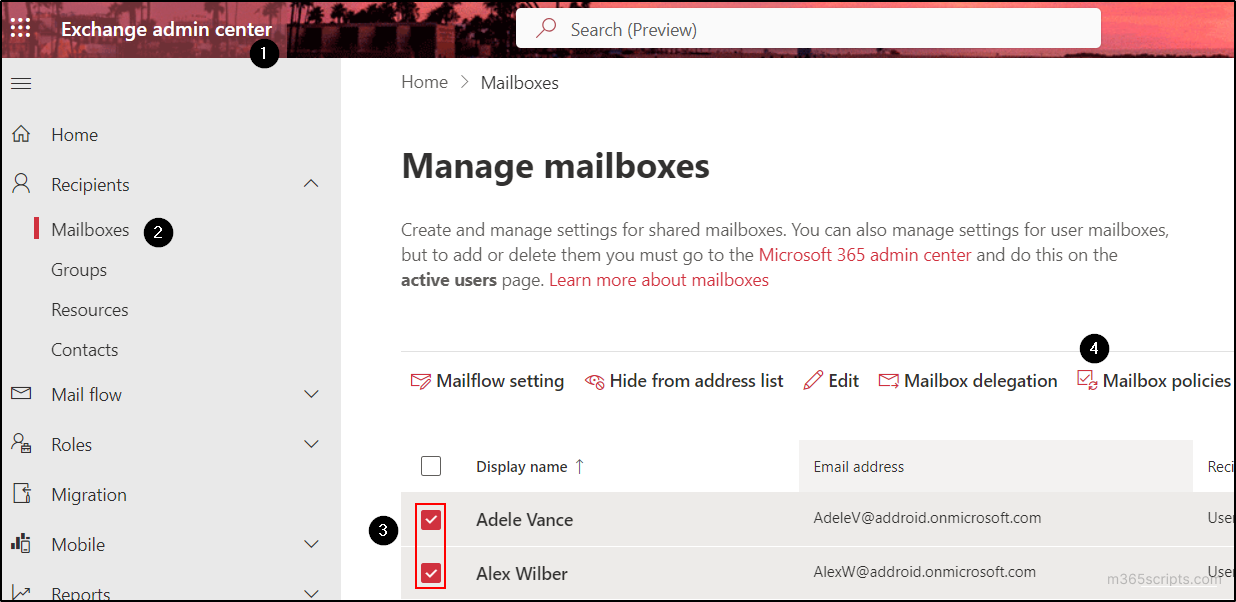
- Navigate to the ‘Retention Policy’ drop-down and select the archive and deletion policy you have configured.
- Finally, click the ‘Save’ button.

Using Exchange Online PowerShell Cmdlets:
To assign the retention policies to the user mailboxes using the Exchange Online PowerShell, just run the following cmdlet with mailbox UPNs.
|
1 2 3 4 |
$Mailboxes = “<Mailbox UPN(s) separated by comma>” foreach ($Mailbox in $Mailboxes) { Get-Mailbox -Identity $Mailbox | Set-Mailbox -RetentionPolicy “<New Retention Policy Name>” } |
For example,
|
1 2 3 4 |
$Mailboxes = “[email protected]”,“[email protected]” foreach ($Mailbox in $Mailboxes) { Get-Mailbox -Identity $Mailbox | Set-Mailbox -RetentionPolicy “New archive policy” } |
If you want to assign the newly created archive policy for all the mailboxes, execute the cmdlet as demonstrated below.
|
1 |
Get-Mailbox -ResultSize unlimited | Set-Mailbox -RetentionPolicy <New Retention Policy Name> |
Note: If you disable the archive mailbox in Microsoft 365, all content from the archive mailbox will be deleted within 30 days. If you enable the archive again after 30 days, a new mailbox archive is created.
Even though you assign the newly created archive policy for all the mailboxes, any new mailboxes created in the future will be assigned with the default MRM policy. But you can configure the new email retention and archive policy to be automatically assigned for the new mailboxes.
To change the default archive policy in Office 365, you must use Exchange Online PowerShell.
- First, run the following command and note the default mailbox plan of your organization.
1Get-MailboxPlan | Format-Table DisplayName,RetentionPolicy,IsDefault

- After that, execute the following cmdlet to set the new retention policy as the default for your organization.
1Set-MailboxPlan <Default Mailbox Plan> -RetentionPolicy <New Retention Policy Name>
By default, the new retention policy can take up to 7 days for the new retention settings to be applied to the mailboxes. This is because of the Managed Folder Assistant that processes the MRM (Messaging Records Management) once in every 7 days.
If you don’t want to wait for the Managed Folder Assistant to run, you can force the new retention settings to be applied to the mailboxes. To achieve this, use the “Start-ManagedFolderAssistant” cmdlet in Exchange Online PowerShell.
|
1 |
(Get-Mailbox -ResultSize Unlimited).UserPrincipalName | Start-ManagedFolderAssistant |
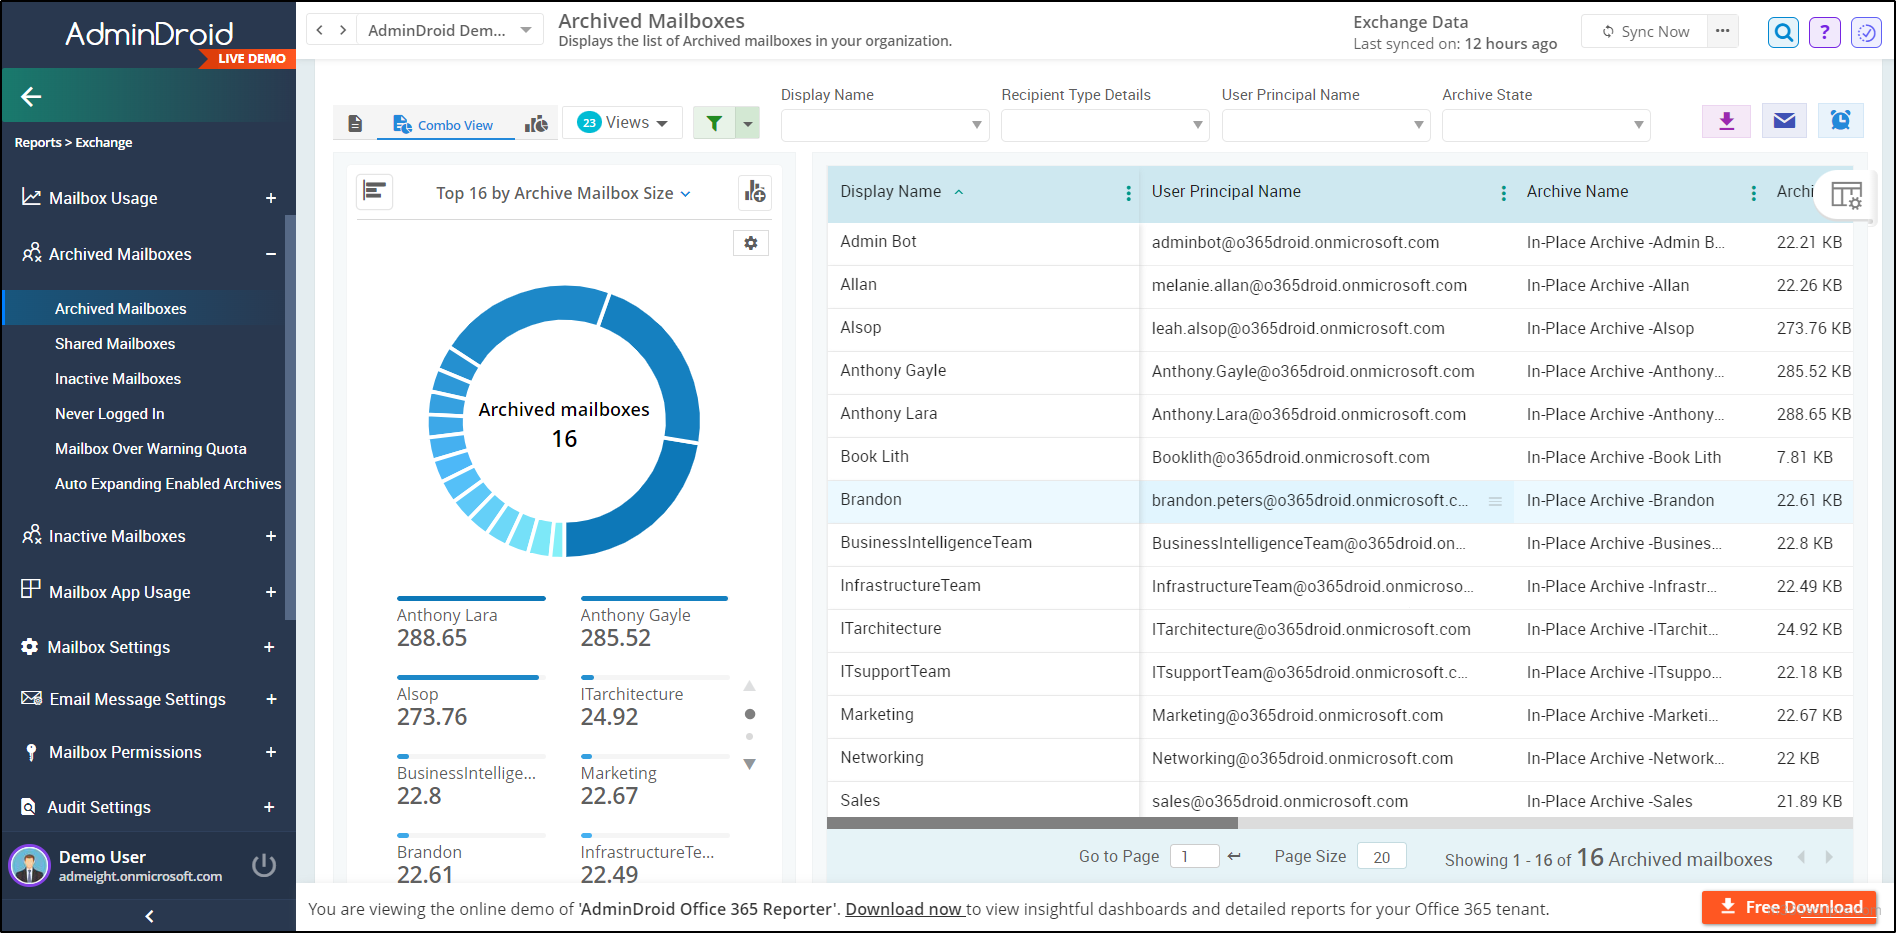
Once archive settings are activated through the admin centers or PowerShell, effective management is essential for identifying archive mailboxes and optimizing overall mailbox storage. AdminDroid simplifies this process by providing dedicated reports on archive-enabled mailboxes, M365 mailbox sizes, mailbox over warning quota, and more. The archive mailbox reports offered by AdminDroid are:
- List of archived mailboxes
- Archived shared mailboxes
- Inactive archived mailboxes
- Never logged in archived mailboxes
- M365 archived mailboxes over-warning quota
- Auto expand enabled archived mailboxes
Further, Admindroid’s Exchange Online reporting tool encompasses details about mailbox information, mailbox usage, mailbox permissions, mailbox security, mailbox settings, etc.
Forget basic auditing tools! Deeply understand your Microsoft 365 mailboxes with comprehensive reports offered by AdminDroid’s Exchange Online auditing tool. It provides detailed insights into mailboxes accessed by non-owners and guests, advanced threat protection statistics on mail flow, inbox rule changes, mailbox management role assignments, access changes, permission changes, etc.
Offering over 170+ reports, AdminDroid’s Exchange Online management tool enables admins to track, schedule, and receive alerts on suspicious Exchange Online activities. Apart from EXO management, AdminDroid offers 1800+ reports and 30+ dashboards to monitor and analyze all Microsoft 365 services. All the reports provided by AdminDroid are enriched with vibrant graphs and eye-catching charts, making it easy for admins to gain understandable insights.
Download AdminDroid M365 reporting tool now and seize the excellence of powerful insights with the free 15-day premium edition for your Microsoft 365 environment.
Final Thoughts:
Implementing the archive and deletion policy through MRM retention for Exchange Online mailboxes proves superior to exporting mailboxes as PST files. Archive policies streamline storage optimization, providing automated management and avoiding the pitfalls of manual PST exports. This ensures an effective approach to data retention.
We trust that this blog provides helpful guidance for configuring and customizing the archive and deletion policy for your mailboxes. We welcome your comments for any additional questions or insights you may have. Your feedback is greatly appreciated!