How to Enable or Disable Archive Mailbox in Office 365 using PowerShell
Archiving allows mailboxes to possess extra mailbox storage space. By default, mailbox archiving (aka, in-place archiving) is disabled for all the Exchange mailboxes. When an archive mailbox is enabled, mailbox contents are moved to the archive mailbox based on the archive and deletion policy.
After enabling the archive, a mailbox can have up to 100GB of additional storage. If a mailbox needs more storage, you can use an auto-expanding archive. To manage archiving, you can use the admin center or PowerShell. Let’s see how to manage online archive mailbox in Office 365.
- Enable archive mailbox using PowerShell
- Enable mailbox archive using UI
- Enable auto-expanding archiving
- Disable archive mailbox in Office 365
- Get archive mailbox and size report
With PowerShell, you can configure archives for a mailbox or bulk mailboxes. We have given the possible ways to turn on Exchange Online archiving using PowerShell.
- Enable online archive for a mailbox
- Enable archive mailbox for all users
- Enable archive for bulk Office 365 users
Before using the PowerShell cmdlets, you must connect to Exchange Online PowerShell.
1.Enable Archive Mailbox in Exchange Online:
Run the below cmdlet to turn on archiving for a single mailbox.
|
1 |
Enable-Mailbox –Identity [email protected] -Archive |
This example enables archive mailbox for John.
2.Enable Archive Mailbox for All Users:
To enable archiving for all the users in your organization, you can execute the following cmdlet. The cmdlet sets archiving for user mailboxes (I.e., excludes shared and other mailbox types) and whose archive mailbox is currently not enabled.
|
1 |
Get-Mailbox -Filter {ArchiveStatus -Eq "None" -AND RecipientTypeDetails -Eq "UserMailbox"} | Enable-Mailbox -Archive |
Note: Generally, shared mailboxes don’t require licenses. To enable archiving for a shared mailbox, you must assign a license.
3.Bulk Enable Exchange Online Archiving (Import CSV):
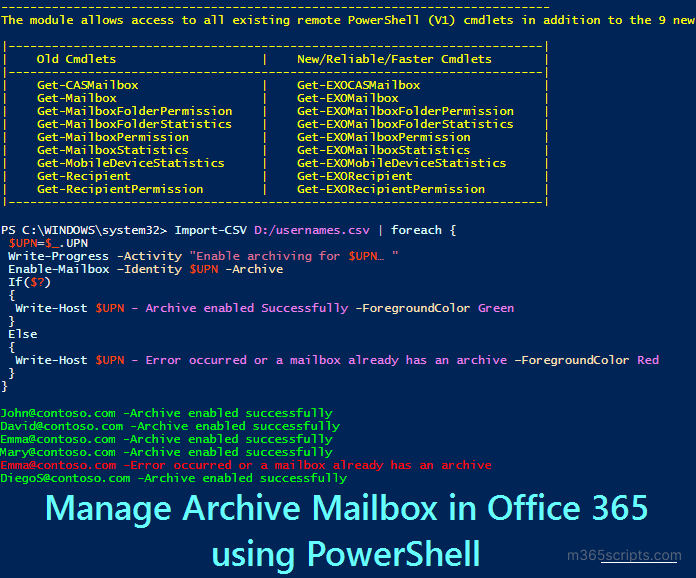
To enable archiving for bulk users or a list of users, you can import users from a CSV file.
|
1 2 3 4 5 6 7 8 9 10 11 12 13 14 |
Connect-ExchangeOnline Import-CSV <FilePath> | foreach { $UPN=$_.UPN Write-Progress -Activity "Enable archiving for $UPN… " Enable-Mailbox –Identity $UPN -Archive If($?) { Write-Host $UPN - Archive enabled Successfully -ForegroundColor Green } Else { Write-Host $UPN - Error occurred or a mailbox already has an archive –ForegroundColor Red } } |
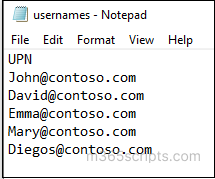
Input CSV file format:
For a small organization, admins can easily use Admin centers to enable archiving. It can be done via two admin portals.
- Enable archive using Exchange admin center
- Enable archive from Microsoft Purview
Neither method is suitable for large organizations as it doesn’t support bulk archiving.
1.Enable Archive Mailbox using Exchange Admin Center:
Follow the steps below to turn on archiving through EAC.
- Go to Exchange admin center.
- Click ‘Mailboxes’ under ‘Recipients.’
- Click the mailbox which you want to enable archive. And navigate to the ‘Others’ tab.
- Select ‘Manage mailbox archive’ and turn on ‘Mailbox archive’.
However, you can’t enable archive for bulk users through EAC.
2.Enable Archive Mailboxes in Microsoft Purview Compliance Portal:
- Go to Microsoft Purview Compliance portal.
- In the left pane, click ‘Data lifecycle management’ and then click the ‘Archive’ tab.
- Select the mailbox in which you want to enable archive and click ‘Enable archive’ from the top.
Note: If the ‘Archive’ tab in the Purview compliance portal is not visible, then it means that you don’t have the necessary permission and you need to contact your administrator to assign the required role. You must have the ‘Mail recipient role’ in Exchange Online to enable or disable archive mailboxes.
Auto-expanding (formerly called unlimited archiving) automatically adds additional storage space for archiving until archive mailbox storage reaches 1.5TB.
To enable auto-expanding archiving for all the users, run the following cmdlet.
|
1 |
Set-OrganizationConfig –AutoExpandingArchive |
Run the below cmdlet to enable auto-expanding archive for a specific user.
|
1 |
Enable-Mailbox –Identity [email protected] -AutoExpandingArchive |
Note:
- Before enabling auto-expanding archive, the mailbox must have turned on archiving.
- Auto-expanding archiving is only supported in user and shared mailboxes with a growth rate that doesn’t exceed 1GB per day.
When you want to turn off archiving, you can disable archive for mailboxes.
To disable archive for a specific mailbox,
|
1 |
Disable-Mailbox –Identity [email protected] -Archive |
To disable the archive mailbox for all users, run the following cmdlet.
|
1 |
Get-Mailbox -Filter {ArchiveStatus -ne "None" -AND RecipientTypeDetails -Eq "UserMailbox"} | Disable-Mailbox -Archive |
You can also turn off the archive for bulk users through input CSV. To disable archiving for bulk users or a list of users, you can import users from a CSV file.
|
1 2 3 4 5 6 7 8 9 10 11 12 13 14 |
Connect-ExchangeOnline Import-CSV <FilePath> | foreach { $UPN=$_.UPN Write-Progress -Activity "Disable archiving for $UPN… " Disable-Mailbox –Identity $UPN -Archive If($?) { Write-Host $UPN - Archive disabled Successfully -ForegroundColor Green } Else { Write-Host $UPN - Error occurred –ForegroundColor Red } } |
To disable online archive through GUI, you can follow the same steps as enabling archive.
To check archive mailbox size, you can use the Get-MailboxStatistics cmdlet.
|
1 |
Get-MailboxStatistics –Identity [email protected] -Archive | select DisplayName,TotalItemSize |
You must mention the –Archive parameter to retrieve archive mailbox statistics. Else, it will retrieve primary mailbox statistics.
To get more detailed reports on archive mailboxes, you can use the pre-built script to generate an archive mailbox size report.
Sample Output:
The exported archive mailbox size report looks similar to the screenshot below.

Script Highlights:
- The script uses modern authentication to retrieve audit logs.
- The script can be executed with an MFA enabled account too.
- Exports report results to CSV file.
- Helps to find out archived shared mailbox.
- Helps to generate archived user mailboxes report.
- Allows you to generate a report for list of mailboxes using input CSV.
- Automatically installs the EXO V2 module (if not installed already) upon your confirmation.
- The script is scheduler-friendly. i.e., Credential can be passed as a parameter instead of saving inside the script.
Once you have utilized the native reporting tools mentioned above to enable or disable archive in mailboxes, it is essential to manage them periodically. To do so, you need to navigate to the properties of each mailbox, which can be a daunting task.
However, you can make use of AdminDroid to eliminate this complexity of jumping over the mailbox properties. AdminDroid provides you with a separate report on archive-enabled mailboxes.
With AdminDroid’s “Archive Mailboxes” report, you can gain all the achieve enabled mailboxes in Exchange Online. With this report, you can manage additional mailbox storage space by analyzing details such as the size of the archive mailbox, archive warning quota, archive quota, etc.
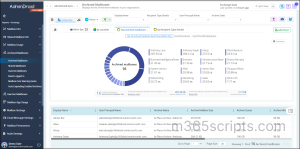
Furthermore, AdminDroid offers insights on shared archive mailboxes, inactive archive mailboxes, auto-expanding enabled archive mailboxes, and so on, for effective archive mailbox management.
Also, to protect your organization from insider threats, Exchange Online reporter gives you detailed reports on mailbox permissions, inactive mailboxes, mailbox usage, forwarding configurations, Exchange settings, and so on.
Aside from the above, you can safeguard the Microsoft 365 mailboxes using the exclusive statistics on ATP policies, delegate mailbox activities, and membership changes from AdminDroid’s Exchange Online auditing tool.
Additionally, the well-organized data in Exchange Online dashboard will provide an easy understanding of all Office 365 mailboxes and their details.
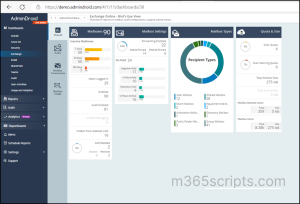
AdminDroid – End to End Solution for Effective Exchange Online Management!
Take a look at AdminDroid for seamless management of archive mailboxes in Office 365!
I hope this blog will help admins to manage Exchange Online archive mailboxes efficiently.

