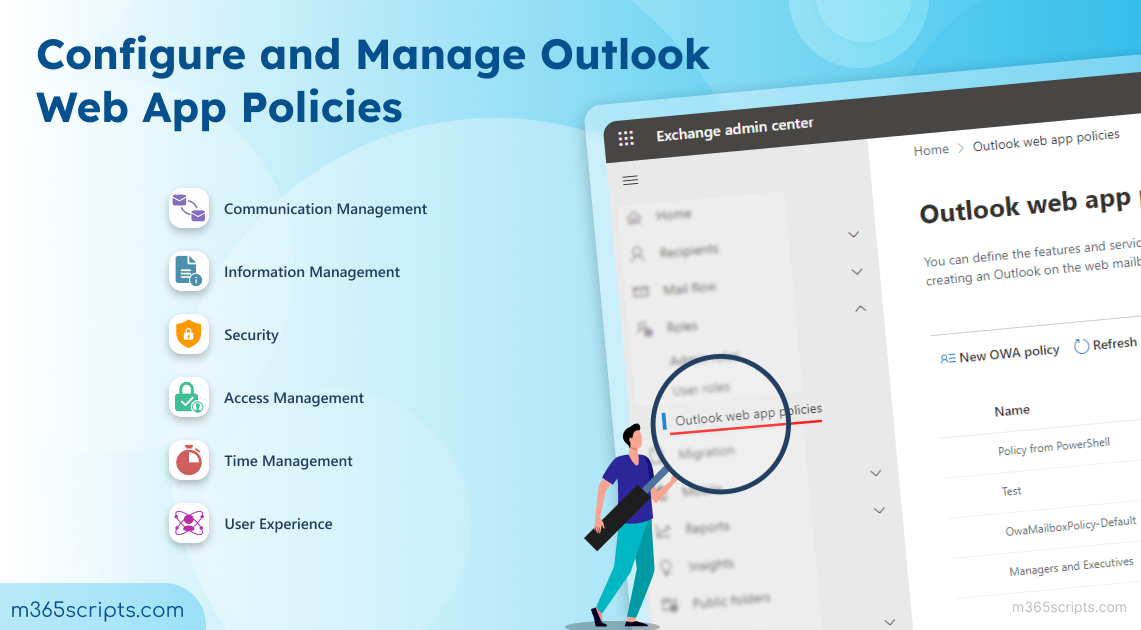
Configure and Manage Outlook Web App Policies
Create and manage Outlook Web App mailbox policies in Exchange Online to control user features and settings. Configure communication, security, and user experience options through Exchange admin center or PowerShell. Apply policies to manage what users can access in OWA.
Microsoft Outlook on the web (previously known as Outlook Web App) is widely used and easily accessible through web browsers to communicate efficiently from anywhere. Configuring Outlook on the web mailbox policies is essential to control the availability of settings and features for Outlook users. Every organization has a default mailbox policy named OwaMailboxPolicy–Default that is applied to all user mailboxes. Admins can create different policies for various types of users. However, remember that a mailbox can have only one OWA mailbox policy.
Managing Outlook on the web mailbox policies can be done through the Exchange admin center (EAC) or PowerShell. Let’s explore the detailed steps of each method.
- Manage Outlook Web App Policies Using Exchange Admin Center
- Manage Outlook Web App Policies Using PowerShell
Before proceeding, remember that you need to be assigned the ‘Organization Management’ or ‘Recipient Management’ role group to configure OWA policies in Exchange Online. Also, this OWA policy is applicable for Outlook on the web and new Outlook for Windows users.
By using Exchange admin center, you can create, configure, and delete Outlook on the web mailbox policies efficiently. You can enable or disable features for end users related to communication, security, user experience, time management, etc., including work hours and location, password change, email signature, and more.
To create a new Outlook on the web policy in Exchange Online, you can follow the steps below.
- Sign in to the Exchange admin center.
- Navigate to Roles–>Outlook web app policies.
- Select the ‘New OWA policy’ option.
- Name your policy and click Next.
- In the ‘Features’ page, all the features will be selected by default, except for a few user experience features. You can turn off any feature by unchecking the box based on your needs. Then, click Next.
- On the ‘File Access’ page, you can control how users access and view email attachments. If you don’t want to allow users to access files from public or shared computers, you can uncheck the box and click Next.
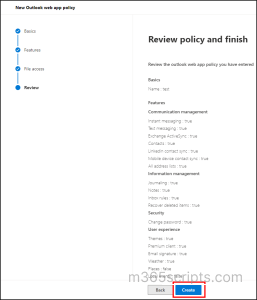
- Review the policy and select ‘Create’.
- After successful creation, choose ‘Done’.
Note: Setting features in the ‘Features’ page will override the Outlook on the web virtual directory settings.
Then, your custom OWA policy will appear on the Outlook web app policies page.
If you want to adjust the org-wide default OWA policy, you can click on the ‘OwaMailboxPolicy-Default’ and choose ‘Manage features’ or ‘Manage access’ in the right pane to modify the settings. Then, select ‘Save changes’ to save your modifications. The same will be applied to custom policy modifications.
Controlling ‘Offline access’ will not be available when creating a new OWA policy. You need to configure Offline access by modifying the policy after creation. By default, Offline access will be set to ‘Always’.
To assign or remove an Outlook Web App mailbox policy for single and multiple user mailboxes, do the following steps.
- Navigate to Recipients–> Mailboxes in the EAC.
- To assign or remove the OWA policy for a single mailbox, choose the desired mailbox.
-
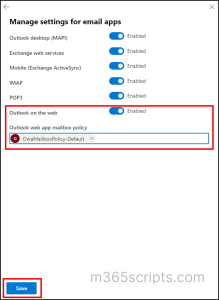
- In the details pane, click ‘Manage email apps settings’ under the ‘Email apps & mobile devices’ category in the ‘General tab’.
- Outlook on the web is enabled by default. If you want to assign a custom policy, remove the default OWA policy under ‘Outlook web app mailbox policy’.
- Then, type the first letter of your custom policy and select the respective policy from the suggested lists. Click Save to assign the policy to the user.
- To remove or disable the OWA policy for a user, simply move Outlook on the web toggle to disable it on the same page and click Save.
- To assign or remove the OWA policy for multiple mailboxes, select the required mailboxes.
-
- Select Edit–> App settings.
- Enable Outlook on the web setting.
- Then, type the first letter of the OWA mailbox policy and select it from the suggested list.
- Click Save to assign the policy to the users.
- To remove an OWA policy from multiple users, you can disable Outlook on the web setting on the same page.
To delete an Outlook on the web mailbox policy using the Exchange admin center, follow the steps below.
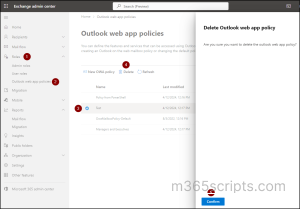
- Navigate to Roles–> Outlook web app policies in the EAC.
- Select the desired OWA policy and click Delete.
- Then, select ‘Confirm’ in the right pane to give your confirmation for policy deletion.
Note: You can’t select multiple policies and bulk delete using EAC. You need to manually choose each policy and delete them separately.
Though you can view, configure, assign, and delete OWA policy using the Exchange admin center, there are certain drawbacks that admins might get frustrated with.
- Firstly, you can’t assign or remove users while creating the policy itself. You need to select users and remember the policy name to type the first letter for assigning a policy.
- Bulk creation or bulk deletion of OWA policy is not possible using EAC which is truly challenging.
To overcome these challenges, you can go with Exchange Online PowerShell to manage Outlook Web App policies more efficiently. Let’s dive into detail.
Before proceeding, you must connect to Exchange Online PowerShell.
To retrieve a summary of all the Outlook Web App policies available in your organization, run the below cmdlet.
|
1 |
Get-OwaMailboxPolicy | Format-Table Name |
To retrieve detailed information about an OWA policy, run the below cmdlet.
|
1 |
Get-OwaMailboxPolicy –Identity <policy name> |
To create a mailbox policy for Outlook on the web, run the cmdlet below.
|
1 |
New-OwaMailboxPolicy –Name <policy name> |
Note: If you create a policy, all the features and access settings are enabled by default. If you want to modify any of them, you can use Set-OwaMailboxPolicy cmdlet.
To modify an OWA policy, you can use the below cmdlet.
|
1 |
Set-OwaMailboxPolicy –Identity “<Policy Name>” [Settings] |
You can replace [Settings] with the required parameters and their values you wish to modify. Let’s see how to disable the password change feature below.
|
1 |
Set-OwaMailboxPolicy –Identity “<Policy Name>” -ChangePasswordEnabled $false |
When assigning an OWA policy for bulk users, you can assign it to a specific department, or specific mailboxes based on your needs.
Case 1: To assign an OWA policy for users in a specific department, run the below cmdlets. Let’s see how to assign it to your organization’s managers.
|
1 2 3 |
$<VariableName> = Get-User –ResultSize unlimited –Filter “(RecipientType –eq ‘UserMailbox’) -and (Title –like ‘*Manager*’)” $<VariableName> | foreach {Set-CasMailbox –Identity $_.MicrosoftOnlineServicesID -OwaMailboxPolicy “<Policy Name>”} |
The above cmdlets retrieve the managers and assign the specified OWA mailbox policy to them.
Case 2: To assign an OWA policy for specific mailboxes, run the below cmdlets. Before proceeding, you must create a text file with a list of required user accounts.
|
1 2 3 |
$<VariableName> = Get-Content “<text file>” $<VariableName> | foreach {Set-CasMailbox –Identity $_ –OwaMailboxPolicy “<Policy Name>”} |
For bulk removal of OWA policy assignments from users, you can utilize the same cmdlet specified above and modify the value of the “-OwaMailboxPolicy” parameter with $null instead of giving the policy name.
Assign or Remove Outlook Mailbox Policy for Individual Users
To assign an OWA mailbox policy for a single user, you can use the below cmdlet.
|
1 |
Set-CasMailbox –Identity <MailboxIdentity> -OwaMailboxPolicy “<Policy Name>” |
To remove an OWA mailbox policy from a user, replace the policy name with $null as shown below.
|
1 |
Set-CasMailbox –Identity <MailboxIdentity> -OwaMailboxPolicy $null |
To remove an Outlook mailbox policy from the organization, use the below cmdlet.
|
1 |
Remove-OwaMailboxPolicy –Identity “<Policy Name>” -Confirm $false |
To remove an OWA policy for a specific tenant in your organization, run the below cmdlet.
|
1 |
Remove-OwaMailboxPolicy –Identity “<Organization Name>\<Tenant Name>\<Policy Name>” -Confirm $false |
Note: Confirm attribute is used to avoid getting confirmation for policy deletion.
In conclusion, managing Outlook on the web mailbox policies help control the availability of features based on user roles and organizational needs. Additionally, organizations should also consider applying mobile device mailbox policies to extend email security enforcement to smartphones and tablets. Furthermore, if you have any queries, feel free to drop them in the comment section below. Happy scripting!